


Another way to complete this project is by contouring out the small holes in the antlers using Design Space and skipping the twine. Not sure about contouring in Design Space? No problem, click here to learn more.


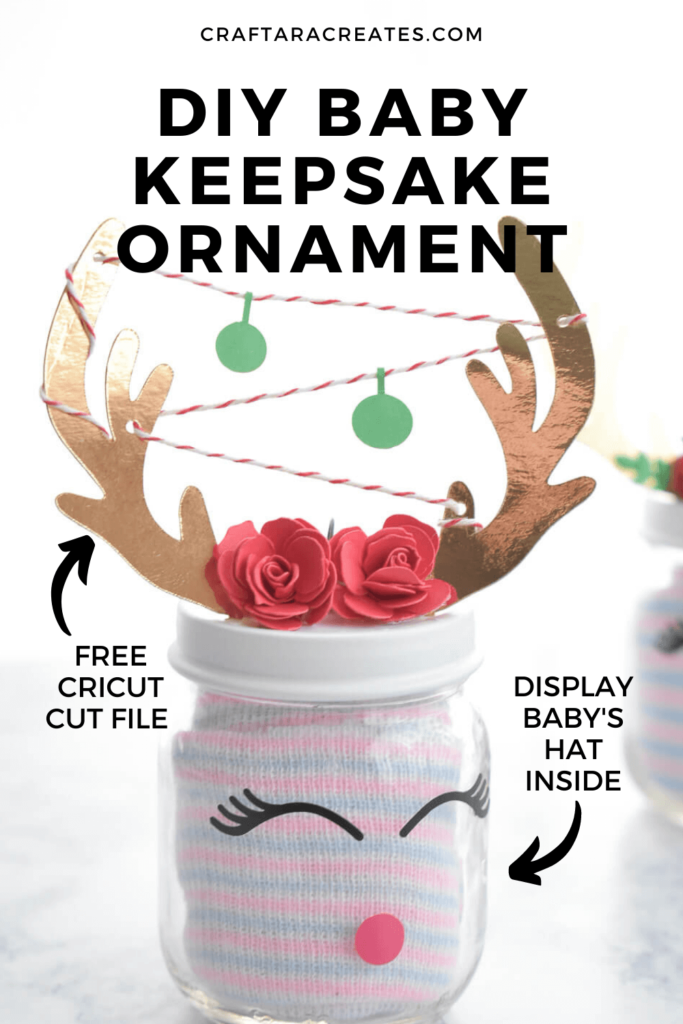
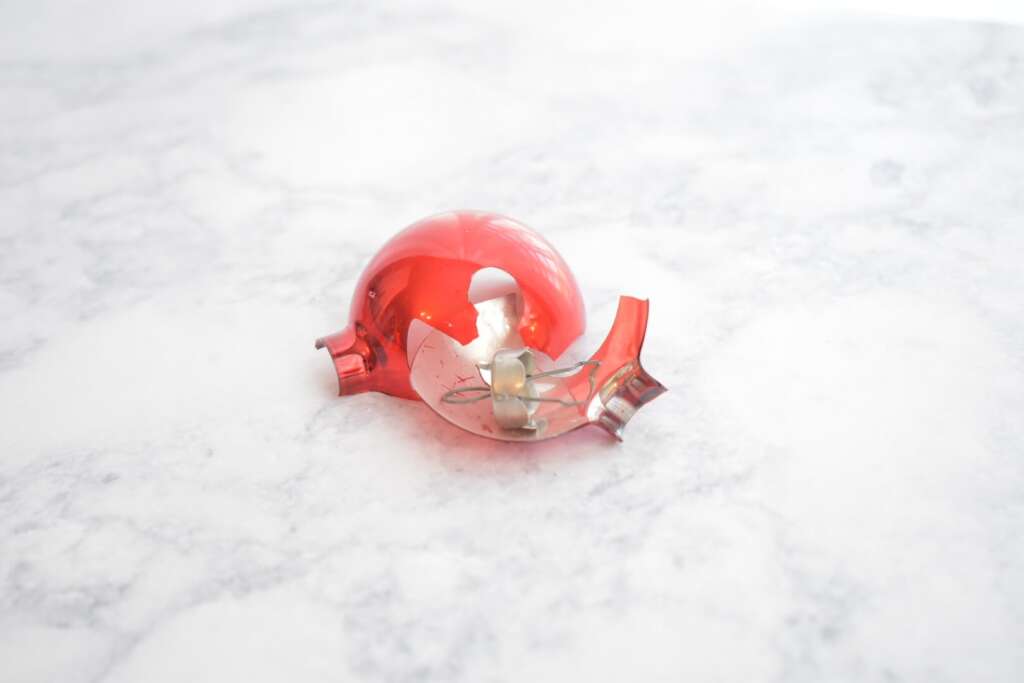
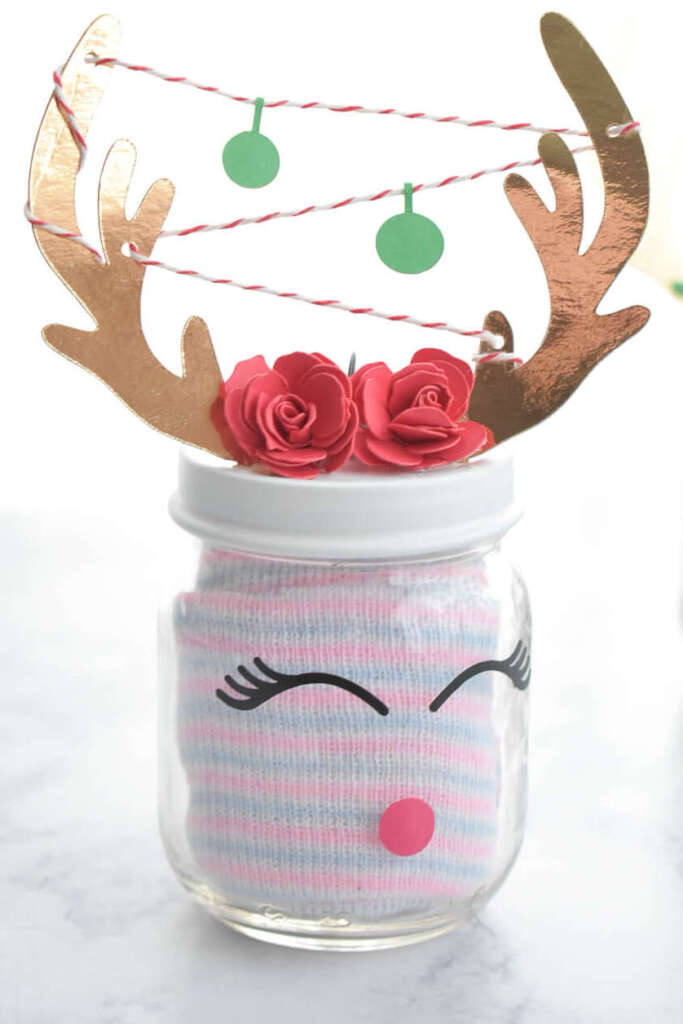
Ever come across a broken ornament when you pull out the holiday decorations? I have. With a broken ornament and a glass baby food jar, create a special DIY Baby Keepsake Ornament with Cricut. The glass jar is perfect to show off that tiny first baby hat from the hospital or a hospital bracelet and/or to fold up a note for your child to read later in life.
This post may contain affiliate links, which means I’ll receive a commission if you purchase through my links, at no extra cost to you. Please read my full disclosure for more information.
The free antler cut file is in my resource library. Sign up here to unlock the resource library and grab the free SVG cut file. You will find this in the Christmas Craft section of the resource library.
You will be included in my email newsletter with helpful Cricut ideas, tips and resources. Unsubscribe anytime and your email will never be shared.
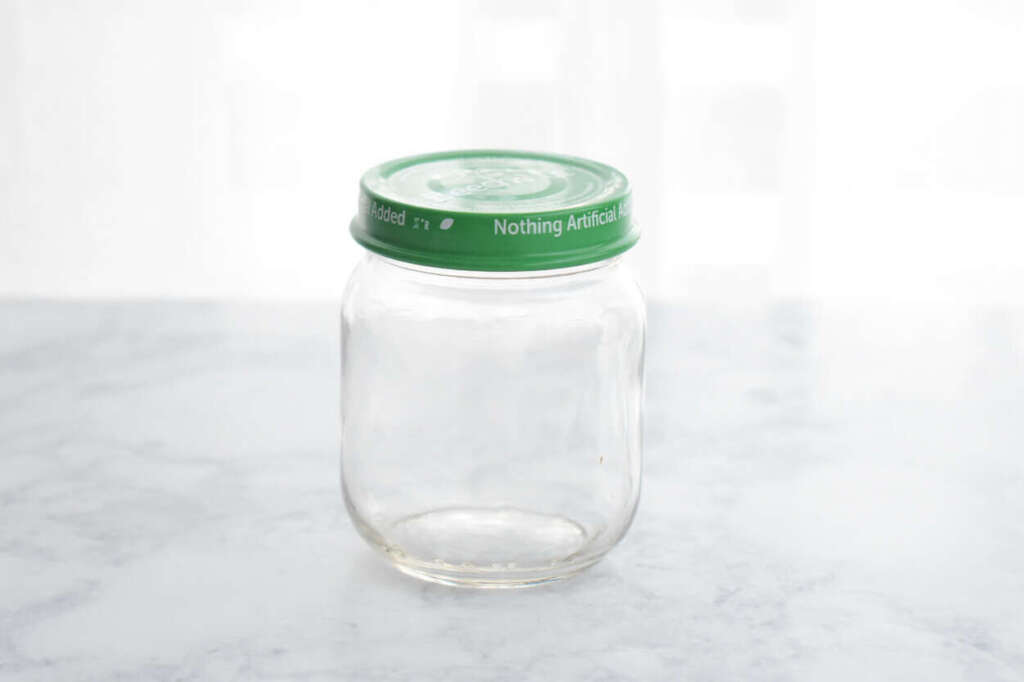
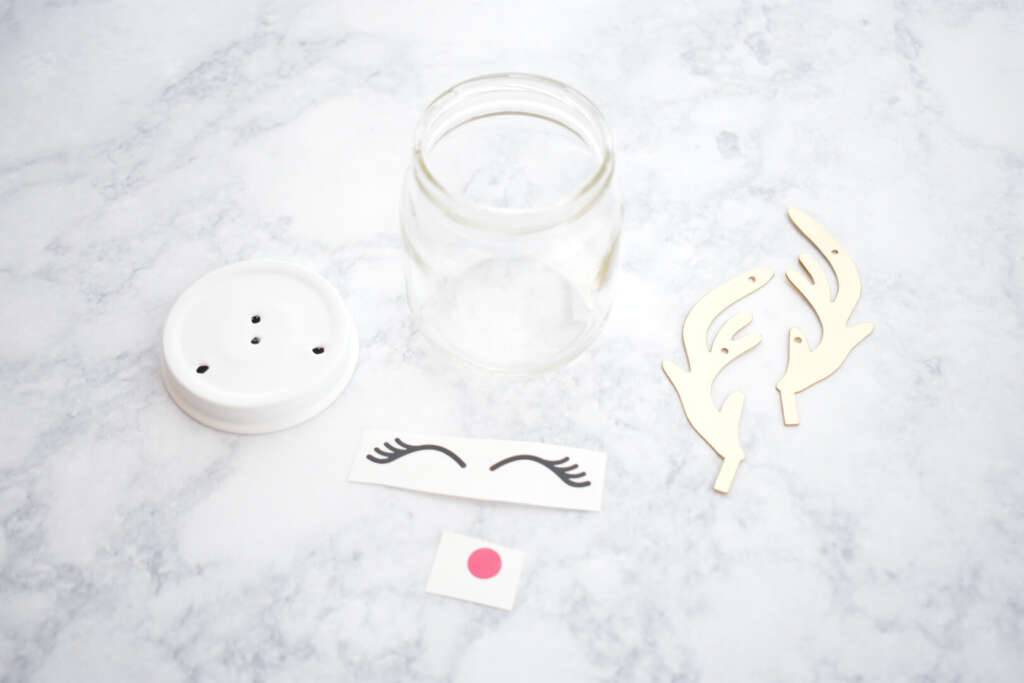
To create the baby keepsake Christmas ornament, start by cleaning the baby food jar and remove any labels. Allow the jar to dry.
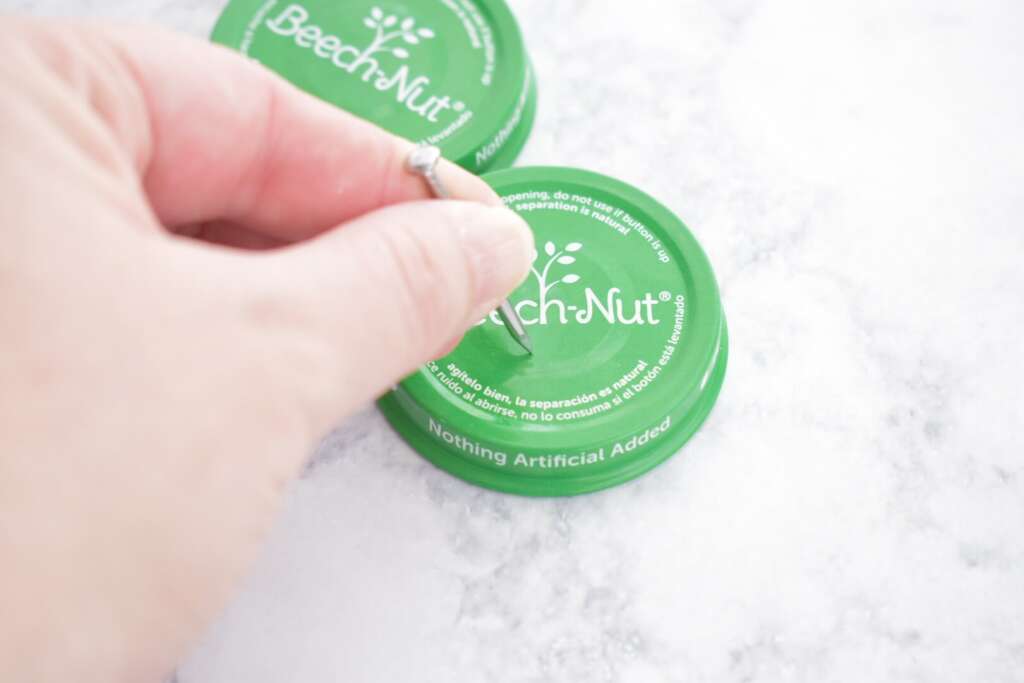
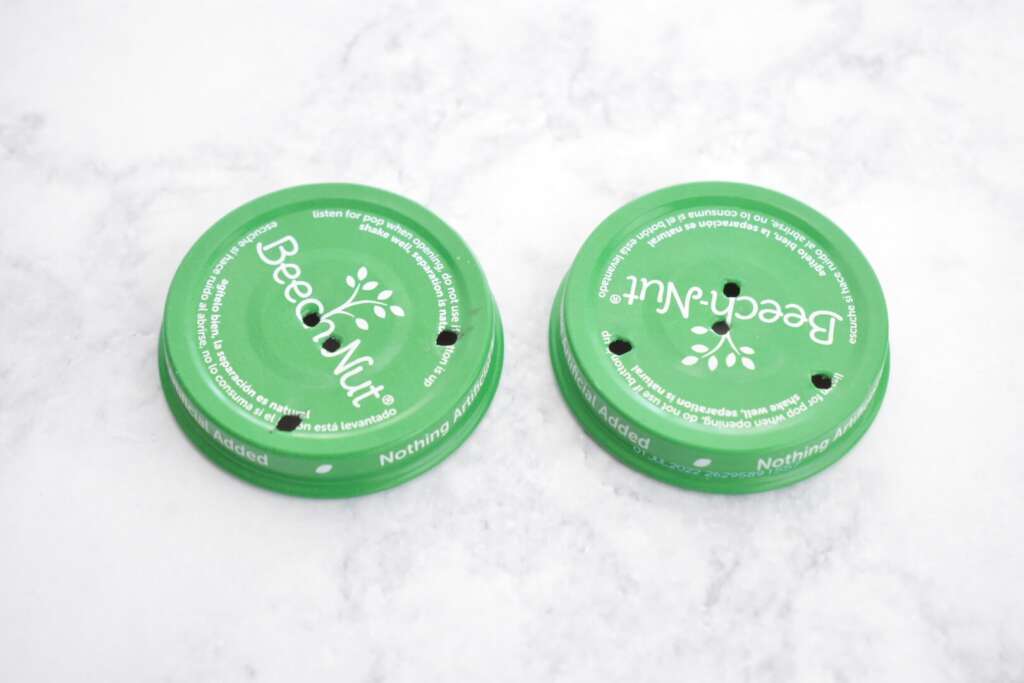
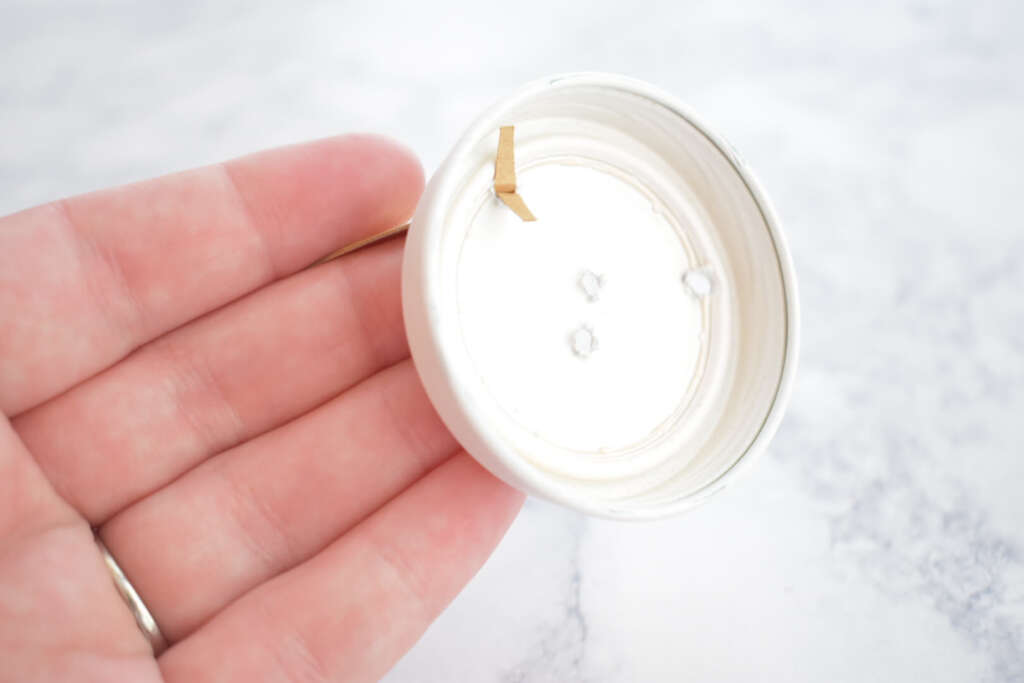
On the lid, we need to add holes for the ornament cap and antlers. The metal lid of a baby food jar is fairly soft and easy to puncture. Use a nail or sharp object and a hammer to puncture the jar.
The two holes in the center are for the ornament cap and two holes in the side front area are for the two antlers. Once the holes are made, apply 1 or 2 layers of white spray paint and let dry. I used a spray paint with a satin finish and it turned out beautifully.
While the paint is drying on the baby keepsake Christmas ornament, we can prepare the project in Cricut design space. Download the free antler SVG cut file and upload the SVG file into Cricut Design Space.
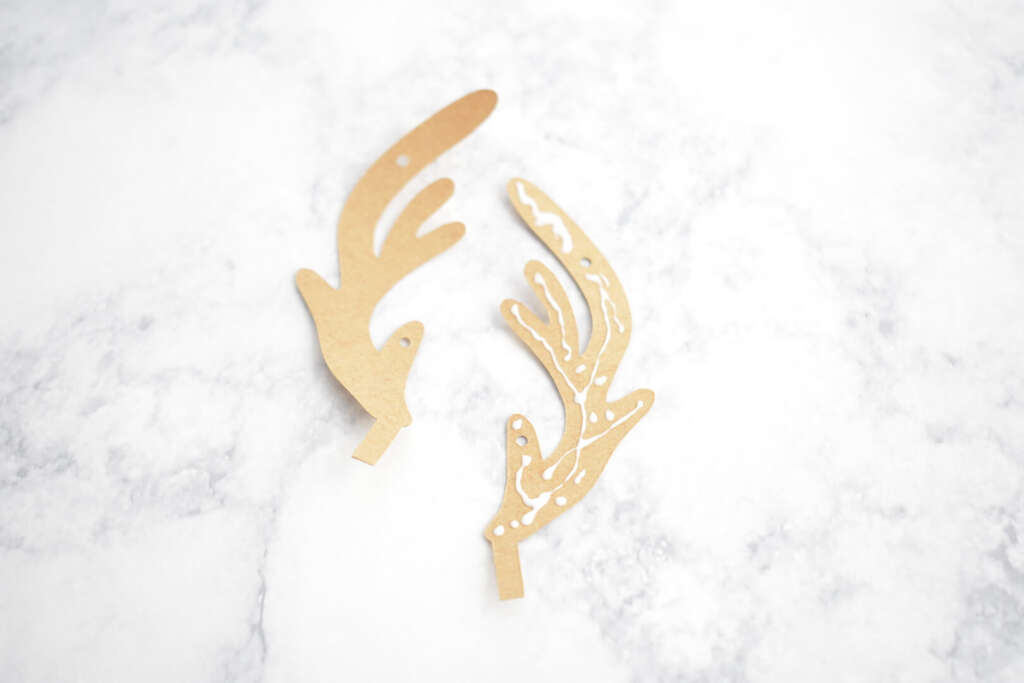
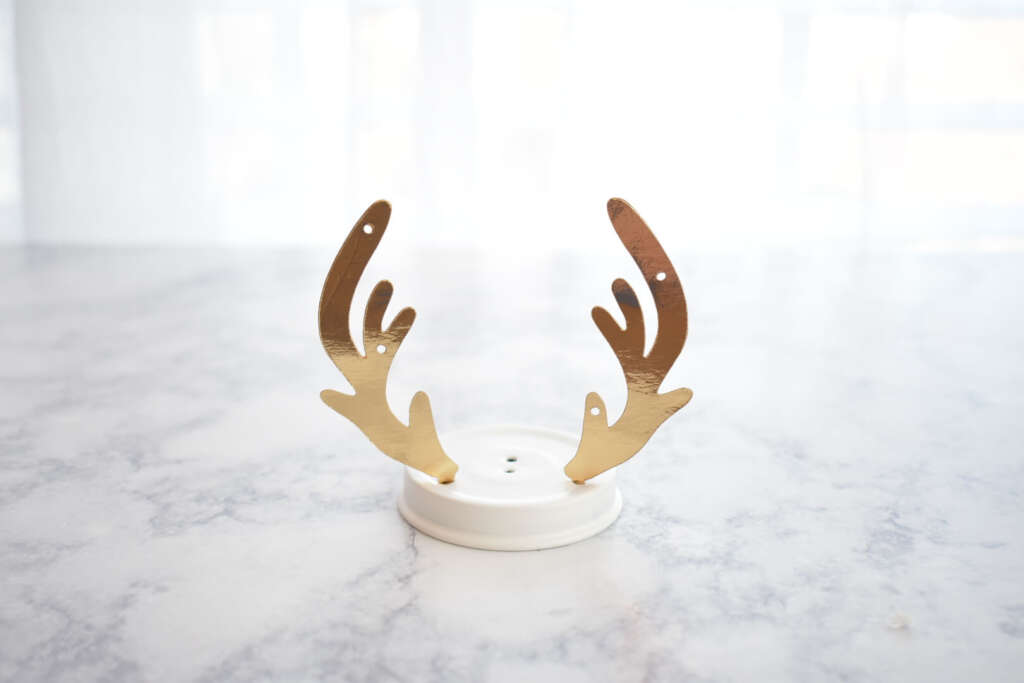
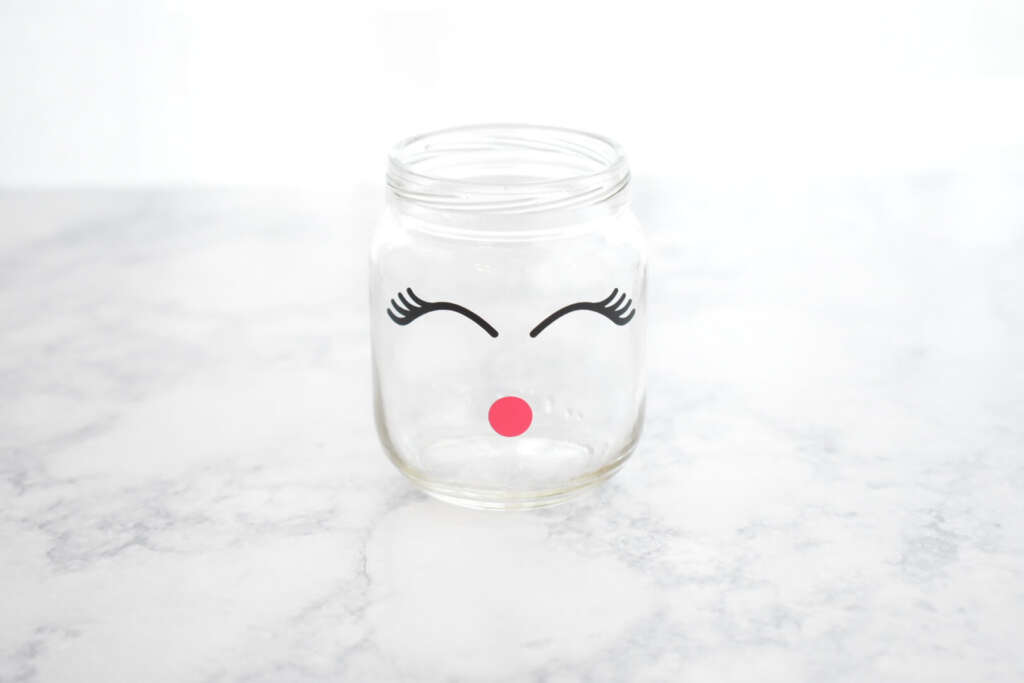
The cut file has 4 antlers – the front and back of both sides. Double check the size of the grouped together design. Adjust the design to be 2.551″ Width by 5.684″ Height, this makes for 3 inch tall antlers. For the eyes and face, I searched the Cricut images library for “eyelash” and used a circle shape for the nose. I cut the antlers out in gold mirror cardstock and the face in adhesive vinyl.
To prepare the antlers for the DIY Baby Keepsake Ornament, apply glue to the front and back, however, do not apply glue to the bottom tab. The bottom tab will be used to secure the antlers to the lid from the inside.
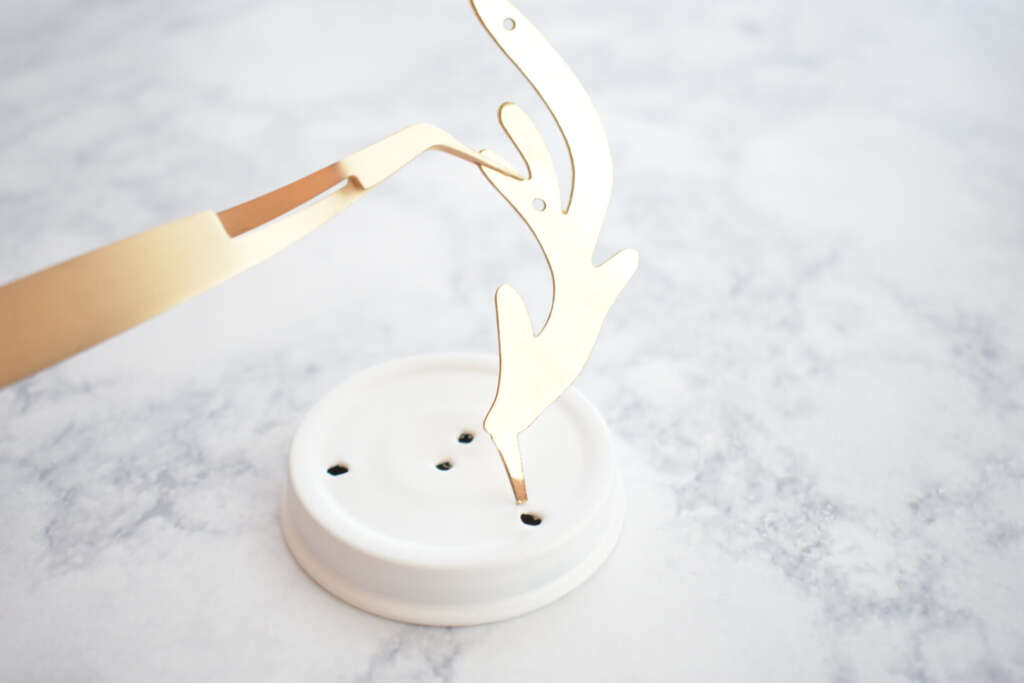
Check the size of the answers and the hole. If necessary, trim the bottom tab to fit within the hole on the lid.
Once the antler is inserted into the lid, separate the tab and add a small spot of hot glue under each tab to secure the antler to the lid.
Next, use transfer tape to apply the eyelashes and nose.
Insert the ornament cap.
For fun, I threaded bakers twine around the antlers and through the holes to mimic the playfulness of my kids.
Another way to complete this project is by contouring out the small holes in the antlers using Design Space and skipping the twine. Not sure about contouring in Design Space? No problem, click here to learn more.
Did you find this tutorial on how to make a DIY Baby Keepsake Ornament with Cricut helpful? If yes, please pin this idea and let me know your thoughts in the comments below!
This website is a participant in the Amazon Services LLC Associates Program,
an affiliate advertising program designed to provide a means for sites to earn
advertising fees by advertising and linking to amazon.com.
Craftara Creates © 2023. All rights reserved.
| Cookie | Duration | Description |
|---|---|---|
| cookielawinfo-checkbox-analytics | 11 months | This cookie is set by GDPR Cookie Consent plugin. The cookie is used to store the user consent for the cookies in the category "Analytics". |
| cookielawinfo-checkbox-functional | 11 months | The cookie is set by GDPR cookie consent to record the user consent for the cookies in the category "Functional". |
| cookielawinfo-checkbox-necessary | 11 months | This cookie is set by GDPR Cookie Consent plugin. The cookies is used to store the user consent for the cookies in the category "Necessary". |
| cookielawinfo-checkbox-others | 11 months | This cookie is set by GDPR Cookie Consent plugin. The cookie is used to store the user consent for the cookies in the category "Other. |
| cookielawinfo-checkbox-performance | 11 months | This cookie is set by GDPR Cookie Consent plugin. The cookie is used to store the user consent for the cookies in the category "Performance". |
| viewed_cookie_policy | 11 months | The cookie is set by the GDPR Cookie Consent plugin and is used to store whether or not user has consented to the use of cookies. It does not store any personal data. |