Step-by-Step Guide: Easy Christmas Cupcake Topper and free cut file for Cricut
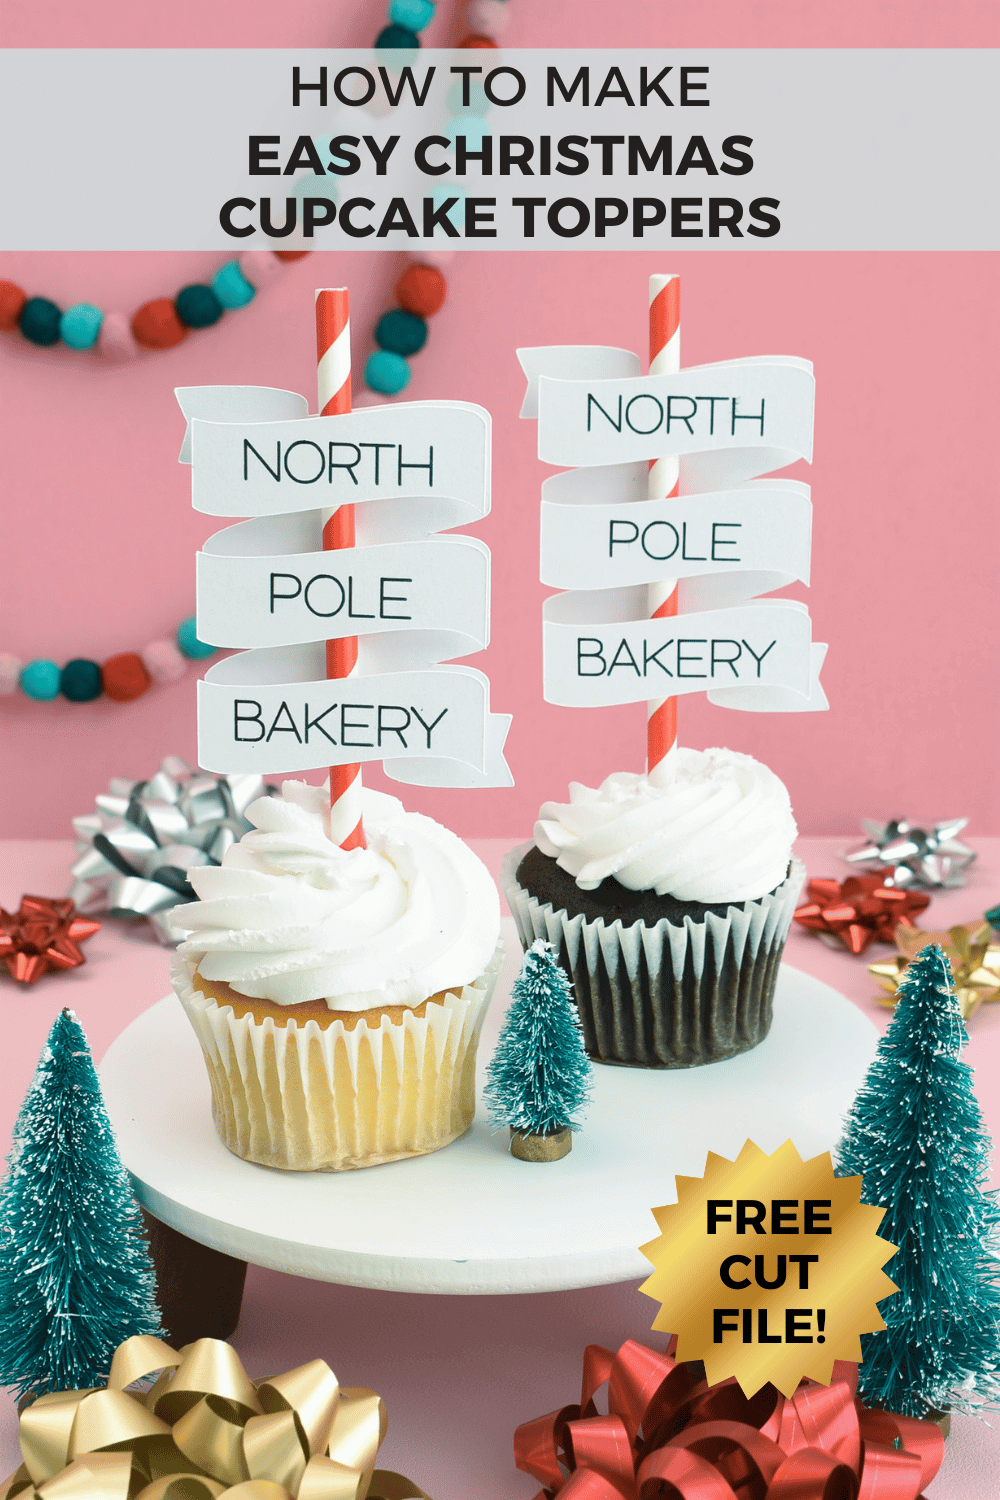
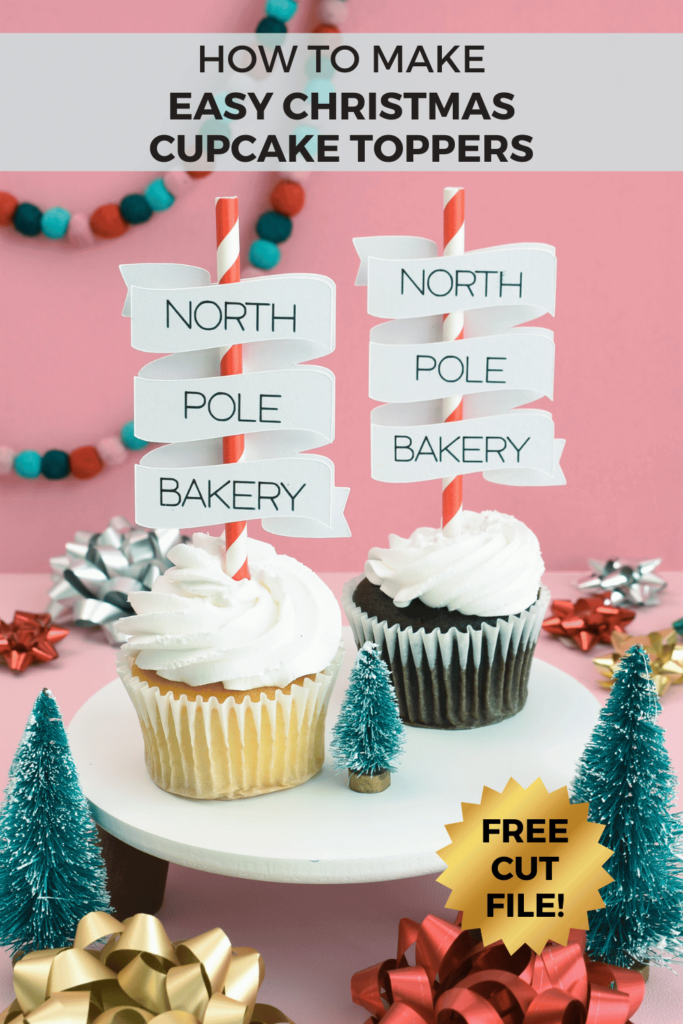
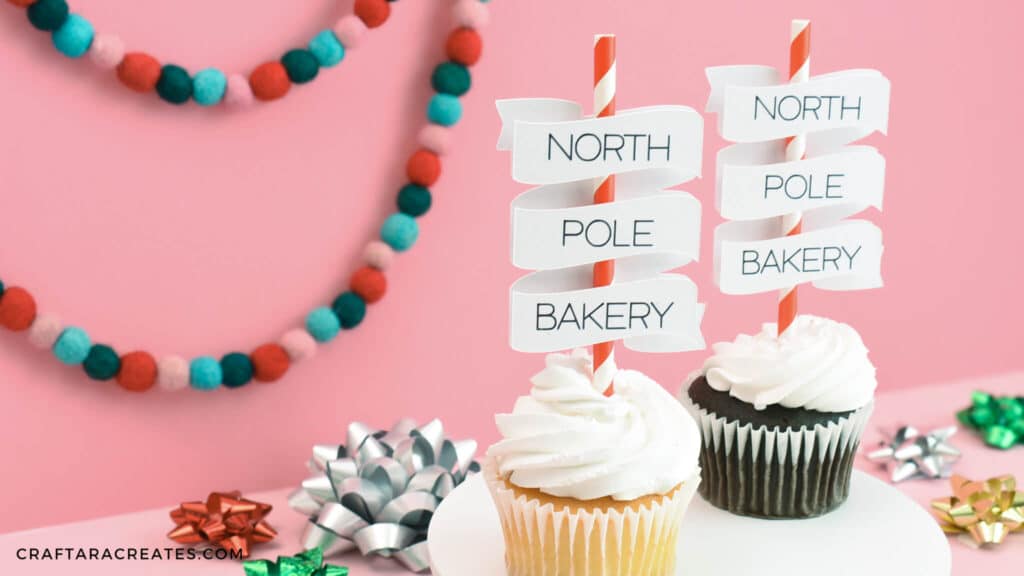
Check out these charming holiday cupcake topper flags for Santa’s North Pole Bakery. They’re adorable and super easy to create using your Cricut machine. With these little flags poking out of the snowy white icing, they remind me of my favorite Christmas movie – Rudolph the Red-Nosed Reindeer.
The easy Christmas Cupcake Topper project combines Cricut cuts and pens to make cute mini signs for the cupcakes at your holiday party this year. I used a heavyweight cardstock with a smooth finish and a subtle shimmer on both sides along with a striped paper straw to achieve this look.
In this easy Christmas Cupcake Topper tutorial, I’ll guide you step by step on setting up this project in Cricut Design Space, using Cricut pens with your machine, and assembling the toppers. This project is compatible with any Cricut machine from the Cricut Joy to the Cricut Maker model.
This post may contain affiliate links, which means I’ll receive a commission if you purchase through my links, at no extra cost to you. Please read my full disclosure for more information.
Where can I find the Easy Christmas Cupcake Topper cut file?
The cut file arrives to you via email from 12×12 cardstock shop. Be sure to sign up for the 12 days of Christmas Paper Crafts HERE
Here's What You'll Need To Make an Easy Christmas Cupcake Topper with Cricut
Materials to get at 12×12 Cardstock Shop:
- Cardstock: CRYSTAL – 12X12 PEARLESCENT CARDSTOCK – NEENAH STARDREAM
- Or MYSTERY CARDSTOCK SCRAP BAG – ONE POUND OF CARDSTOCK
- Extra Tall Foam Tabs: CUBIES BY BEARLY ART – 1248 PIECE DIMENSIONAL FOAM ADHESIVE
- Thin Double Sided Tape: SUPER TAPE – 1/8 INCH DOUBLE-SIDED – ICRAFT
Other Tools and Materials:
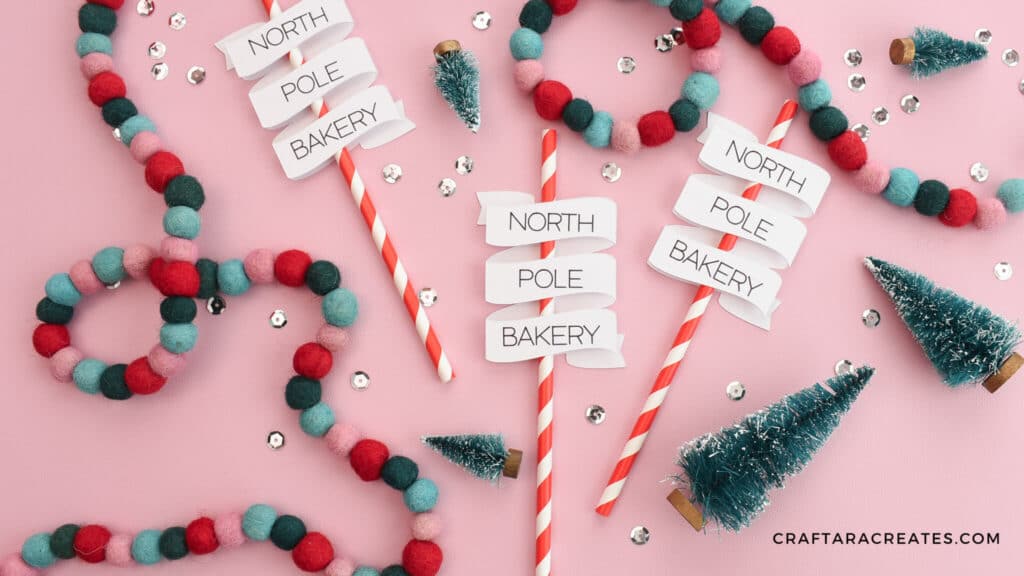
What can I use cupcake toppers for besides cupcakes?
Cupcake toppers are versatile and can be used for various purposes beyond cupcakes.
- Pancakes: These would look great on top of a stack of pancakes dusted with powdered sugar on Christmas morning.
- Donuts: The flags would look great extending out of a stack of powdered donuts at brunch.
- Beverage Accents: Elevate your preferred holiday drinks with these as festive drink stirrers.
- Table Setting Decorations: Enhance your Christmas dessert table by incorporating these red and white striped mini flags from the North Pole Bakery into your place settings.
How to upload the Easy Christmas Cupcake Topper into Cricut Design Space
To begin this project, start by uploading the provided cut file. After downloading the .zip file, unzip it by double-clicking and accessing the folder. Inside, you’ll find the license and the cut file itself. The cut file is recognizable as it begins with ‘SVG’ and is named ‘SVG-HolidayCupcakeTopperFlag.svg’.
You have two options to add it to Cricut Design Space: either drag and drop it directly or use the green browse button to locate the file.
When you enter the “prepare to upload” screen, you might notice the cut file’s font appears a bit faded and unusual, but rest assured, it’s all intact. Trust the process and proceed by clicking the green “upload” button.
You will notice on the upload screen that the cut file displays correctly. Select the design and click “add to canvas”.
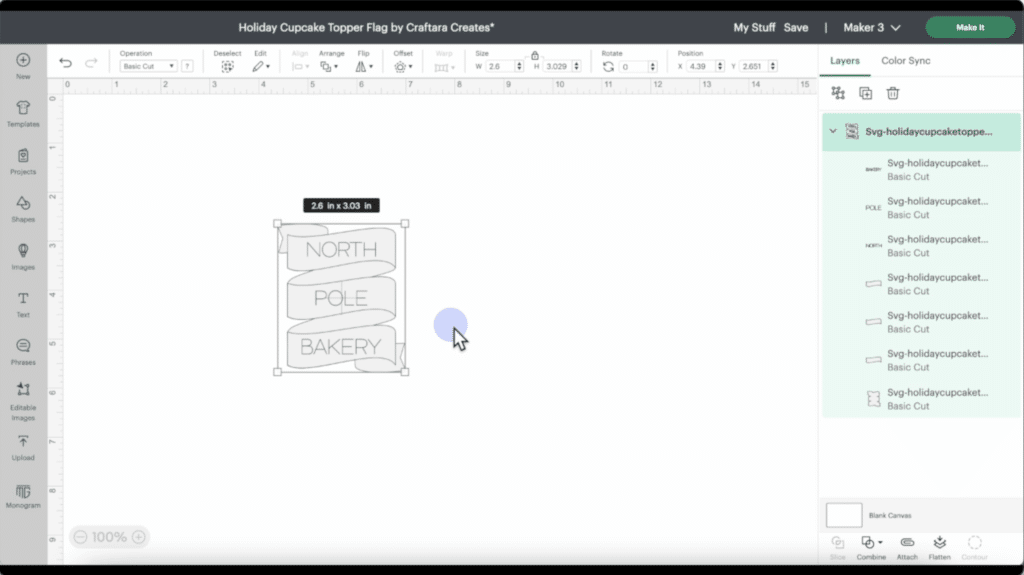
How to prepare your Christmas Cupcake Topper
After uploading your design to Cricut Design Space, the first step is to check its size. For mine, I kept it at 2.6 inches wide, but feel free to adjust it as needed. I recommend not going any larger but you could size down to 2.3 inches wide. Then, ungroup the project for making adjustments.
Start by changing the color of the shapes to match your cardstock. Following that, choose the text layers and head to the Operations menu to pick the Pen function, which instructs the Cricut machine to draw with a Cricut Pen. A similar Cricut font is BFC Autumn Woodland in upper case.
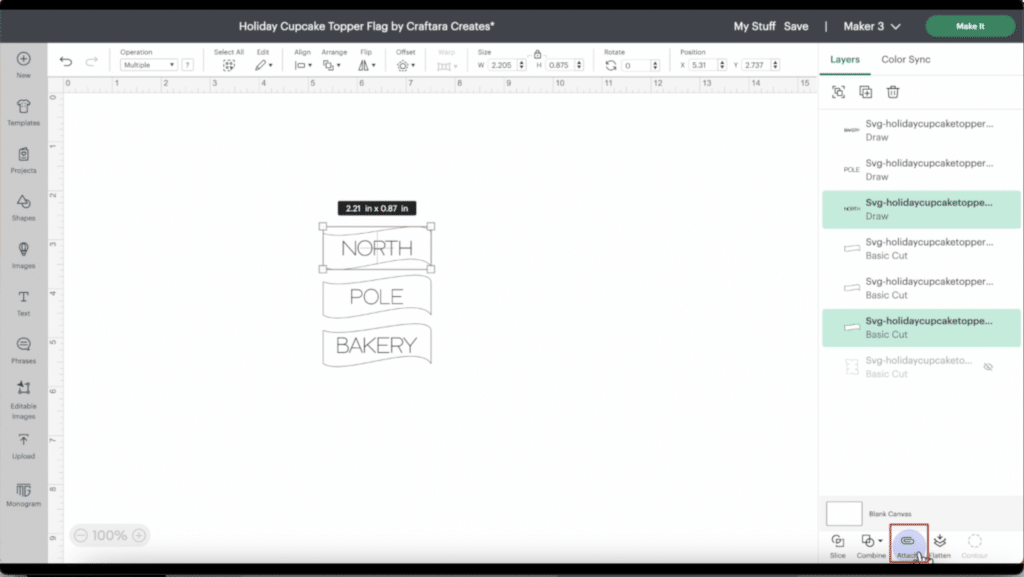
Next, we need to connect the text to the shapes. To simplify this process, hide the base layer image, then select one shape and its corresponding text, and click “attach.” Repeat for each shape, linking all three shapes and words together.
Moving on, unhide the base layer, select all, and group together the whole design for easier handling. Duplicate the design for as many Christmas cupcake toppers as needed.
Click “Make it” to send your easy Christmas Cupcake Topper to your Cricut machine. When on the Make screen, select the material setting suitable for your cardstock by clicking “Browse all materials.”
Cutting your easy Christmas cupcake topper
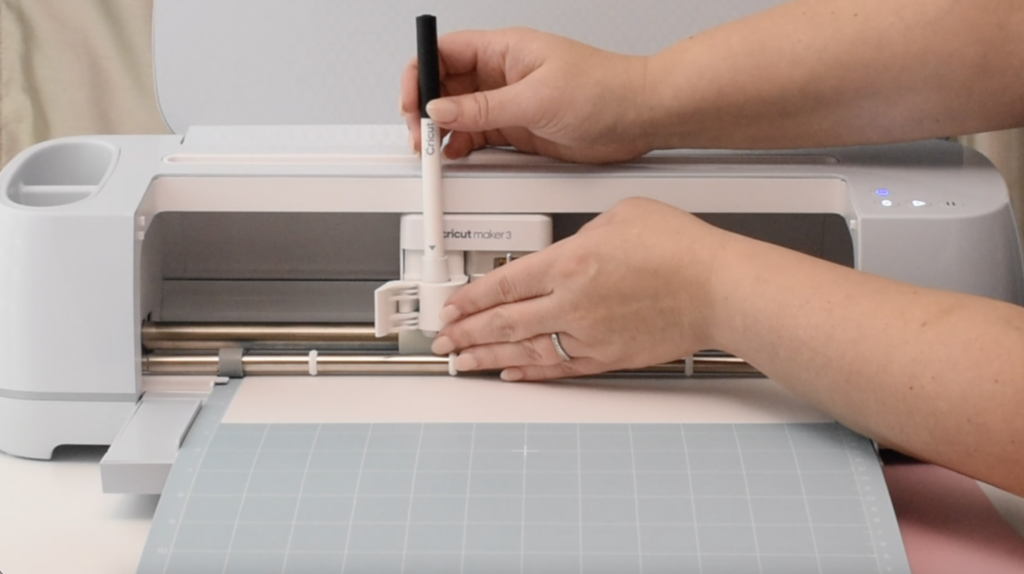
Next, let’s proceed to your Cricut machine. Secure your cardstock onto a machine mat; I opted for a new, sticky blue light-grip mat for heavyweight cardstock. Smooth it down using a brayer to ensure a strong grip, then load the mat into your Cricut machine.
Now, it’s time to attach the Cricut pen. Open clamp A and firmly insert the Cricut pen, ensuring it clicks into place. Look for the arrow guiding you to insert the pen into the holder, then secure clamp A.
The fine point blade should already be in clamp B, which comes with all Cricut machines. Here’s where the magic happens: the machine seamlessly transitions between drawing with the pen and cutting because Cricut can do both functions during the same cut cycle.
Once the cuts are done, unload the mat, and remove the pen just as you inserted it.
Finally, carefully remove the cardstock off the mat.
Assemble your Santa's North Pole Bakery cupcake topper
Now, it’s time to put together your simple Christmas cupcake toppers. Arrange all the pieces and dry assemble your project, which means to assemble without adhesive. Keep in mind that it can be a bit tricky to determine the correct orientation of the base layer, especially if your cardstock looks the same on both sides.
The text banners should perfectly align and fit right into their designated spots. If they don’t, you may need to adjust the base layer until they line up correctly.
Start by attaching a strip of slim double-sided tape to the center of the base layer, which will hold the straw. Alternatively, you can use glue as an option. Carefully position the straw along the center of the base layer.
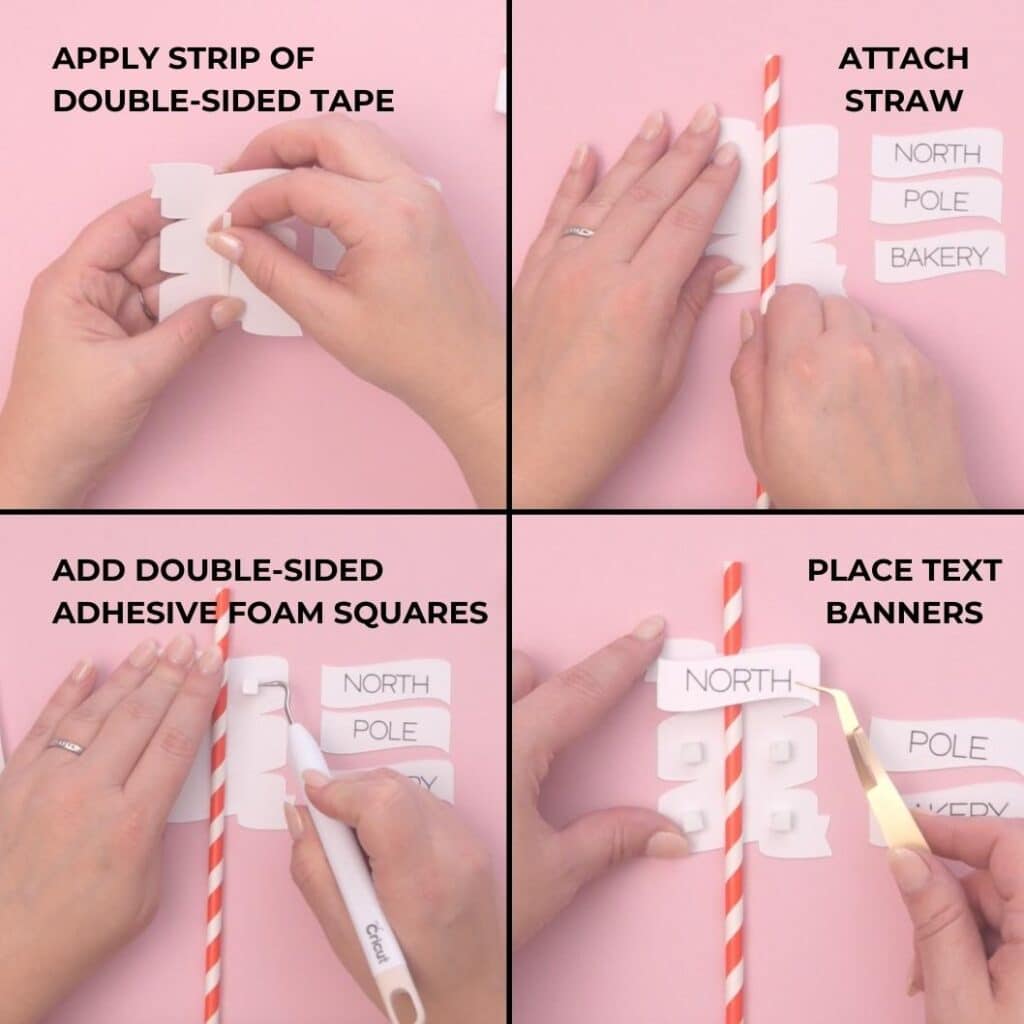
Then, take some extra-tall adhesive foam tabs or squares, attaching one to each side of the straw on all three banners. If you don’t have these extra-tall tabs, you can double up on regular foam squares to achieve the needed height, which should match the straw’s thickness to prevent the text banners from bending much when placed on top.
After fixing all the foam tabs in place, peel off the backing to expose the adhesive.
Now, position each text banner onto the holiday cupcake topper flag, making sure they align properly.With the three text banners in place, your easy Christmas cupcake topper is ready for use. If needed, you can easily trim the paper straws to the desired size using scissors.
Was This Tutorial Helpful?
Did you find this information on how to make an easy Christmas Cupcake Topper with Cricut helpful? If so, please pin this idea and let me know your thoughts in the comments below.
Looking for other christmas cake topper projects?
Check out this simple, beginner friendly Cricut project that is super easy to assemble.