


SUPPLIES
- Cricut Cutting Machine (Joy, Explorer or Maker)
- Cricut Mat (standard grip)
- Fine Point Blade
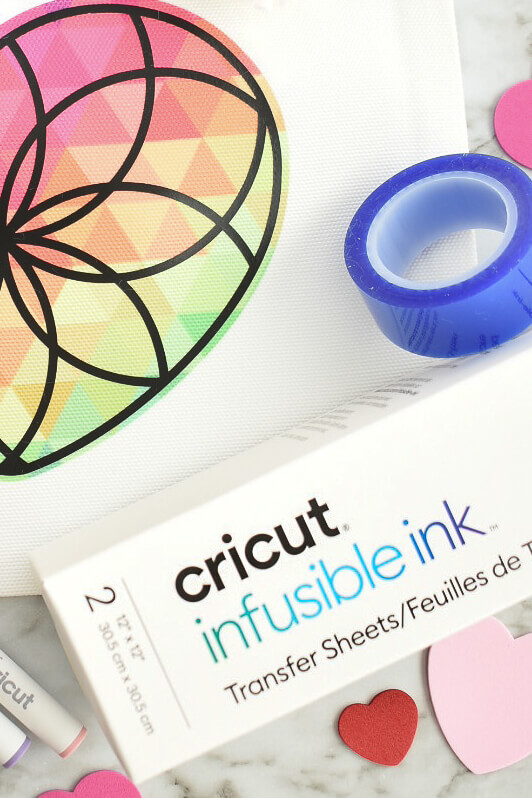
- Cricut Infusible Ink Transfer sheet
- Heat Resistant Tape
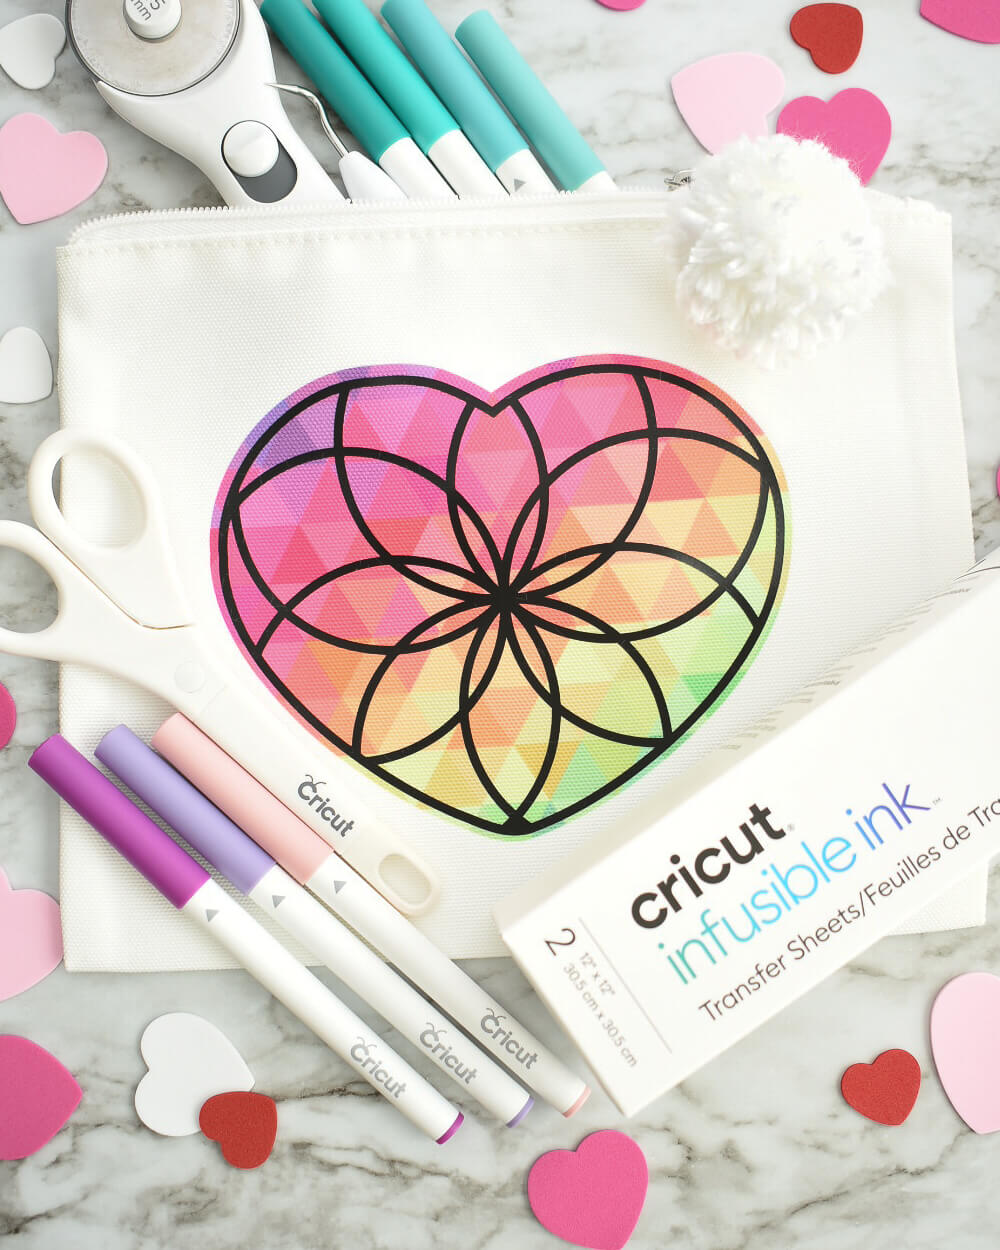
- Cricut Infusible Ink blank – Cosmetic Bag
- Iron-on Vinyl
- Easy press or heat press
- Free Layered heart design (Optional – sign up below for the resource library)
Additional:
Cricut Heat Guide
DIRECTIONS
Infusible Ink Design Tips
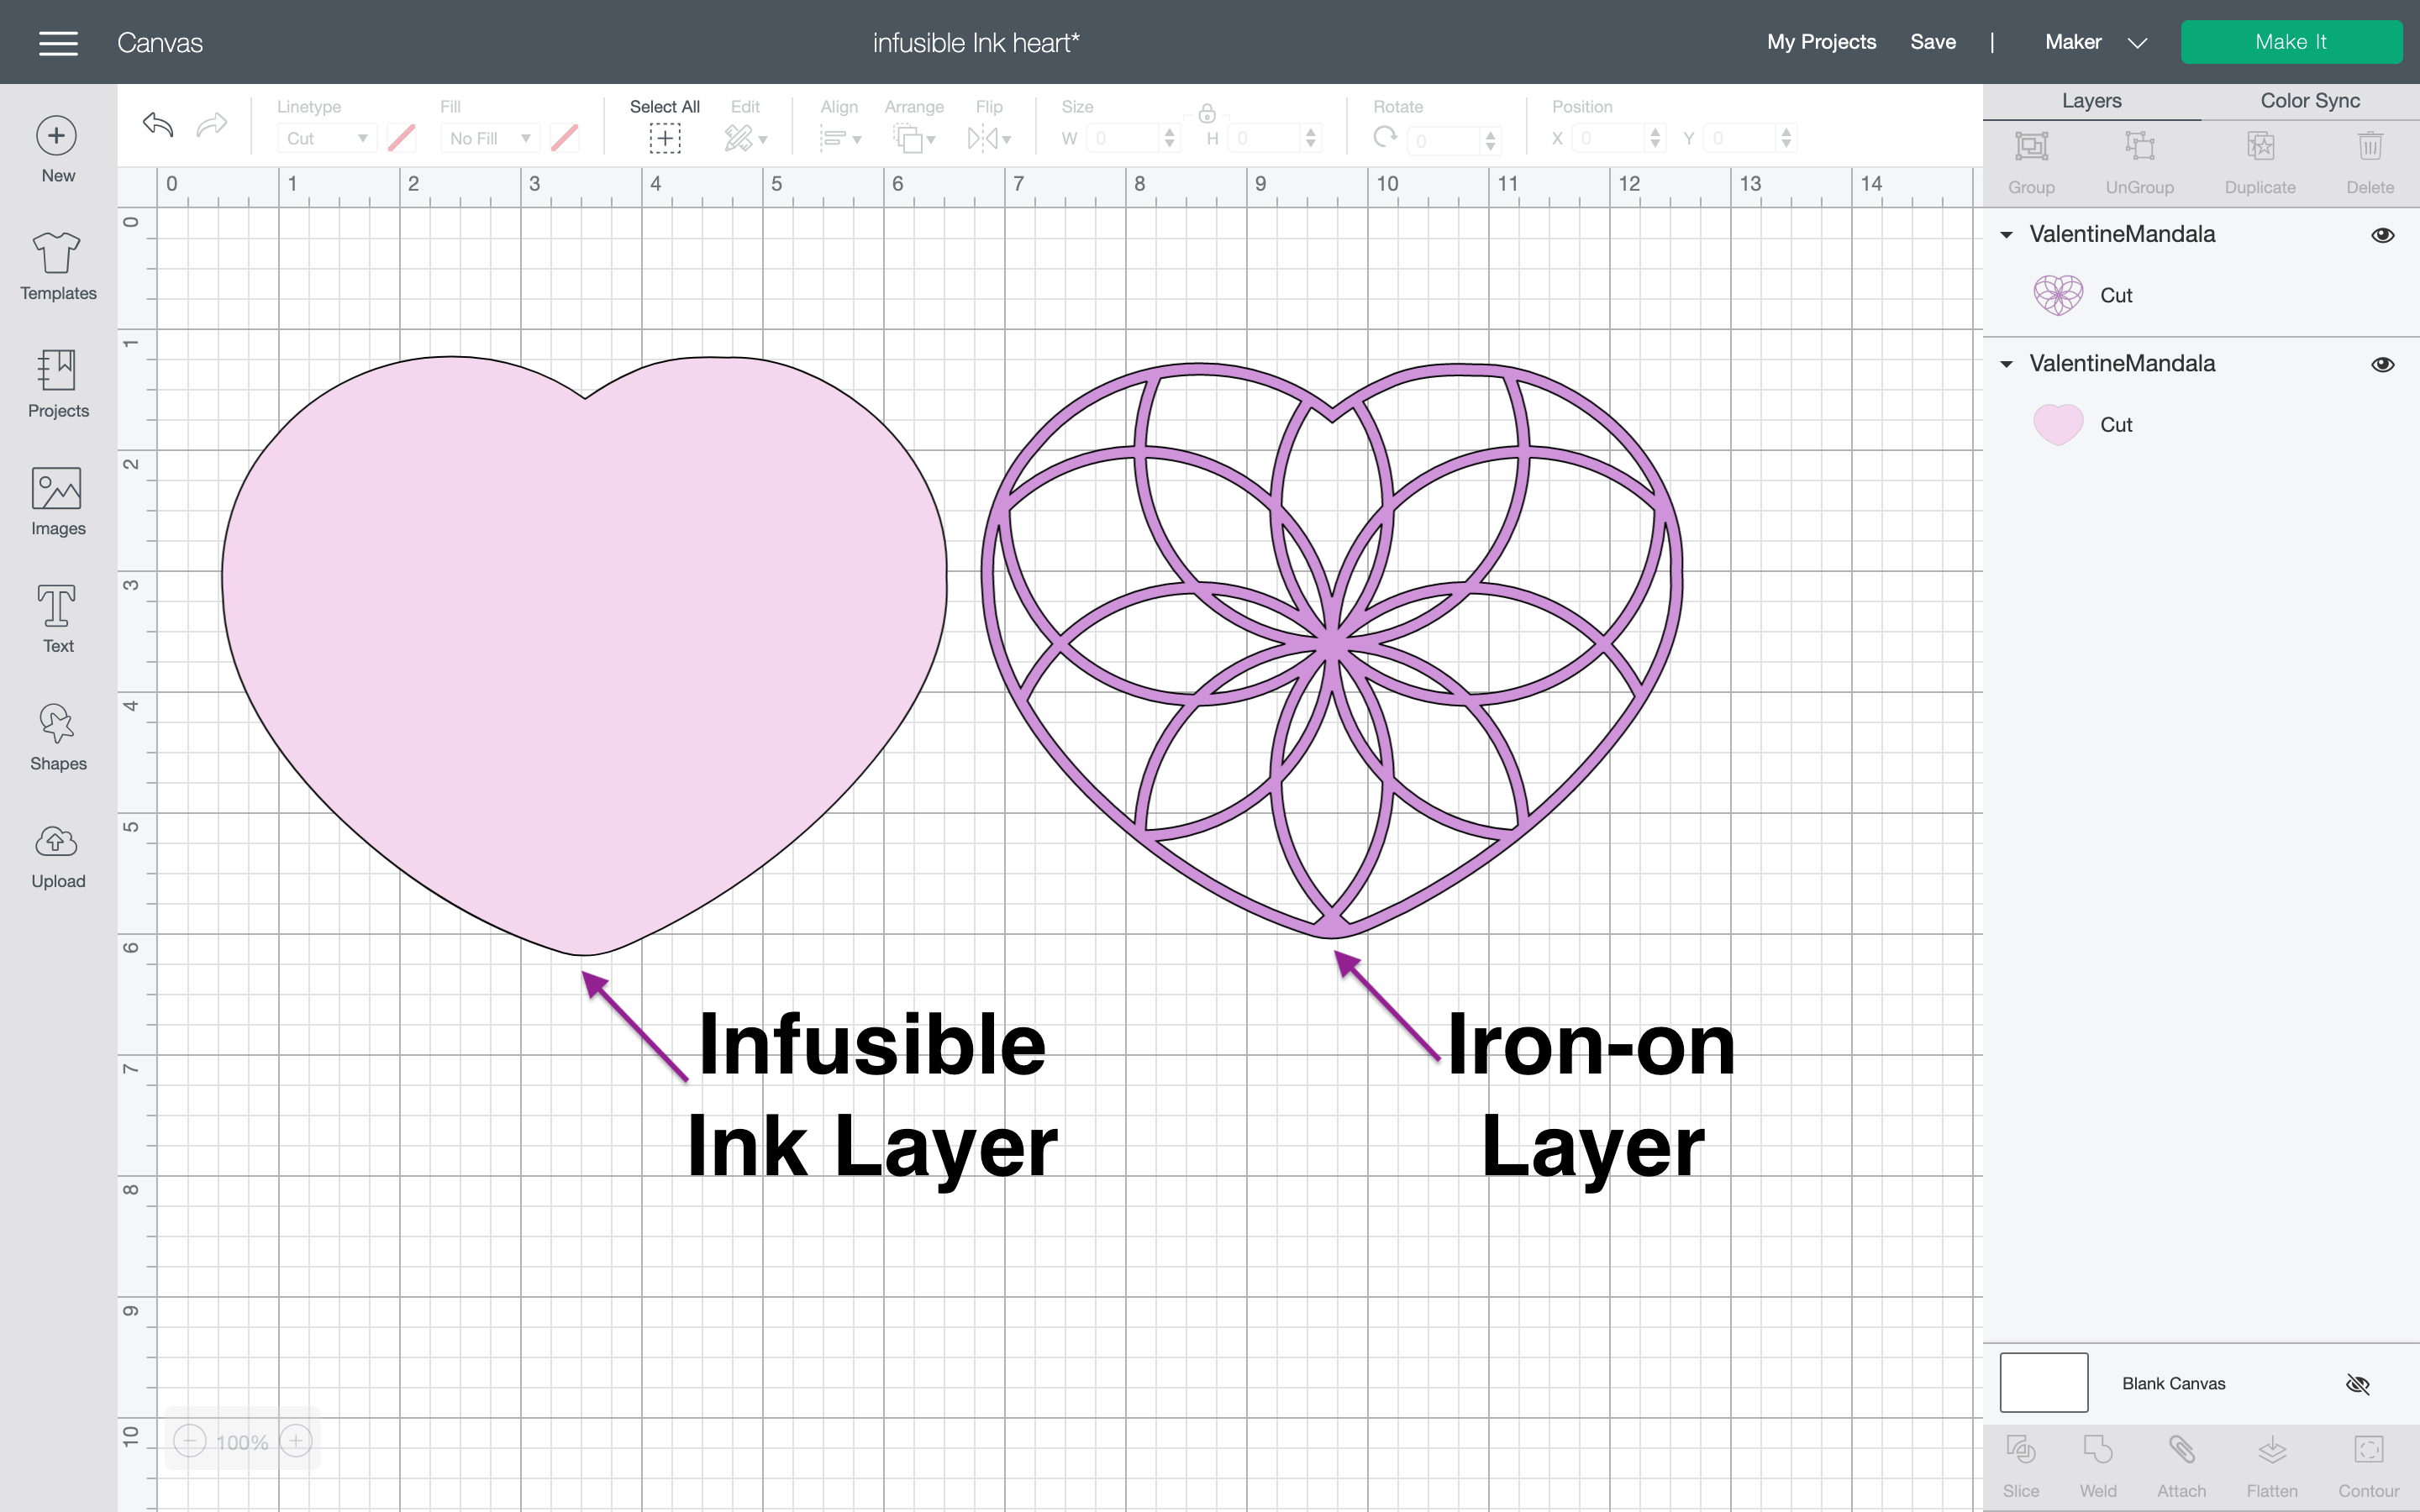
A good Infusible ink layered design would have a large base for the infusible ink transfer sheet layer that shows off the bold colors and pattern as well as a thin layer of iron-on vinyl for the top layer.
Another area to check is the size of the infusible ink design. You want to be sure your design is not larger than the Easy Press you are using. Once you place the heat source onto the infusible ink, it is highly recommended not to move the heat source to avoid the ink from shifting or ghosting. If you have a 9 x 9 Easy Press, size your design no larger than 8.5 or 9 inches.
Cut the design
Cut the Cricut Infusible Ink and Iron-on with the standard fine-point blade. For both infusible ink and iron-on, the designs are mirrored before cutting. For infusible ink, place the ink side up on the mat. For iron-on vinyl, place the shiny side down on the mat.
Prepare your blank
I used a Cricut brand cosmetic bag however, other blanks can be used if they are 100% polyester. Use a lint roller to remove any loose dirt or lint. Add a layer of cardstock to protect from ink bleeding through. I did not have any issues with ink bleeding but this is a good precaution to protect your heat press mat.
Apply Heat with Easy Press
Start with the infusible ink layer and position the design ink side down. Be sure to secure the design with heat resistant tape. The heat resistant tape is important to avoid the infusible ink layer from ghosting due to shifting.
Tips for applying heat to Infusible Ink
Before applying the heat, check the box the Cricut Infusible ink came in because it has a couple of paper sheets used as a protective layer during pressing.
Also, before applying heat, check the Cricut heat guide to double check your heat and temperature settings. Once the Easy Press is applied, do not move it at all. This is a notable difference between iron-on vinyl and infusible ink. Apply light but consistent pressure when the heat source is applied.
If you are wondering if a regular iron would work, unfortunately a regular iron will not work. Infusible Ink requires a very high temperature (although an older Easy Press will work at 360 degrees F for a longer press time – see Cricut Heat guide).
Remove heat
Once the time is complete, carefully lift the Easy Press straight up and avoid shifting the design.
Wait for the surface to completely cool before removing the tape and transfer sheet. No really, wait for the surface to no longer be warm. By waiting, you will ensure the infusible ink process is fully complete and infused.
Apply Iron on Vinyl
Next step is to apply the iron-on layer. Optional, but recommended, secure the iron-on design with heat resistant tape. Press according to the Cricut heat guide.
The Cricut heat guide not only provides temperature and timing instructions but also if the material is warm or cool peel. My iron-on vinyl was a cool peel and it worked perfectly!
2 Comments
Thank you so much for sharing this. What is the name of the iron-on layer? It’s clear and I can’t find it at Michaels. Please help. Thanks
Hi Jackie! Iron-on vinyl has a clear backing layer. I used heat resistant tape to secure the pieces in place before pressing. I also used a teflon sheet as a barrier between the press and the iron-on vinyl. Hope this helps!