


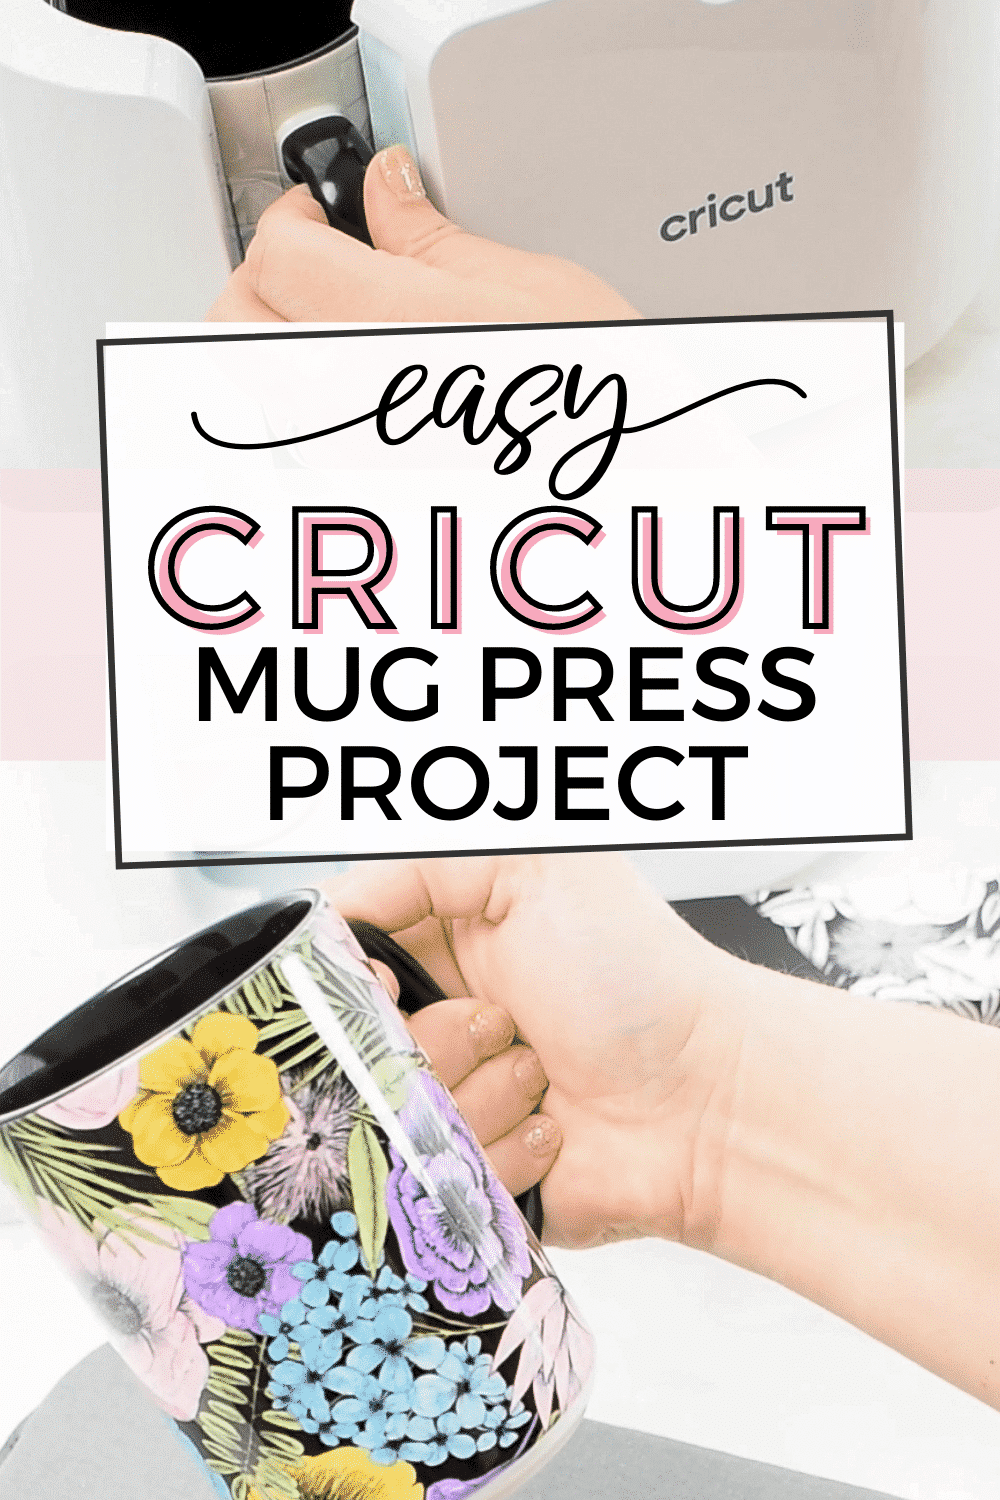
Create a fun and easy project with the Cricut Mug Press and Infusible Ink.
The Cricut Mug Press allows you to create professional grade mugs at home that last a lifetime. Mugs created with the Cricut Mug Press are dishwasher and microwave safe. For a fun and easy project, you can do at home, I will show you how to combine Cricut Infusible Ink Transfer Sheets and Infusible Ink Freehand Markers.
This post may contain affiliate links, which means I’ll receive a commission if you purchase through my links, at no extra cost to you. Please read my full disclosure for more information.
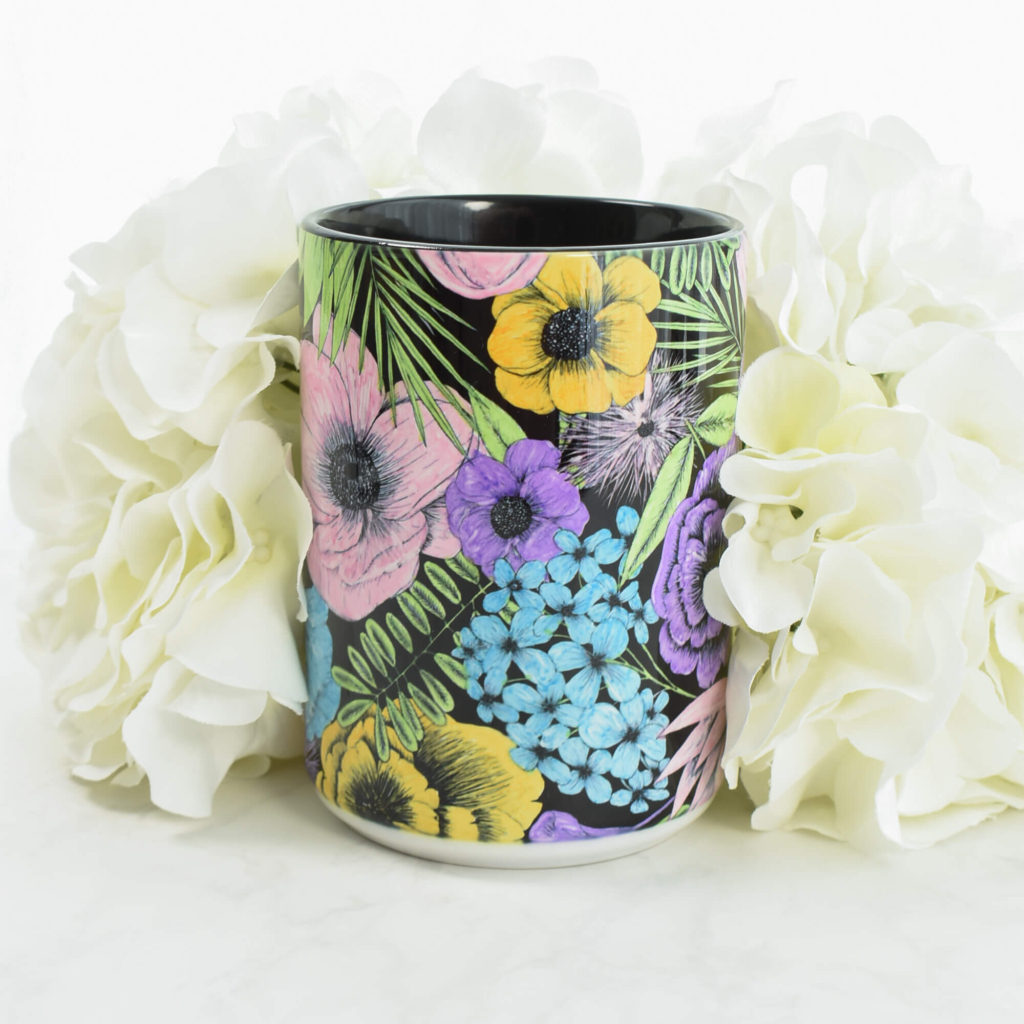
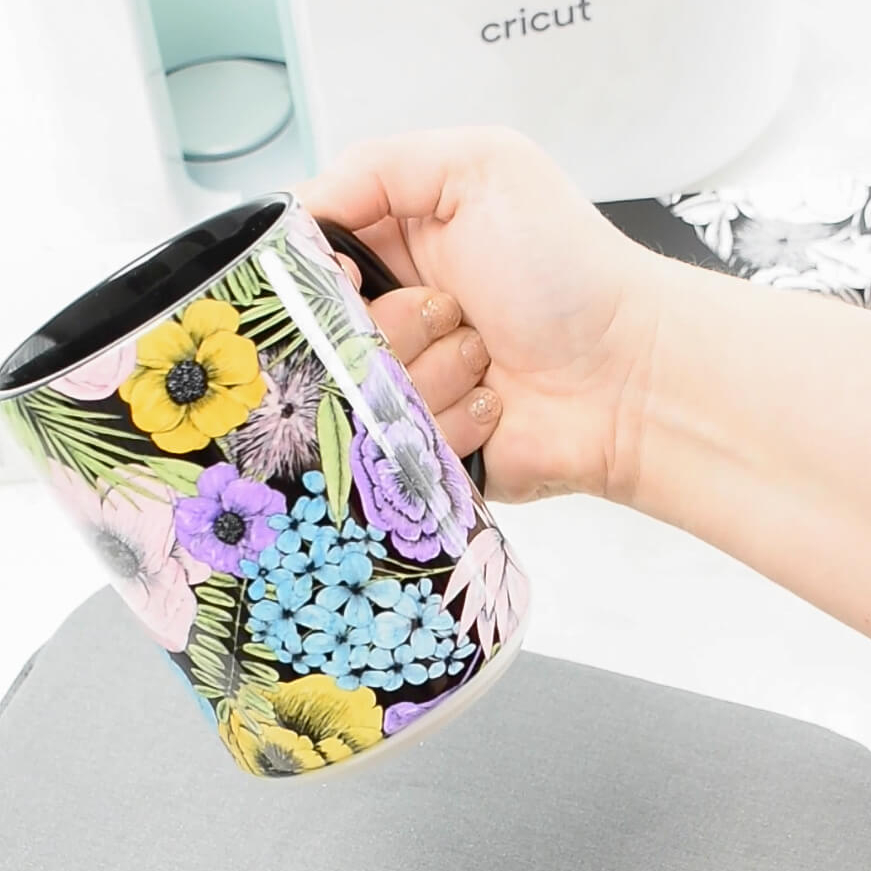
To achieve the bold results, I used a Non-Cricut brand 15 oz. Ceramic Sublimation Mug and it worked perfectly. The black handle and inside make for a fun and easy project color combination. Cricut offers blank mugs made specifically for the Cricut Mug Press. When on sale, the Cricut mugs are similarly priced as compared to other retailers.
The Infusible ink used for this project are a combination of an Infusible Ink Transfer Sheet along with Infusible Ink Freehand Markers. I found the infusible ink freehand markers work better than the Cricut infusible ink pens because the tips are much larger and the ink flows easier for coloring in open spaces.
HERE’S WHAT YOU’LL NEED
- Cricut machine (Joy, Explore Air or Maker)
- Cricut Mat – StandardGrip Machine Mat
- Cricut Mug Press
- Infusible Ink Freehand Markers 2.0, Tropical colors
- Infusible Ink Transfer Sheet Patterns: Black Botanicals
- Mug Blank with black inside/handle (rated for sublimation)
- Heat Resistant Tape
- Lint Roller
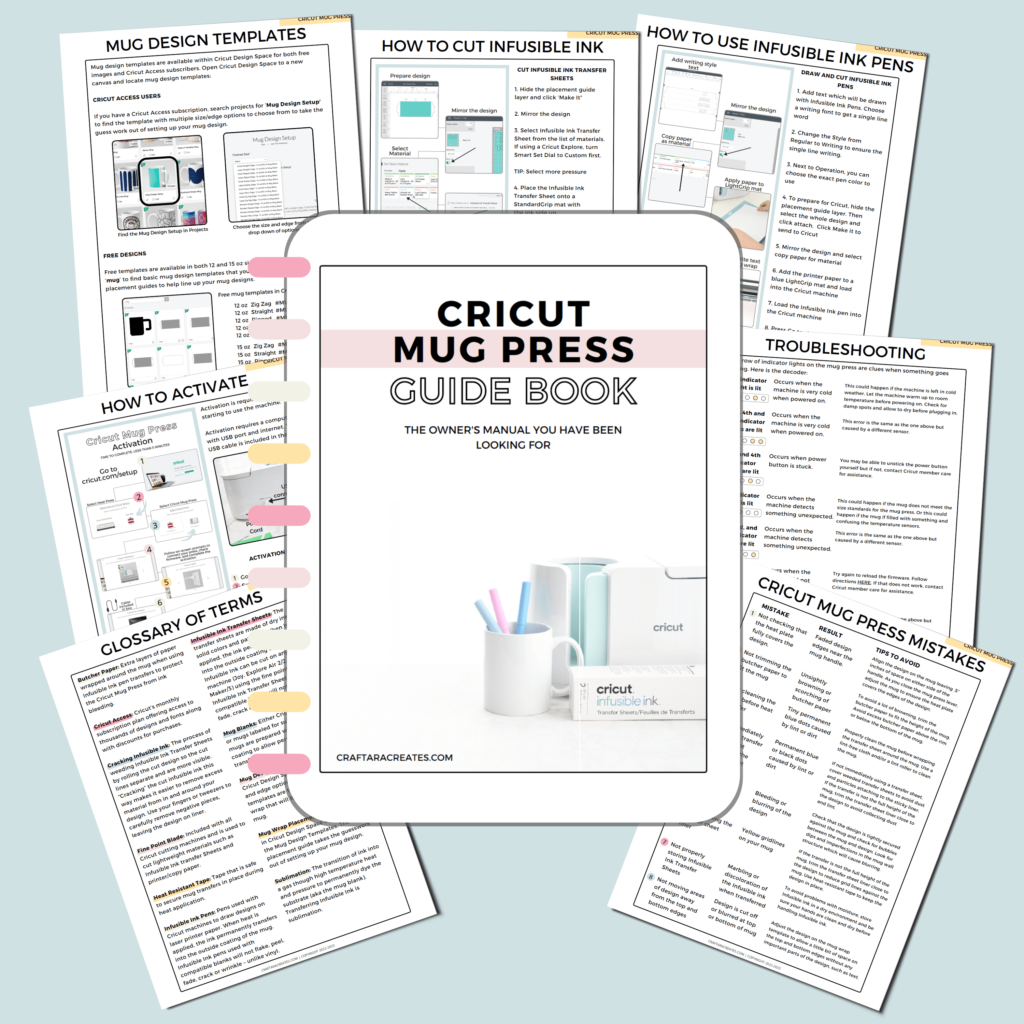
GRAB MY FREE CRICUT MUG PRESS GUIDE
This 13 page, printer friendly quick reference guide is the owner’s manual you wished came with the machine.
HOW TO MAKE A FUN AND EASY PROJECT WITH CRICUT MUG PRESS
Within Cricut Design space, open a new canvas. Search projects for ‘mug’ to find the mug design setup template. This helpful template has ten size/edge options to choose from – but we will be working with the straight edge. Select the size for the mug you are using 12 or 15 oz size. Even though the mug I used is not a Cricut brand mug, the 15 oz design fit perfectly.
Hide the pen layer as noted on the right side layers panel. If no other changes are needed, send the design to Cricut for cutting.
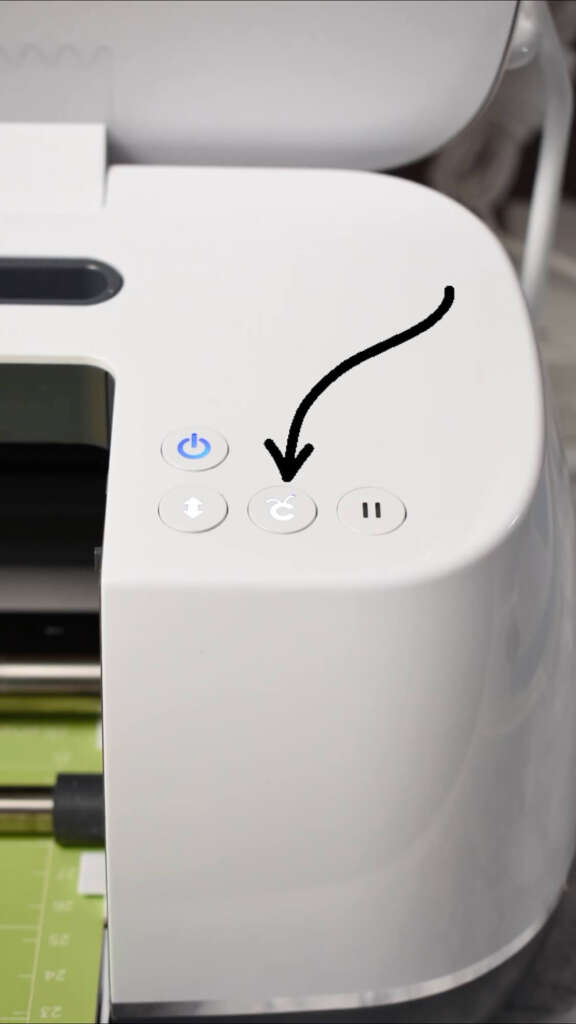
Within Cricut Design Space, be sure to mirror the design much like iron-on vinyl. Select Infusible Ink Transfer Sheet from the list of materials. If using a Cricut Explore machine, turn Smart Set Dial to Custom first.With infusible ink, I use more pressure and repeat the cut after the first cut completes by pushing the C button on the Cricut machine.
Place the Infusible Ink Transfer Sheet onto a StandardGrip mat with the pretty side up.
Using the standard fine point blade that comes with all Cricut cutting machines, load the mat with Infusible ink into the machine, then press Go.
Before unloading the mat, check the cuts with a weeding tool. If the cuts are not all the way through, click the C button to repeat the cut.
Once the cuts are complete, remove the Infusible Ink transfer sheet from the mat. By using the Cricut Design Space mug template, the liner should cut clear from the remaining Infusible Ink transfer sheet.
Gently roll the cut design so the cut lines separate and are more visible. “Cracking” the cut infusible ink this way makes it easier to remove excess material from in and around your design. Use your fingers or tweezers to carefully remove negative pieces from in and around your design, leaving the design on liner.
ADD COLOR WITH INFUSIBLE INK FREEHAND MARKERS
Now we are ready to add color to the cut out Infusible Ink sheet. Tape down the edges to keep the sheet from curling up. Be sure to avoid putting tape directly on the infusible ink but instead, tape the end areas without any ink (the part that will go near the handle). Grab infusible ink freehand markers and get started filling in the design with color.
Allow yourself time to color and be creative with the design. This process feels a lot like an adult coloring book. Go light on the pressure with the freehand markers as they can blur the lines of the infusible ink transfer sheet design.
Note that within the final product, you can see the marker strokes so try to align them in the same direction while coloring – avoid criss cross or zigzagging the marker strokes – unless that is the look you are going for.
Once the whole sheet is filled in to your liking, allow the markers to dry to avoid condensation during heating.

APPLYING INFUSIBLE INK WITH THE CRICUT MUG PRESS
Once the markers are dry, prepare the mug for the Cricut Mug Press by cleaning it with a new lint roller sheet to remove any dust or dirt. Wrap the infusible ink transfer sheet pretty side against the mug. I found it easiest to apply the infusible ink sheet while the mug is upside down because I use the table top to help line up the transfer sheet. Secure the Infusible ink transfer sheet with heat resistant tape.
Pre-heat the Cricut Mug Press and once ready, place the mug in the press and close. The mug press usually takes 6 minutes to press a mug. Wait for the beep and to remove the mug. Caution: the mug will be very hot. Only touch the mug handle and place on a heat resistant surface like an EasyPress mat.
Now the hard part. You need to wait for the mug to cool down all the way. Not only will a hot mug burn you but moving the infusible ink sheet while still hot, may cause colors to bleed. Let the mug sit for 15-20 mins or longer if still warm.
When the mug is cooled, remove the tape and transfer sheet to reveal your masterpiece.

This Cricut Mug Press craft is a fun and easy project and gift idea for friends, family, teachers, coworkers. Pair it with a Cricut Coaster using the same infusible ink transfer sheet to complete the gift. Top off the cute DIY gift idea with their favorite hot beverage: hot tea bags or a couple of k-cups.
WAS THIS TUTORIAL HELPFUL?
Did you find this tutorial how to make a fun and easy project with Cricut Mug Press helpful? If so, please pin this idea and let me know your thoughts in the comments below!
14 Comments
This is such an awesome idea!
Thank you for the suggestion and the tutorial, I will definitely be giving this a try!
Thanks so much Michele! I’m glad you enjoyed this project.
I just made this mug for a friend and it turned out so pretty! Thanks for the tutuorial –LOVE the infusible ink pens!
That’s so awesome to hear Jen! I’m so glad you had fun with infusible ink pens and the mug press. Yay!
Tara, that is the most beautiful mug I have seen. Don’t know where you got the black mug but I am definitely wanting to try my hand at this project. Great job and thanks so much for sharing.
Thank you so much Tina. The Black handle mugs came from Amazon. Search for sublimation mugs.
WOW BEAUTIFULLY DONE.
Thanks so much Yvonne!
WOW! this is pretty! I love it. I will definitely be getting some freehand markers, can’t wait to try this out. Thank you!
Thank you so much Eve! Glad you like this project.
Thanks for a fun way to design my mug. Can’t wait to try this.
Hi Jane! I’m glad you are excited to try this project out!
So glad to have read this article. Love the idea of coloring the infusible ink sheets. I didn’t know this could be done. Going to try tonite.
thank you for your ideas, just love them.
BKB
Yay! Glad to hear you found this tutorial useful!