


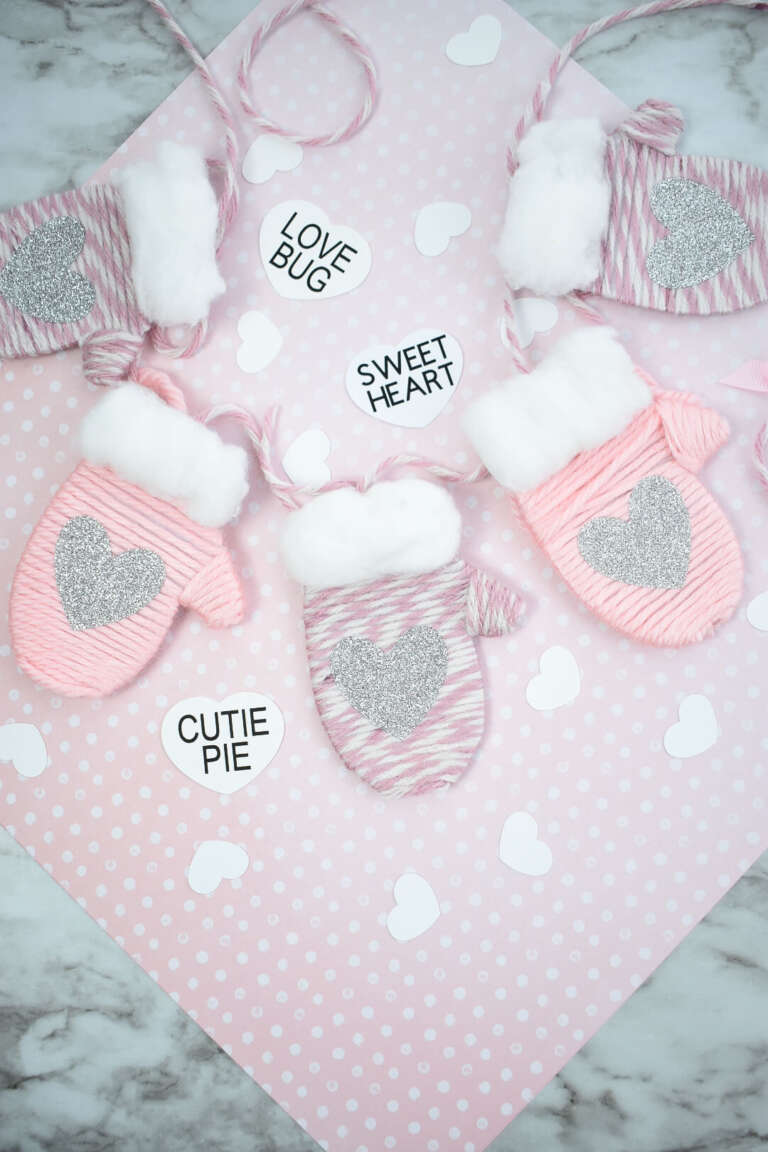
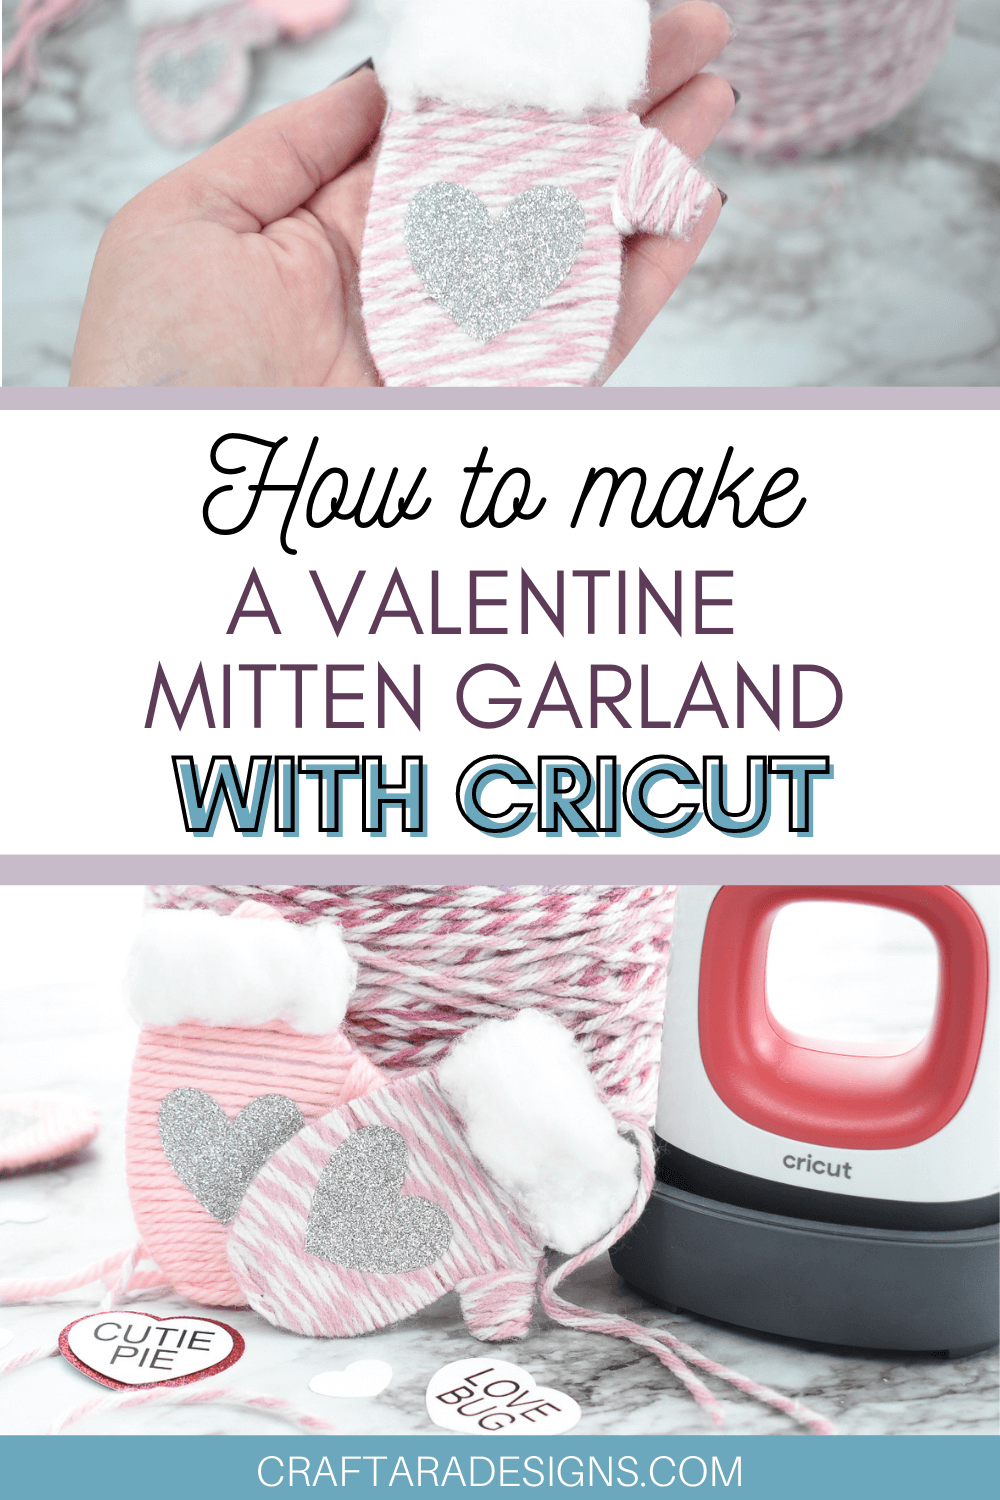
Today I bring you a Cricut Valentine craft project that uses the Cricut to cut simple shapes that you turn into a string of adorable mittens. Learn how to make a garland of wintery mittens with Cricut and personalize with a little heart for Valentine’s Day. So sweet!
This post may contain affiliate links, which means I’ll receive a commission if you purchase through my links, at no extra cost to you. Please read my full disclosure for more information.
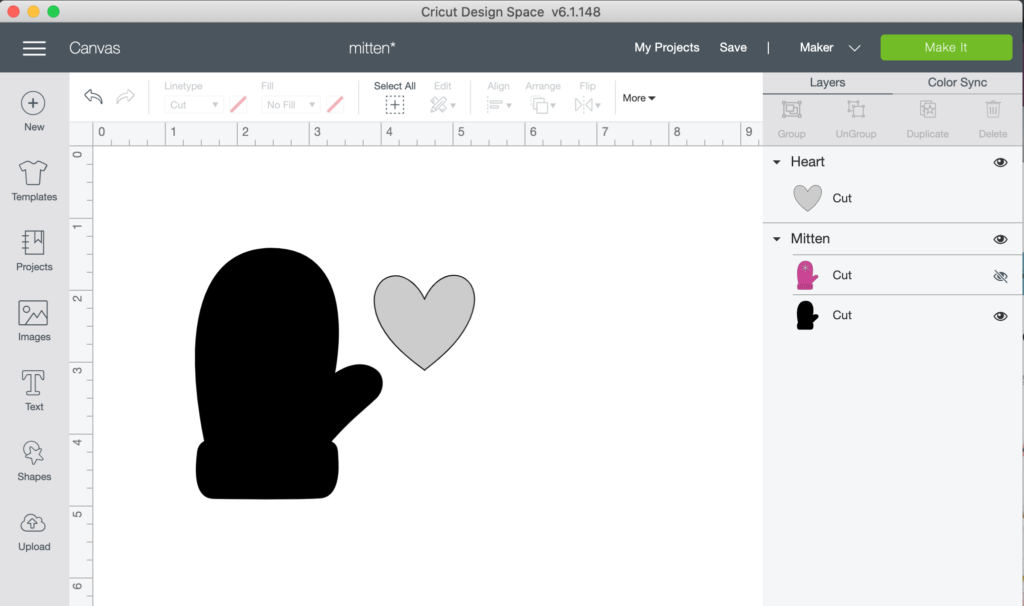
Search for a mitten image in Design Space and adjust the size as needed. My garland was made with mittens sized at 3.5 inches in height. Send the outline of the shape to cut.
Secure flat cardboard to a standard grip mat with painters or washi tape. The cut setting I used is Poster Board with More pressure and the fine point blade.
Flat cardboard can come in a variety of thickness. Play it save by performing a test cut first.
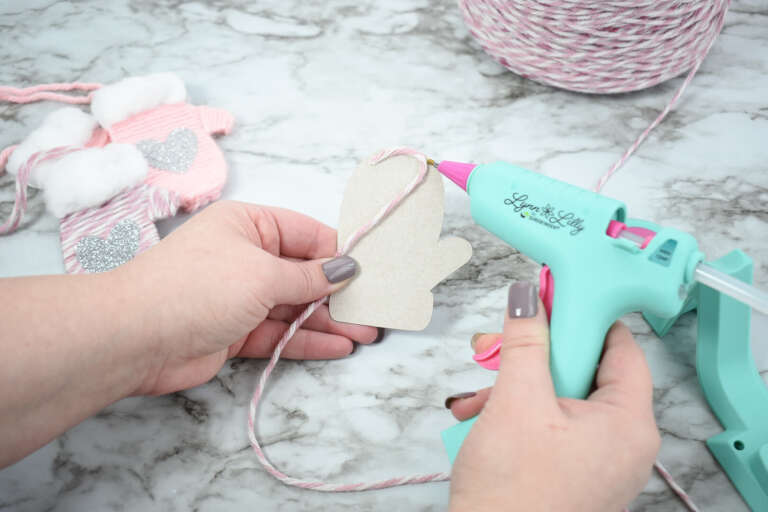
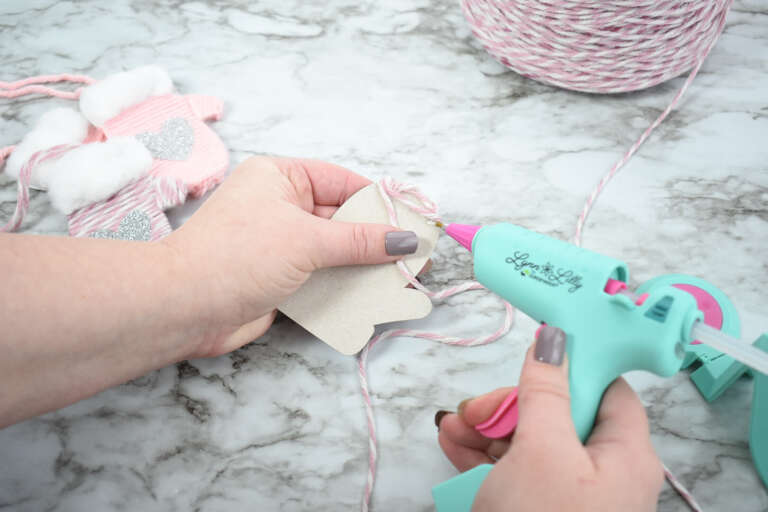
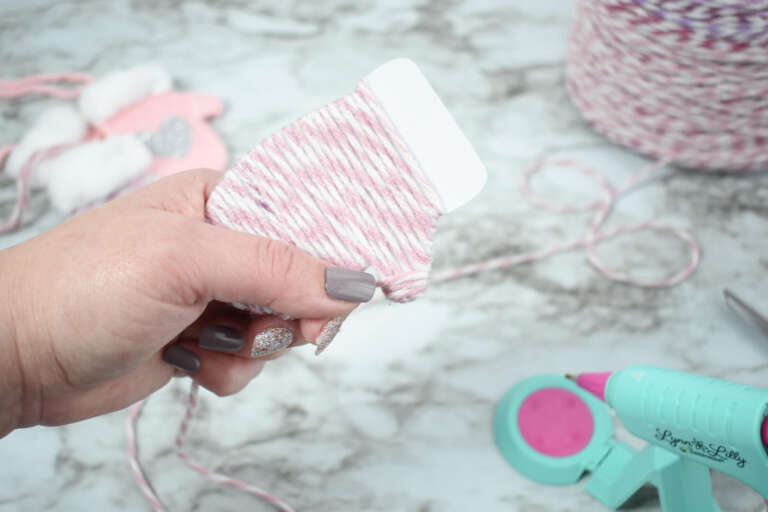
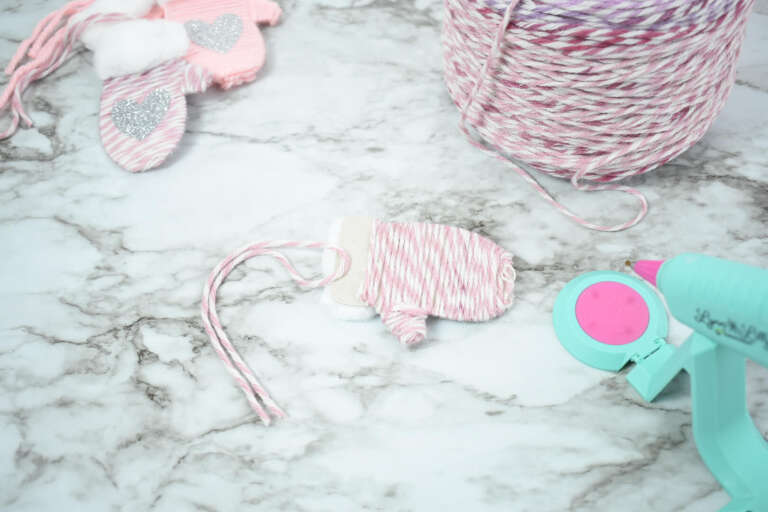
Before wrapping the yarn, decide which side of the mitten will be the back. Try to apply most of the hot glue to the back side or the outside edges on the front. This will help avoid any shifting when the iron-on vinyl is applied. Wrap the mitten with yarn, starting at the round, finger tip part of the mitten.
Keep the yarn secure with adding hot glue periodically as you wrap the mitten.
Separately wrap the thumb section.
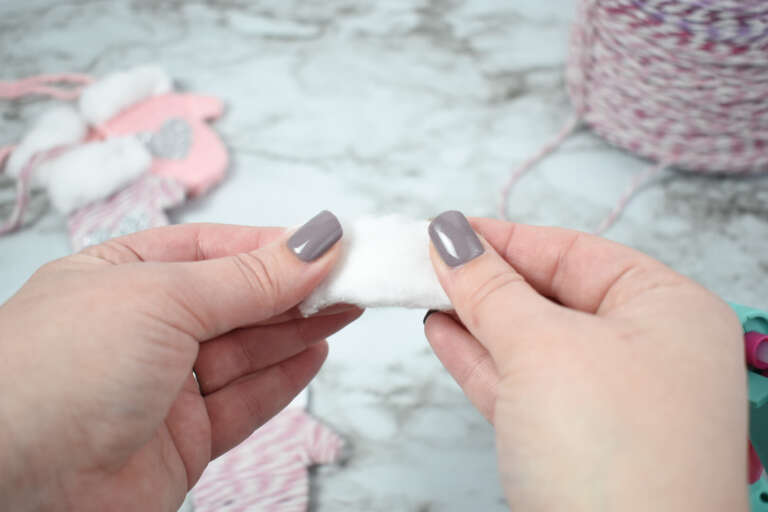
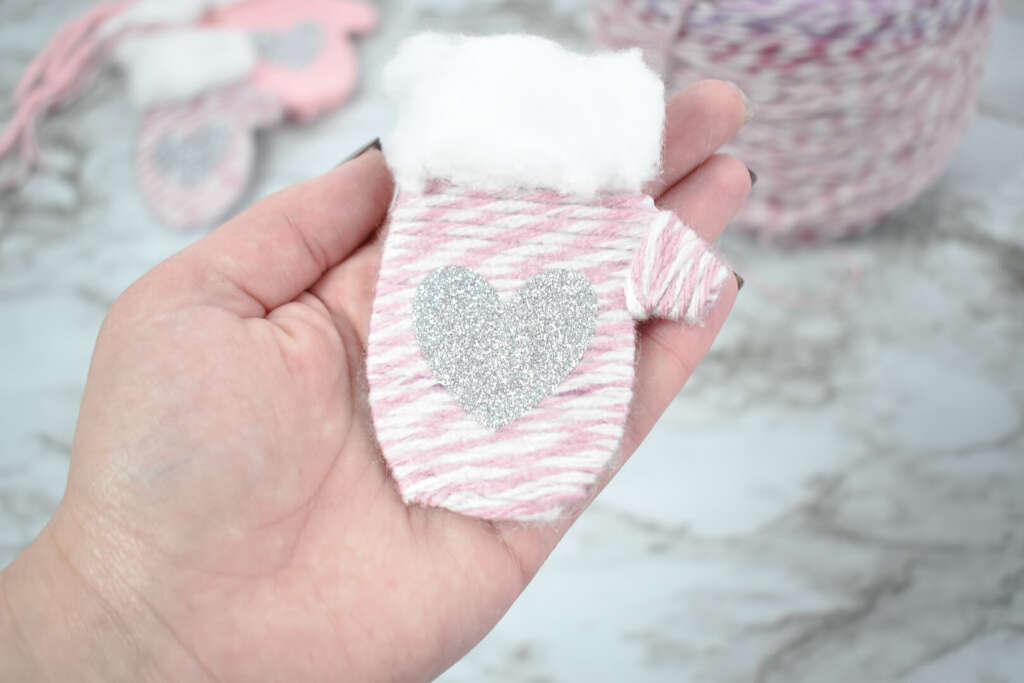
Use a cotton ball to add a fluffy, faux fur cuff by lightly stretching the cotton ball apart. Secure the faux fur cuff to the cardboard mitten with hot glue.
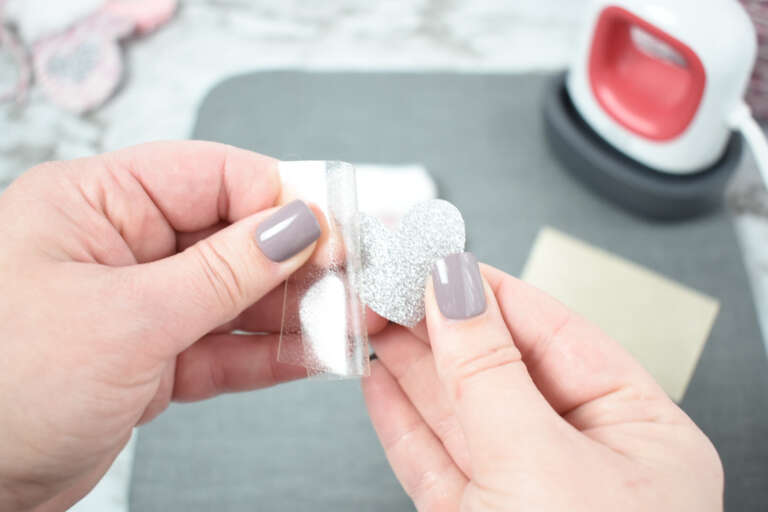
Using Cricut Design space default shapes, create a heart that fits within the mitten shape. Send to the Cricut and cut on iron-on material.
Mirror the design in design space before sending to your Cricut. Apply the iron-on vinyl, shiny side down on the mat.
Pull the shape off the carrier sheet and apply with a teflon sheet as a protective barrier. The reason for this step is that the iron-on carrier sheet is sticky enough to pull and damage the yarn.
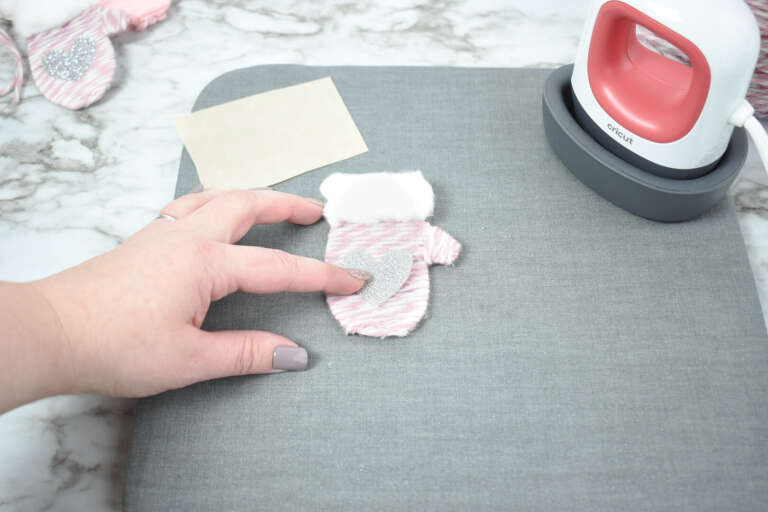
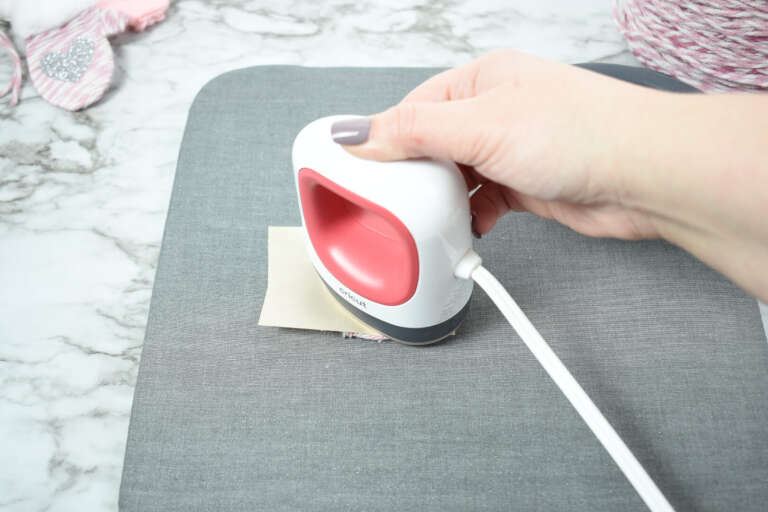
Apply low heat for 10 seconds, check to see if the iron-on is applied well.
Hot glue a strand of yarn as a tie if desired.
Add your adorable mini mittens to a long strand of yarn to finish your garland.
Did you find this tutorial how to make a Valentine themed garland of mittens with Cricut helpful? If so, please pin this idea and let me know your thoughts in the comments below!
Featured by
This website is a participant in the Amazon Services LLC Associates Program,
an affiliate advertising program designed to provide a means for sites to earn
advertising fees by advertising and linking to amazon.com.
Craftara Creates © 2023. All rights reserved.
| Cookie | Duration | Description |
|---|---|---|
| cookielawinfo-checkbox-analytics | 11 months | This cookie is set by GDPR Cookie Consent plugin. The cookie is used to store the user consent for the cookies in the category "Analytics". |
| cookielawinfo-checkbox-functional | 11 months | The cookie is set by GDPR cookie consent to record the user consent for the cookies in the category "Functional". |
| cookielawinfo-checkbox-necessary | 11 months | This cookie is set by GDPR Cookie Consent plugin. The cookies is used to store the user consent for the cookies in the category "Necessary". |
| cookielawinfo-checkbox-others | 11 months | This cookie is set by GDPR Cookie Consent plugin. The cookie is used to store the user consent for the cookies in the category "Other. |
| cookielawinfo-checkbox-performance | 11 months | This cookie is set by GDPR Cookie Consent plugin. The cookie is used to store the user consent for the cookies in the category "Performance". |
| viewed_cookie_policy | 11 months | The cookie is set by the GDPR Cookie Consent plugin and is used to store whether or not user has consented to the use of cookies. It does not store any personal data. |
One Comment