


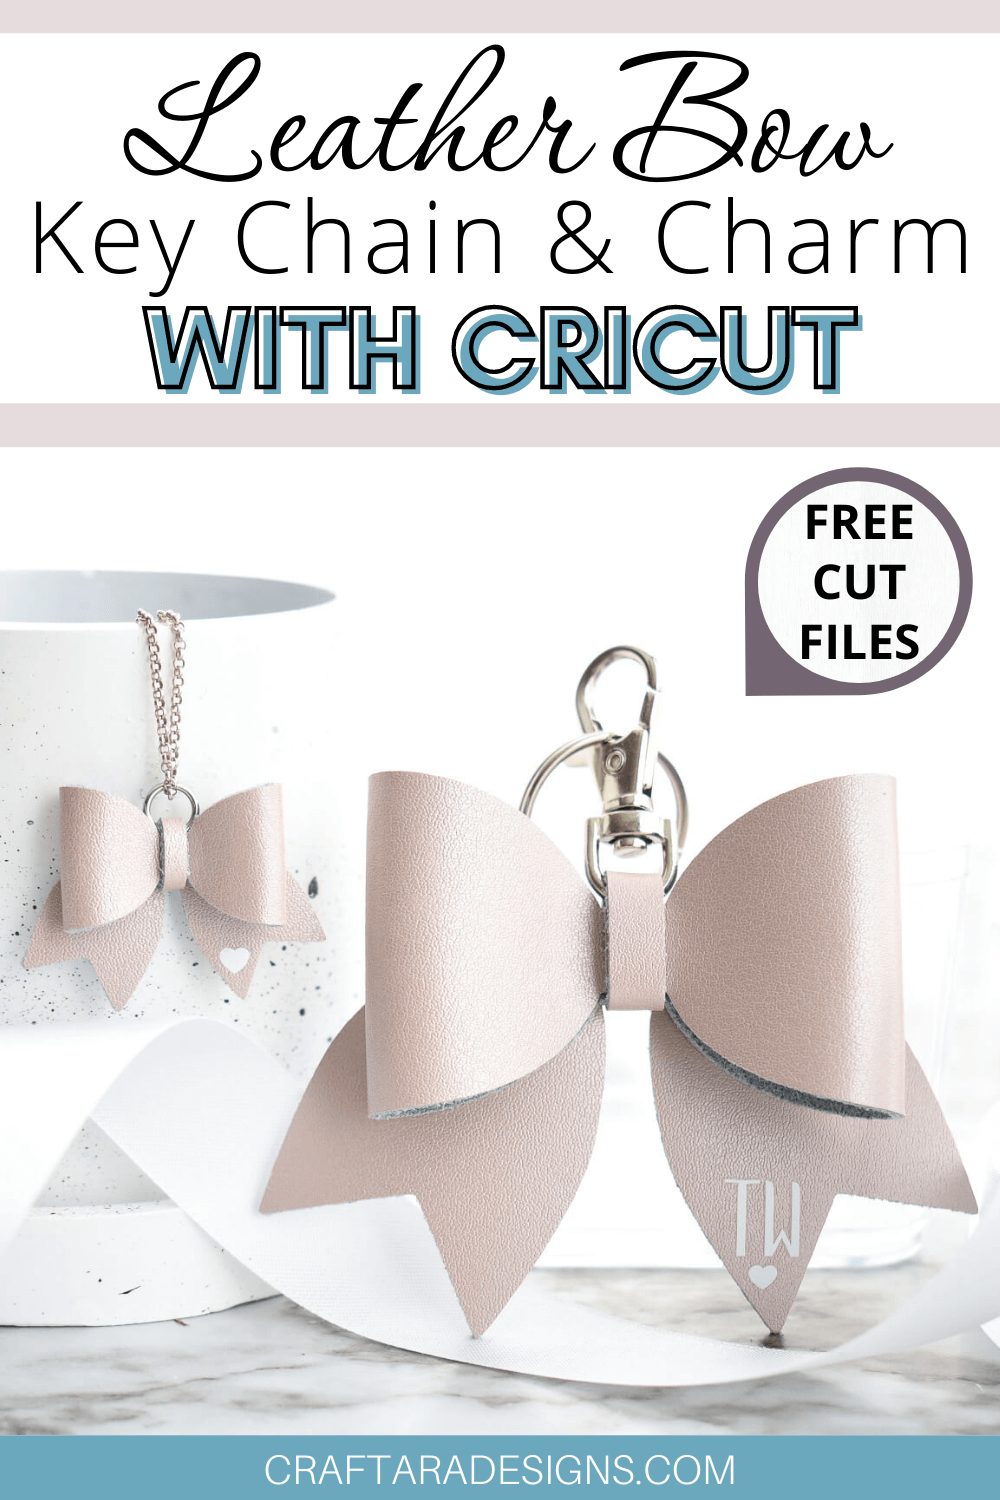
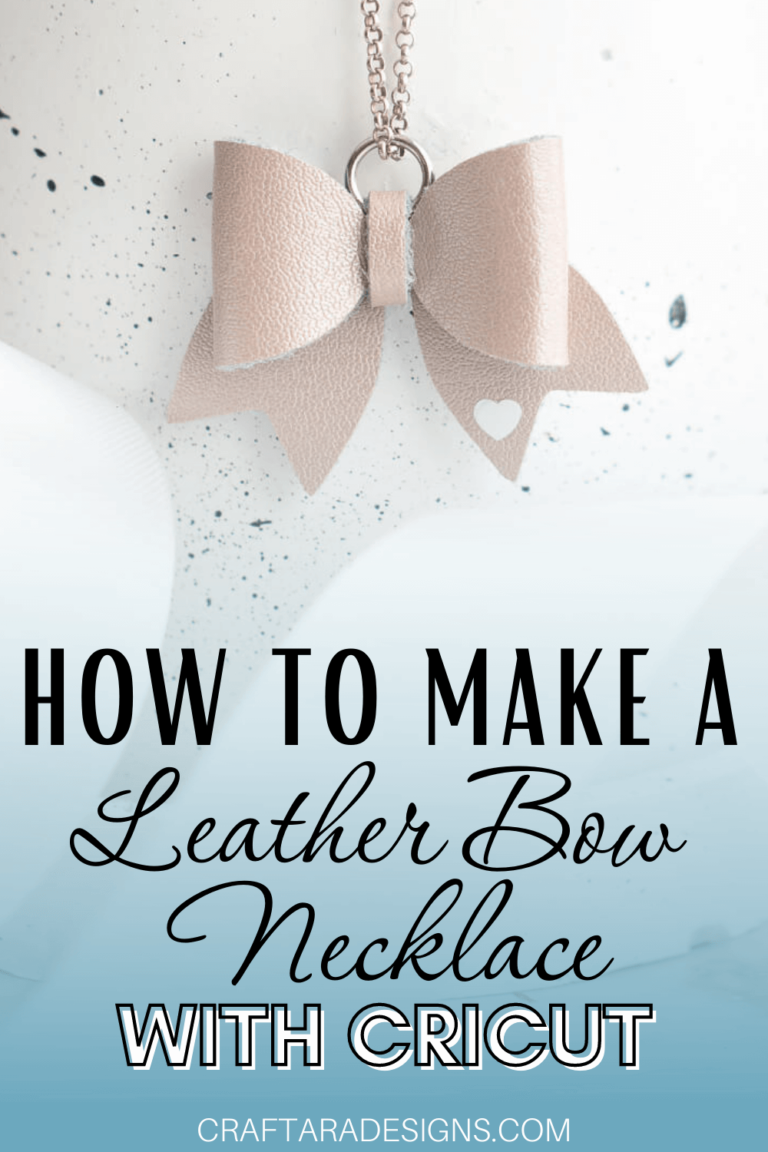
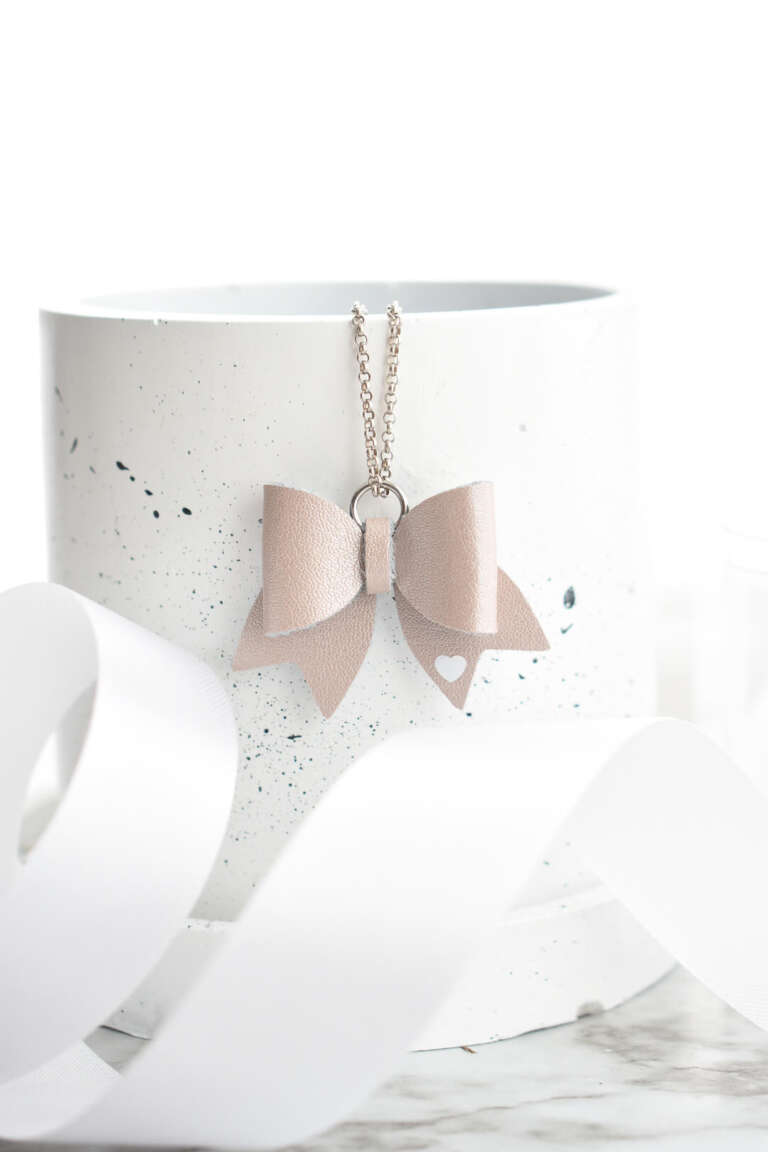
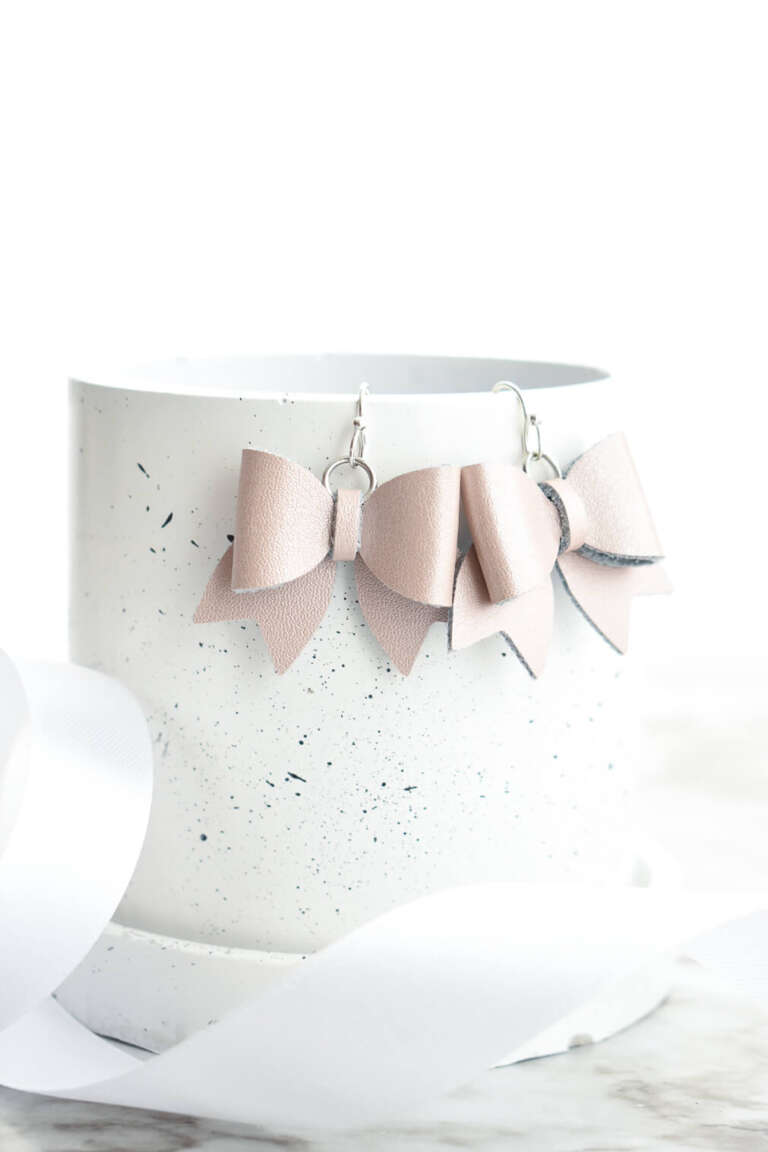
I am so pleased with the results of my first attempt at using a new material to create a leather bow charm with Cricut. These are perfect Mother’s Day gifts because they are beautiful and can be personalized.
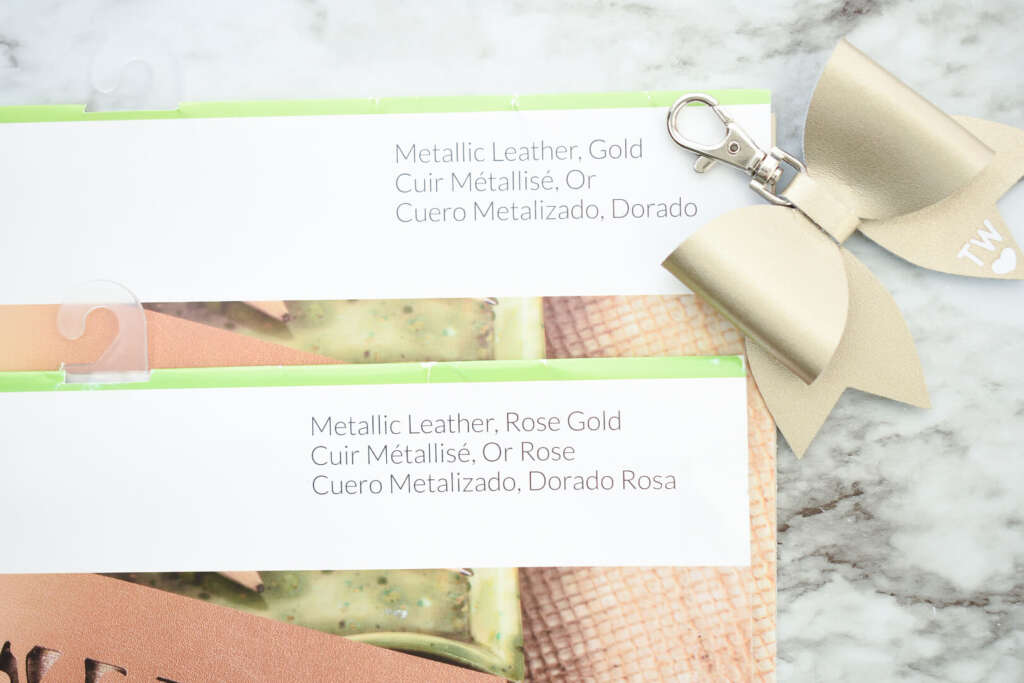
I have noticed that leather and faux leather can come a variety of thicknesses and the Cricut cut settings are very much trial and error. I choose to use Cricut genuine leather to start working with because the package includes the specific cut settings. For the leather bow charm with Cricut, I used a Cricut Maker and the deep point blade. Also, leather can be cut on the Cricut Explore Air 2, however, the blade and cut settings may differ than the Cricut Maker. I have not tested leather on the Cricut Joy. A smart idea that I recommend is to do a test cut with your Cricut machine to confirm the settings before attempting on a larger design to avoid ruining your leather supply.
The leather bow charm design is a free SVG/cut file from my resource library to use with Cricut or any cutting machine that can use SVG files. Scroll down to sign up for the password.
Table of Contents
This post may contain affiliate links, which means I’ll receive a commission if you purchase through my links, at no extra cost to you. Please read my full disclosure for more information.
Supplies
- Cricut maker or explorer air 2
- Cricut genuine leather
- Deep point blade
- Cricut StrongGrip mat
- Cricut StrongGrip transfer tape
- Super Glue
- hardware: earrings, necklace, jump rings
- Jewelry tools
Optional for personalization:
Leather bow charm cut file
The free SVG/cut file includes both the large key chain and mini charm size. Due to frequent Cricut Design Space updates, the size upon upload may not be correct.
Please be sure to adjust the size of the whole design as 9.283 inches wide by 3.692 inches high.
The final charm is about 1.5 inches wide and ~1 1/8th inches tall. The cut file for the small charm looks similar to the larger leather key chain cut file but it is actually slightly different and the assembly is slightly different as well.
The file comes with both SVG and PDF formats. If you are using Cricut, upload the file with the SVG label into Cricut Design Space. If you are hand cutting, print the PDF labeled file to use as a template.
Sign up below for the password to my resource library of freebies.
Leather bow charm Instructions
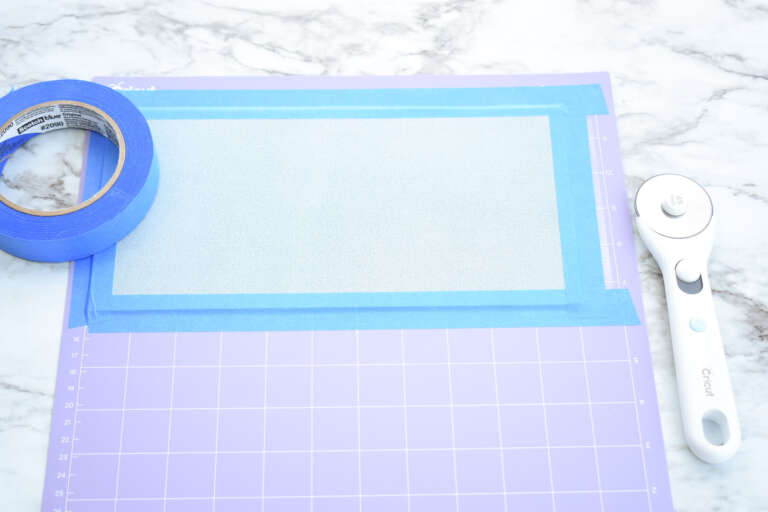
Once your leather bow charm design is prepared to send to the Cricut, size out the piece of leather needed to fit the design. Allow an extra half inch around all edges for tape.
Optional: Use Cricut StrongGrip transfer tape to protect your mat. Adhere the leather to the StrongGrip transfer tape and then place the transfer tape on the strong grip mat. This will reduce the amount of debris left on your mat.
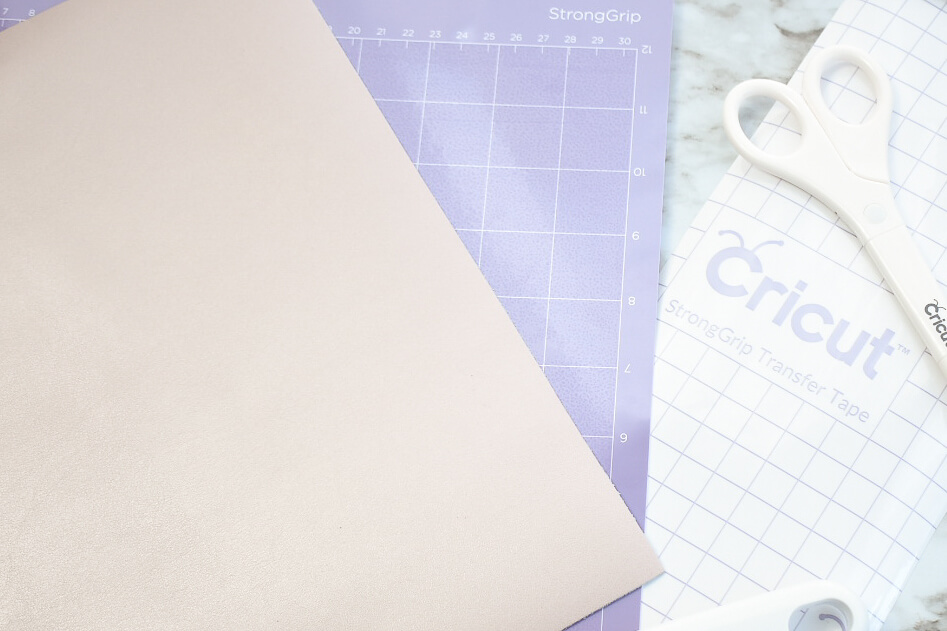
Before you start cutting, you will need to move the wheels over on your Cricut machine. See the photo below. When positioning your leather material on the Cricut mat, leave an inch of space without leather to accommodate all the wheels stacked up on one side. The wheels can glide over the tape no problem, but not the thick leather material. Per the package instructions, I placed the Cricut leather face down on a StrongGrip cutting mat.

Next, I followed the cut settings noted on the package of leather to use the setting “Metallic Leather”. Cricut design space indicated to use the deep point blade with the Cricut Maker.
It is very important to ensure your material is adhered to the Cricut mat as best as you can because the leather setting on the Cricut machine makes multiple passes.
After the cut is finished, remove the tape and excess leather. To remove any debris left from the cut, use a lint roller or extra painters tape to pick up little pieces – especially the side the cut was made.
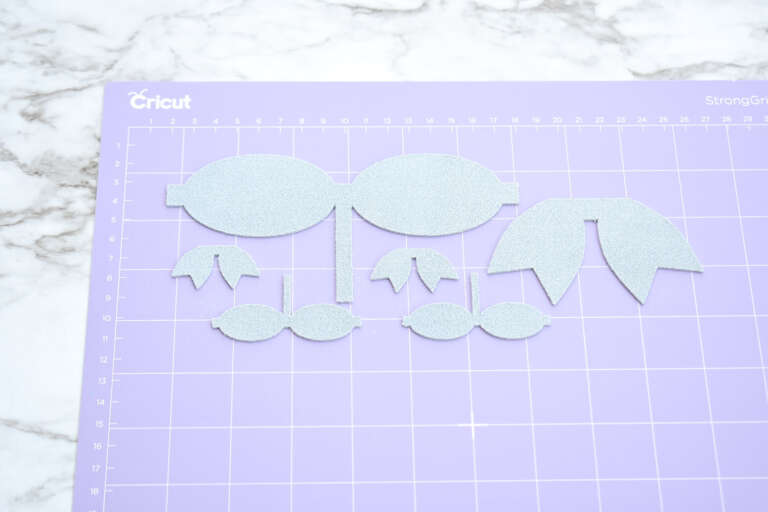
Considering the thickness of the leather and the small cuts of the charms, I’m impressed with the Cricut machine’s precision for these cuts.

Leather bow charm assembly
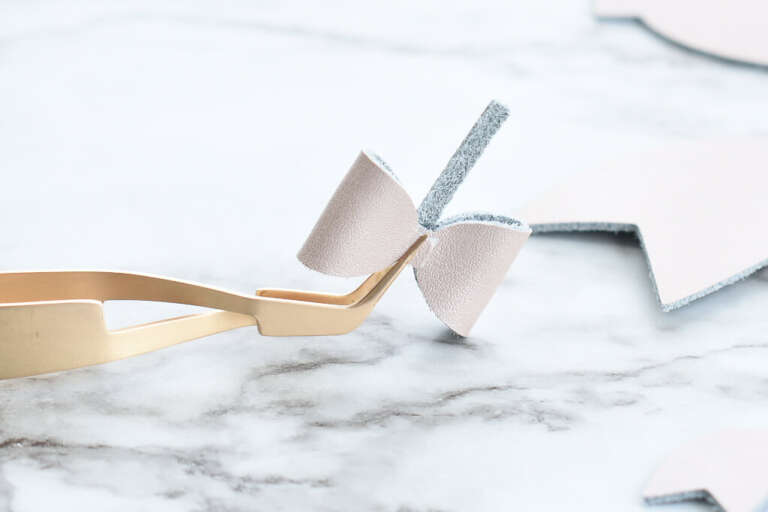
To glue together the leather bow charm, I used quick setting super glue. I found that hot glue was no where near strong enough to hold the thick Cricut genuine leather together.
Warning – super glue will glue your fingers together so try to be really careful to keep it off your skin and ideally, off the pretty side of the leather. Allow yourself extra time to avoid mistakes.
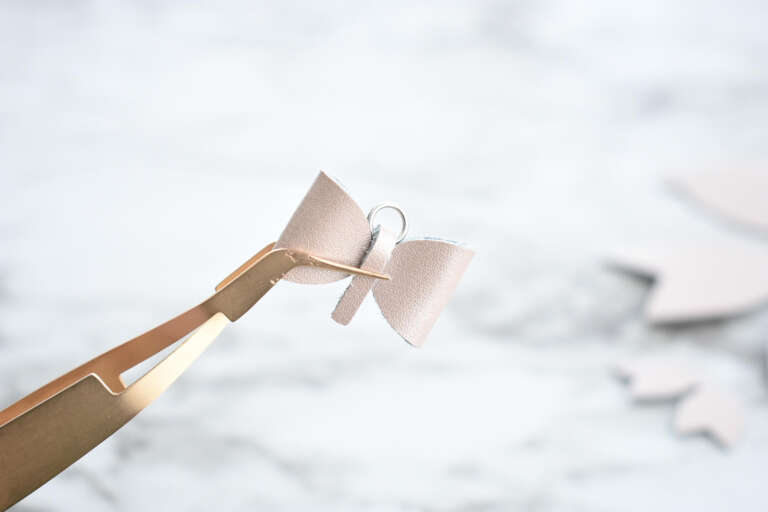
To create a bow, fold over one of the sides and secure with a small dap of super glue. Hold together tightly.

Once the first side is secure, folder over the second side and glue the tab on top of the first. Hold together tightly until the glue is dry.
With both sides secured, now is the time to add a jump ring to the leather bow charm before the next step.
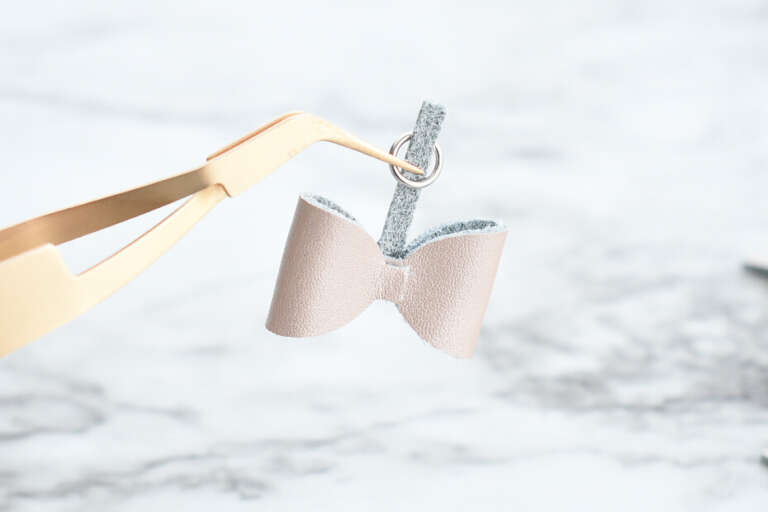
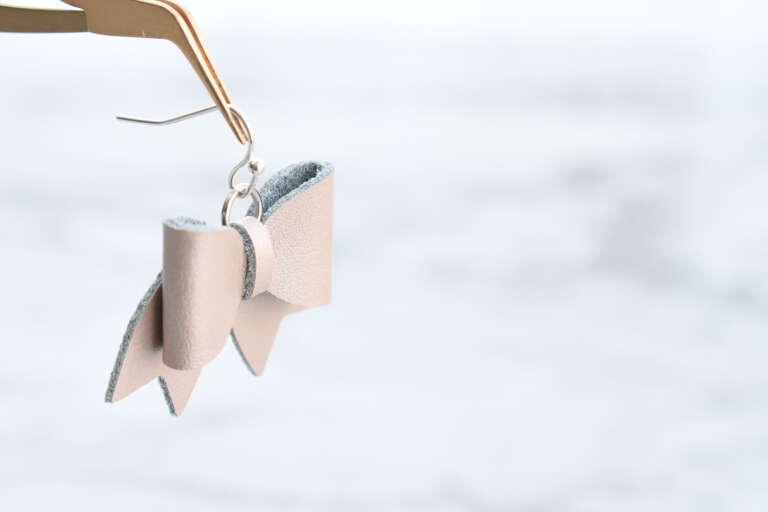
With the jump ring in place, wrap the center piece around the front. Use a small dab of glue at the bottom and on the back – hold very tight until the glue is dry.
Finally, the last step is to glue the ribbon part of the bow. Secure the bow ribbon section across the back with a few small dabs of glue and hold tight. After that your charm is complete and you are ready to add the leather bow charm to earrings or use as a necklace.
If you’d like to add personalization to your leather bow charm, you can with iron-on vinyl. I would recommend keeping the design small and simple. I used a Cricut easy press mini on the lowest setting to apply the iron-on. I applied heat for 10-15 seconds and did a warm peel.
Leather bow charm video assembly
Unlock the resource library to grab the leather bow charm cut file.
Looking for more Mother’s Day project ideas? Check out my talented crafty friends:
5 Comments
Where do I get the template or svg from?
Hi Debi. The cut file is in my resource library, in the Mother’s Day Freebie section. Use the ‘Get the Password’ form under the Resource Library link at the top of the page to get access.
How do I get the password??
Hello Maureen! Thanks for reaching out. I’ll check in with you via email to see where you are stuck.