Make a custom shaker card the easy way with Cricut

CATEGORY

Learn how to make a custom shaker card the easy way with your Cricut machine

In this tutorial, I will teach you how to make custom glitter shakers using the Cricut Design Space offset feature and your Cricut machine. Skip the frustration of trying to line up thin lines of foam tape and learn the simple way to create a custom shape shaker for cards, cake toppers, gift tags, and ornaments using the Cricut Explore Air 2 or Cricut Maker.

This is part three in a series to learn how to create and use glitter filled shakers. In the previous shaker tutorials, we learned the basics of making a shaker. For this tutorial you will learn how to create your own custom design using the Cricut Design Space Offset feature.

In case you missed the previous tutorials, check out how to make a gift tag shaker and how to make layered flower shaker.

Table of Contents

HOW TO MAKE A CUSTOM SHAKER USING CRICUT OFFSET
Custom shape glitter shaker Mother's Day Card

This post may contain affiliate links, which means I’ll receive a commission if you purchase through my links, at no extra cost to you. Please read my full disclosure for more information.

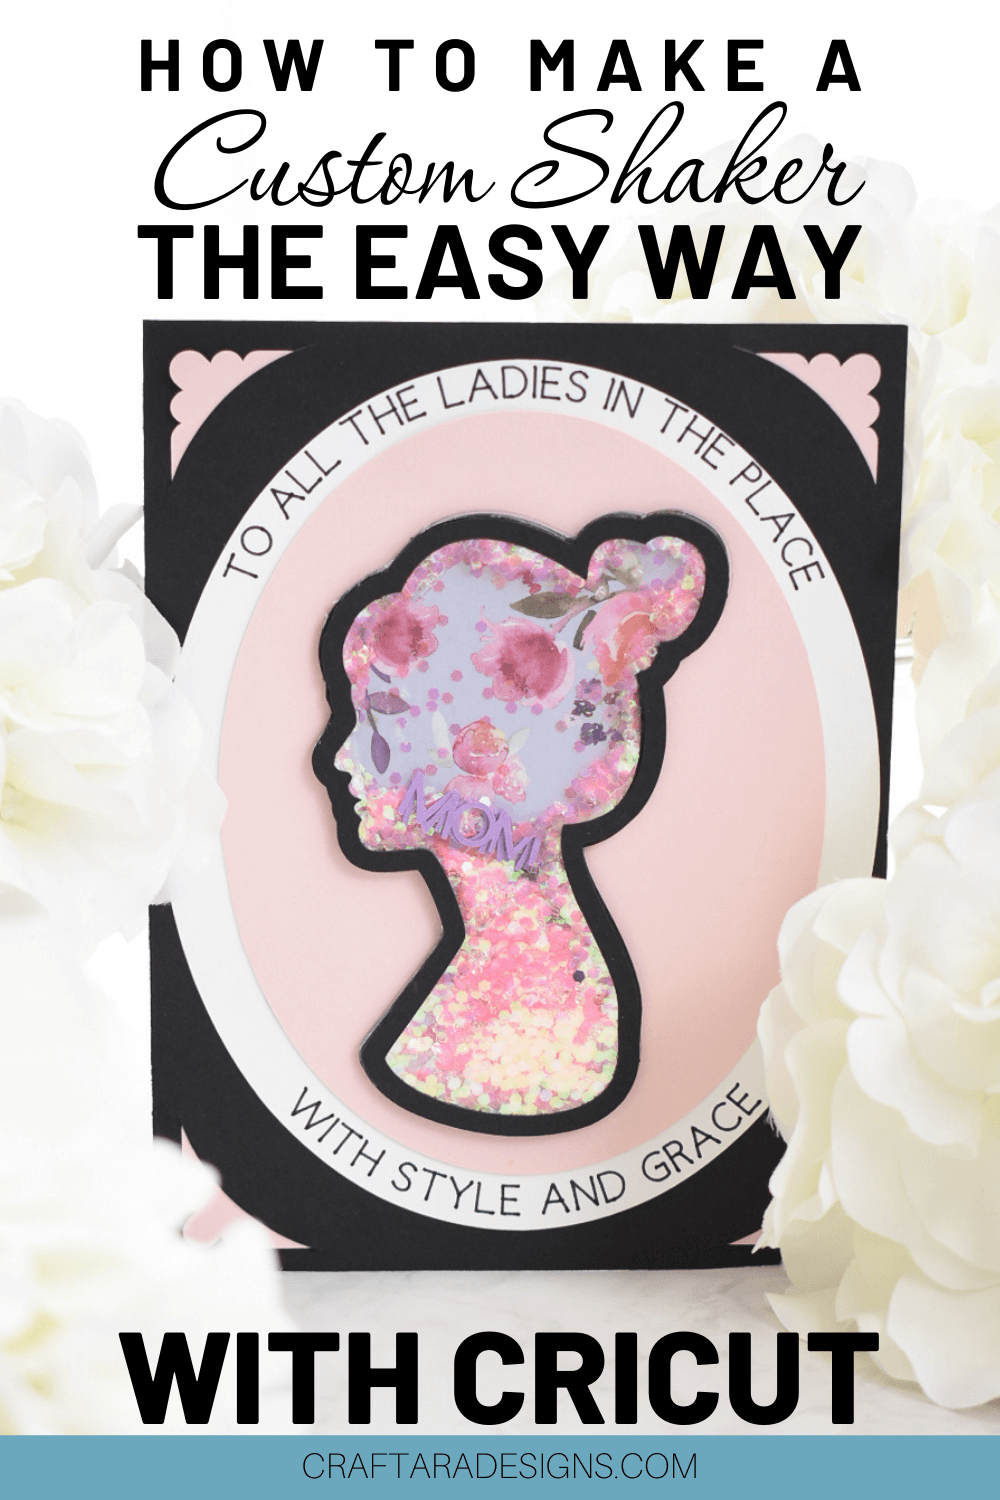
How to make a custom shaker with Cricut Offset

Before starting out on your custom shaker project, please check out my post on how to make a simple gift tag shaker to learn the basics.

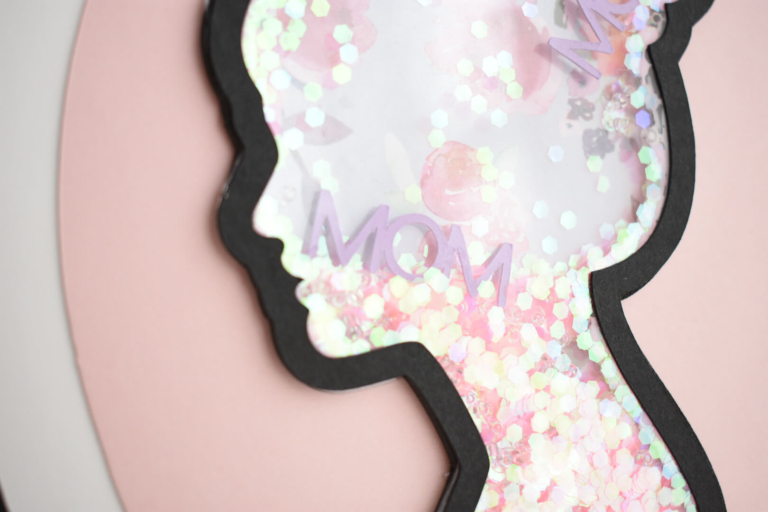
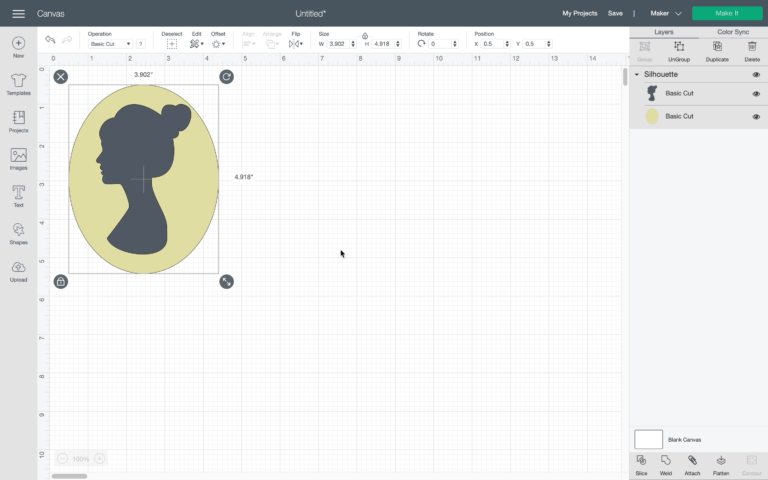
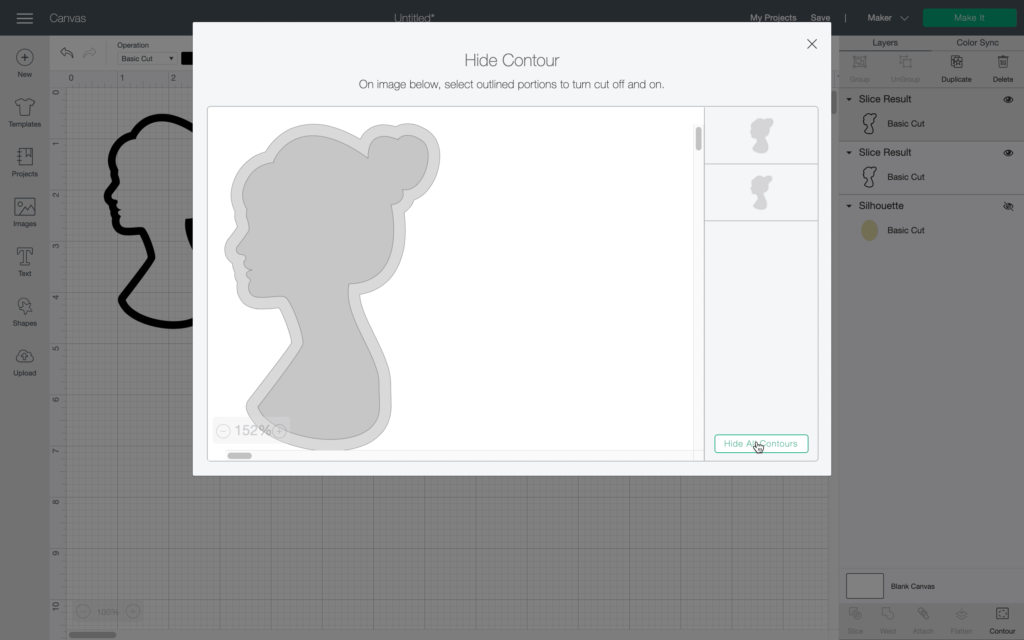
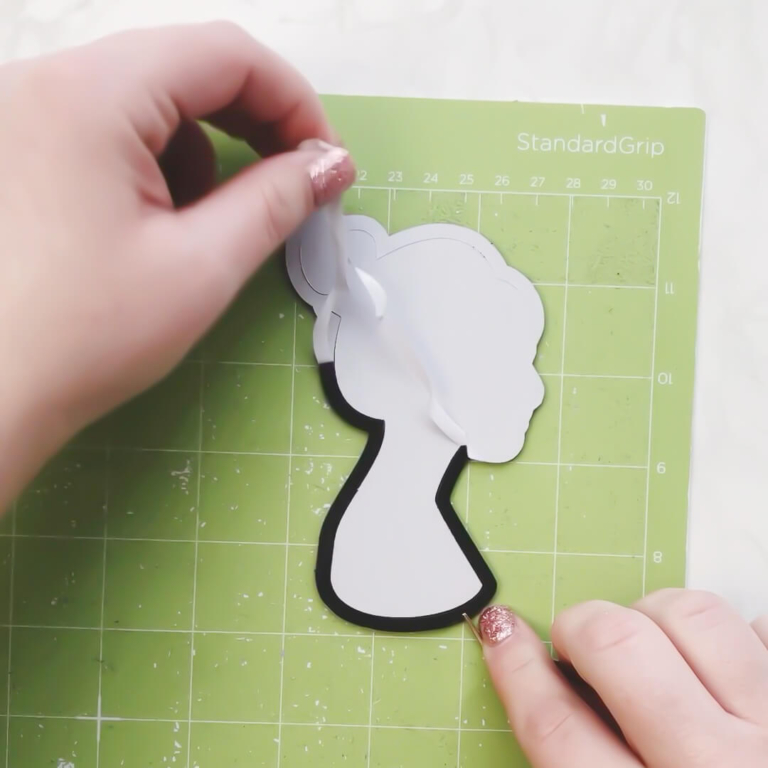
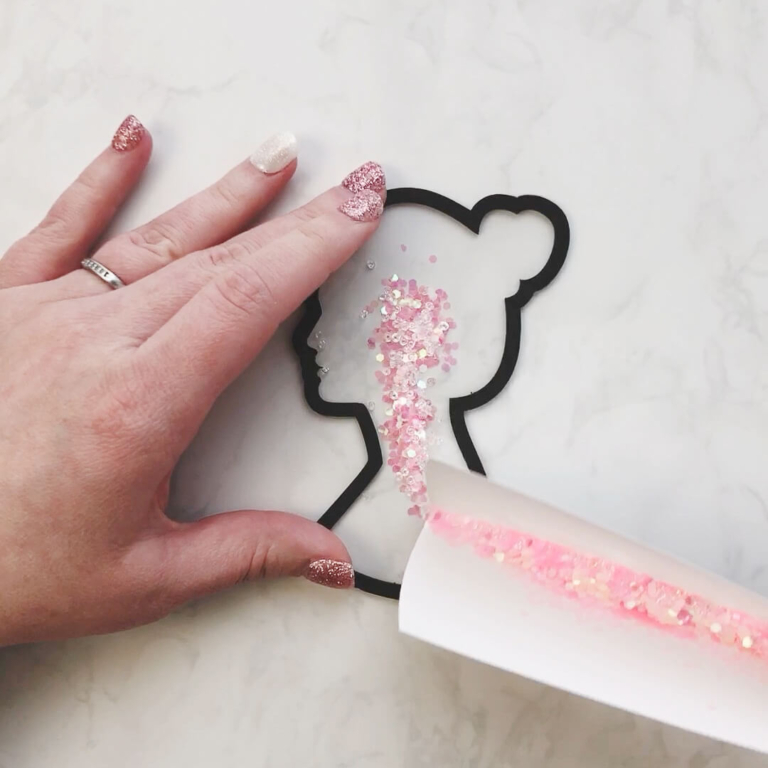
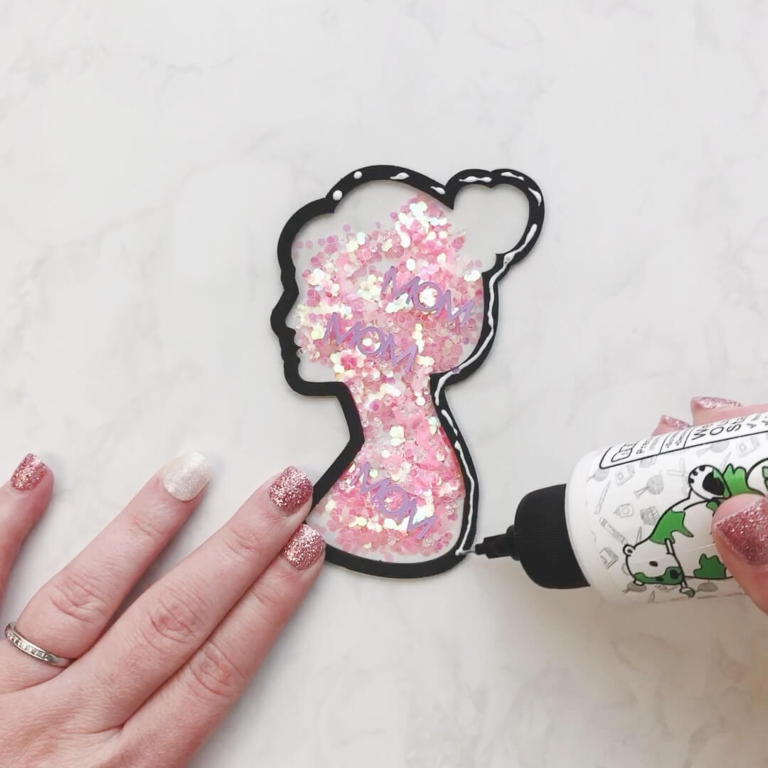
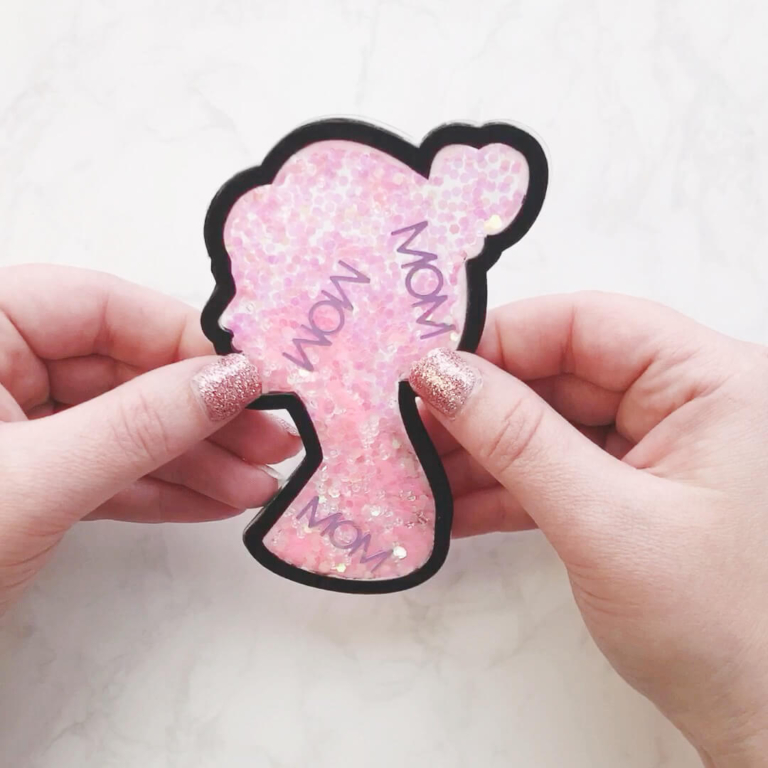
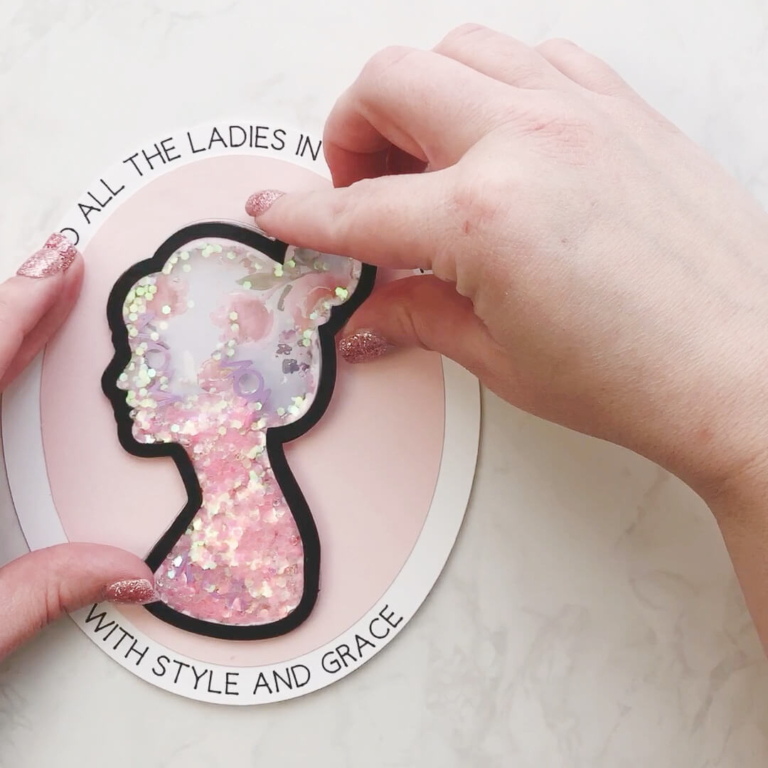
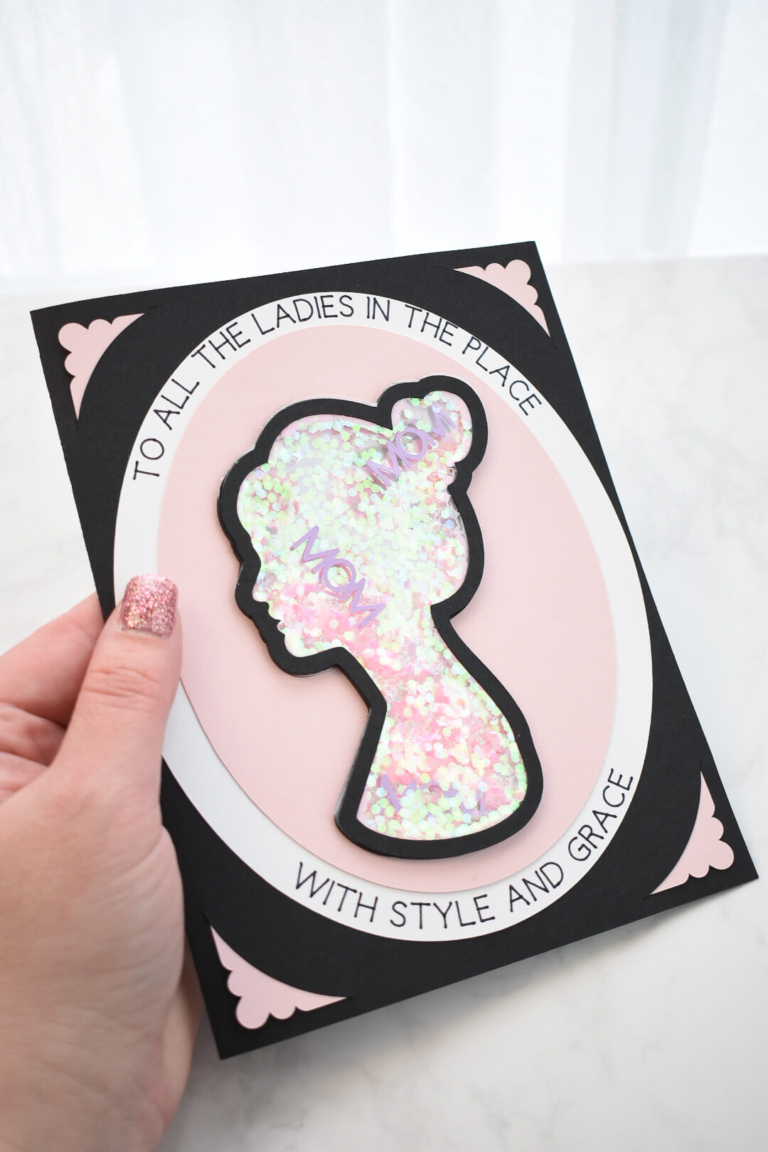
In this tutorial, we will be learn how to create a custom shape double sided shaker. I added my shaker to a card however, you could make it a cake topper, ornament or use it any way you can think of.

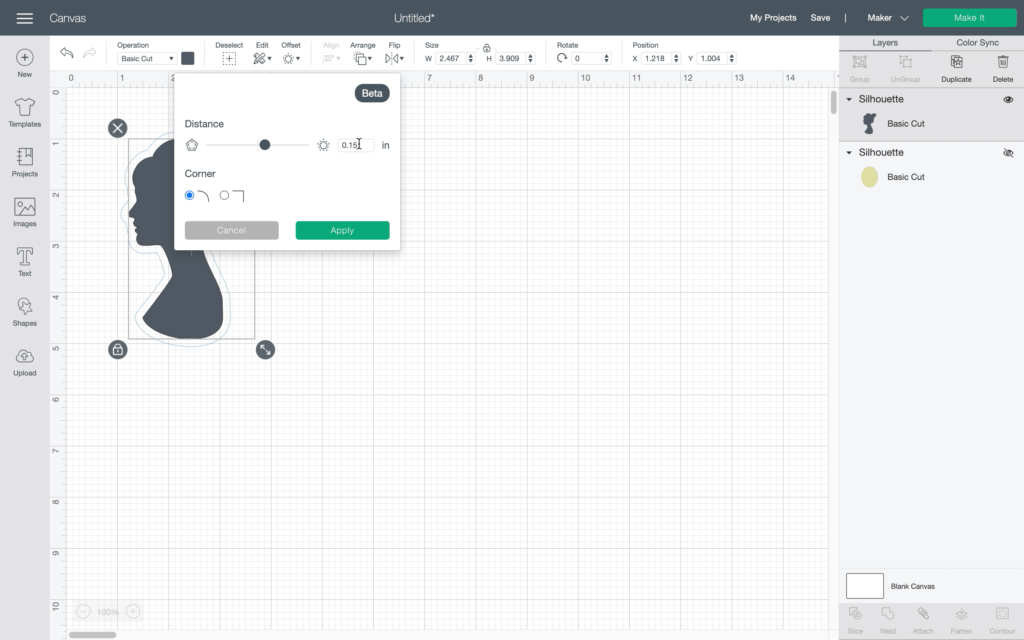
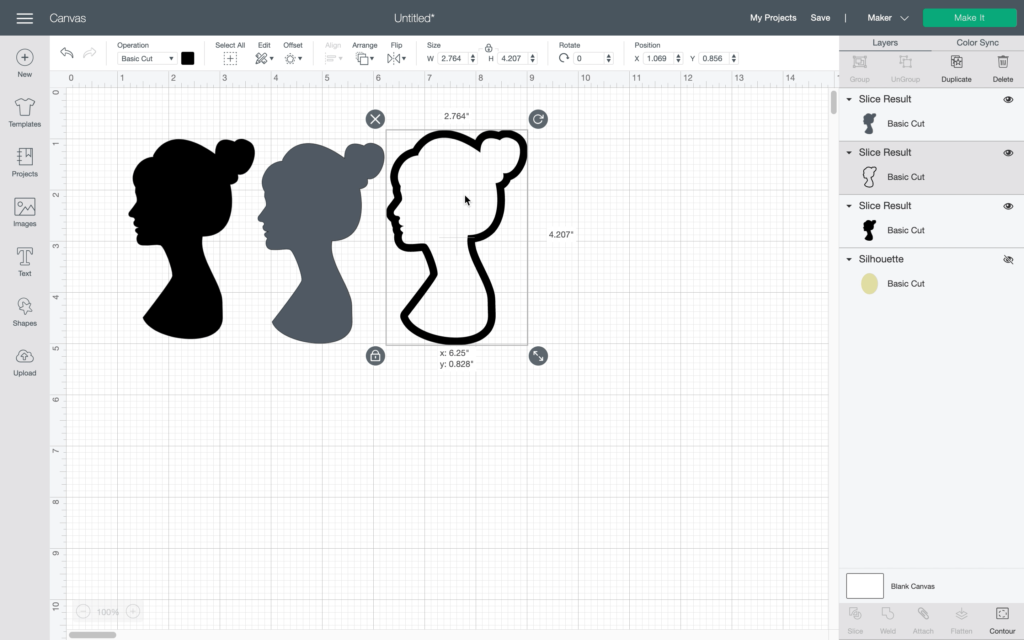
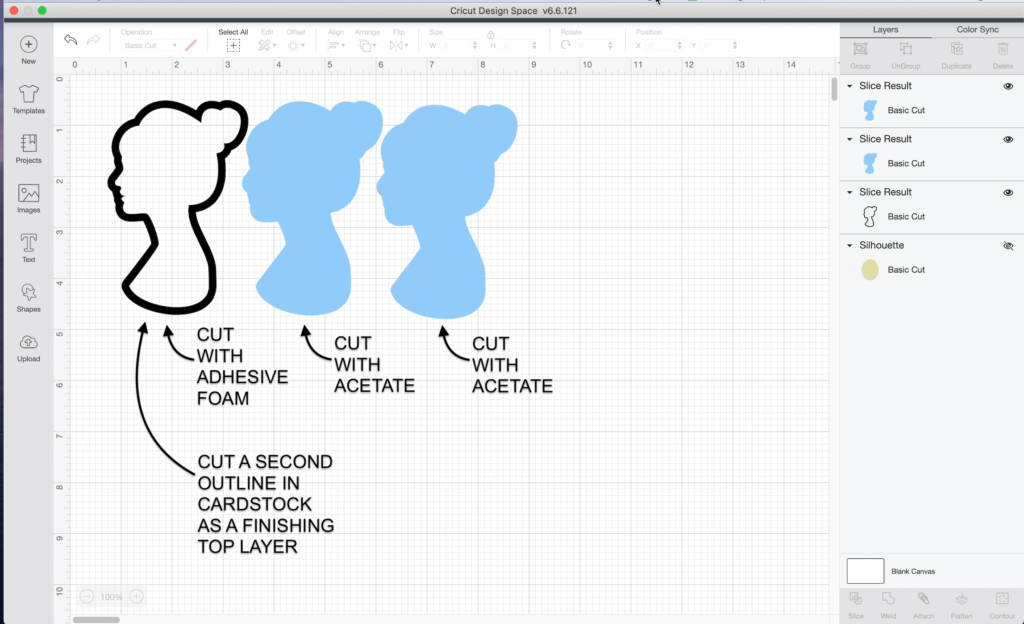
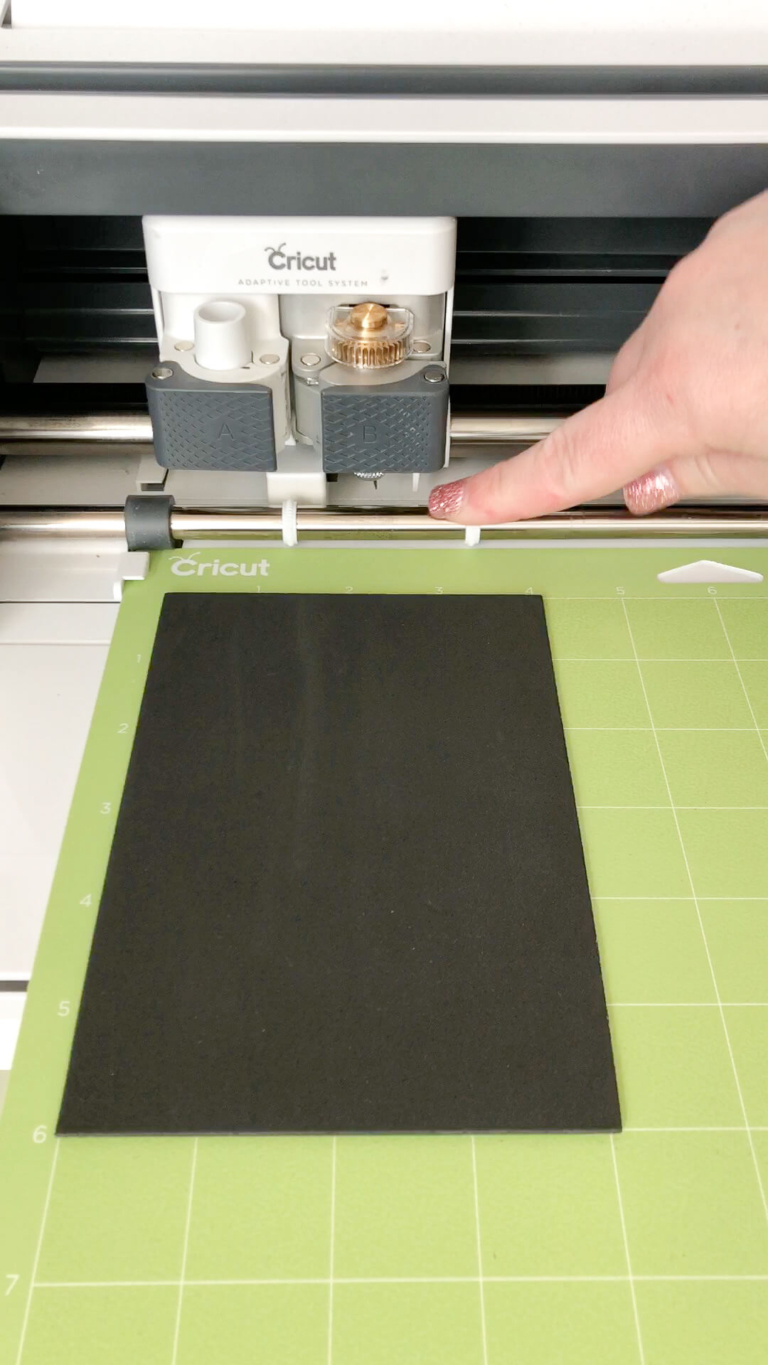
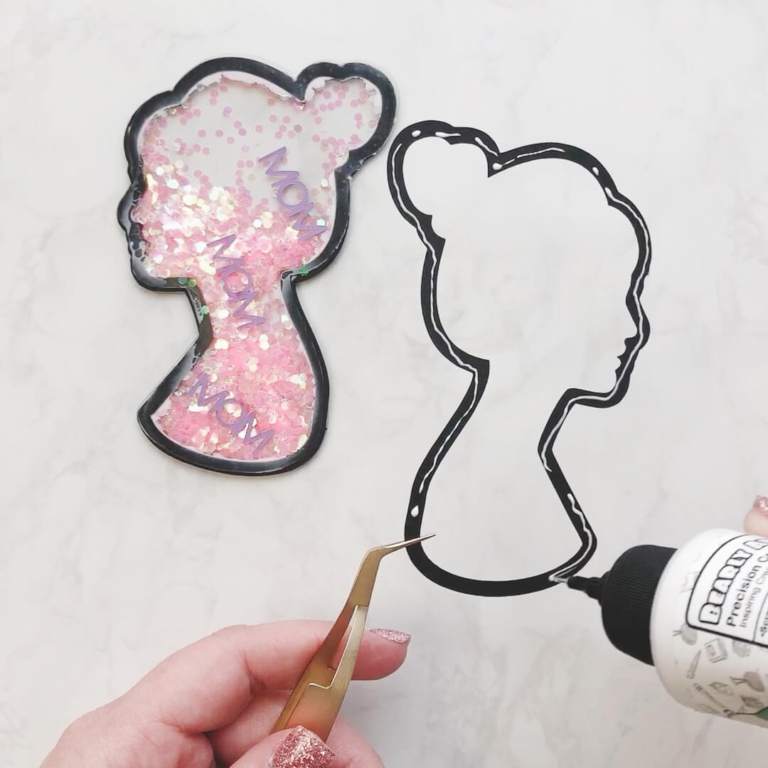
The secret to making a custom shaker card the easy way with your Cricut machine is using adhesive foam because you can cut any shape using your 
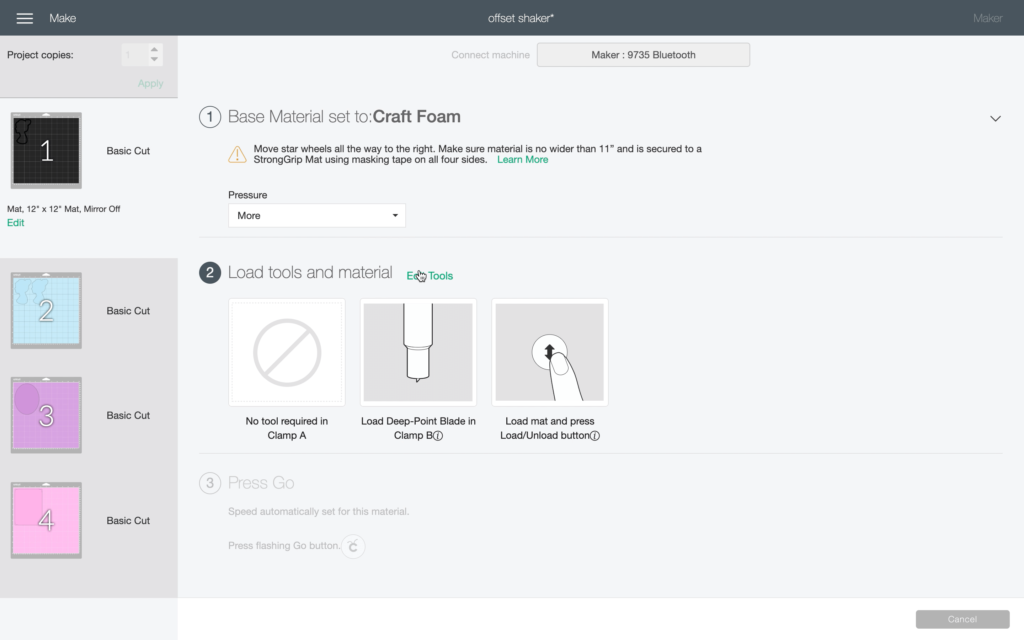
Cricut Maker or Explore Air 2
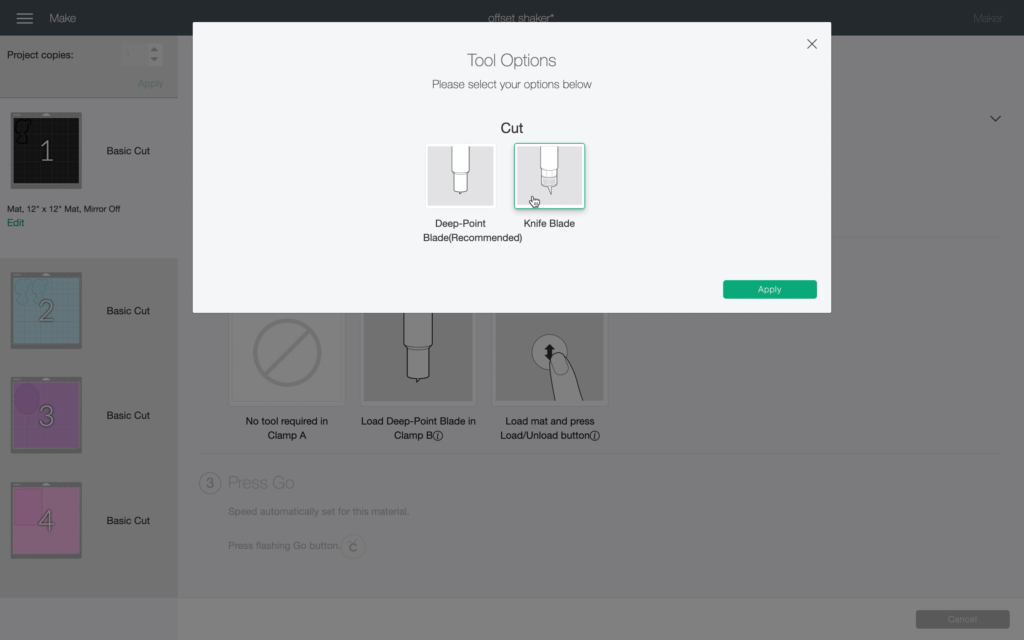
. By making a shaker with adhesive foam, you completely skip the frustrating step of using tiny pieces foam tape to create a pocket for the glitter.

Cricut recently released a new feature to Cricut Design Space called the Offset. This feature has been long overdue as many Cricut users have been asking for it. Until now, Cricut crafters had to create an offset layer using another design software such as Inkscape or Adobe Illustrator.
 
The Cricut Design Space offset feature creates an outline or shadow of your design in the form of a seperate and editable layer. The Offset feature is only available on the desktop version of Cricut Design Space at this time.

Here’s what you’ll need to make a custom shaker with Cricut

Where can I find this design?

This tutorial uses a design directly from Cricut Access. However, the Craftara Designs resource library is full of free SVG cut files compatible with Cricut. Sign up below to unlock the resource library.

How to make a custom glitter shaker with Cricut

Custom Shaker the easy way with Cricut – Video

Instructions to make a custom shaker with Cricut Offset

Start with finding a shape to to use within Cricut Access. I choose a simple, silhouette shape that would be easy to use as a shaker.

Insert the image into the Cricut design space canvas and resize. If grouped together, ungroup the design. I sized my design to fit onto a card.

Cricut Design Space

Select the shape you want to become a shaker and click the Offset tool in Cricut Design Space. Set the distance to 0.15 and use rounded corners. Click apply to create an offset layer.

Cricut Design Space Offset

With the offset layer created, highlight the whole design and click slice to create an outline. This outline will be used as the walls of the shaker and will be cut from adhesive craft foam. Separate out the Slice results and keep the outline.

Cricut Design Space Slice

Duplicate the outline shape. Use the contour tool to ‘Hide All Contours’ and change the color to contrast with the outline shape. This shape will be cut from acetate for the shaker. Duplicate the acetate layer so you end up with two acetate shapes and one outline for adhesive foam.

Noted below but not shown, duplicate the outline shape and cut with cardstock. This adds a top layer to hide any imperfections.

Once the project is ready, click make it to send the project to the Cricut machine.

Cricut Design Space

For the outline, on the Set Base Material screen, search for craft foam as the material. Choose Craft Foam with more pressure.

If you have a Cricut Maker and the knife blade, edit tools to switch to the knife blade. The knife blade makes the best results for designs with more detailed cuts.

With the Cricut Explore Air 2 and the deep point blade be sure to set to More Pressure and check the cut before unloading. Press the C button on your Cricut machine to repeat the cut if it did not go all the way through.

Cricut Cutting Magic

To cut the adhesive craft foam, use the fairly new standard grip mat (or a used strong grip mat) and move the white guide wheels out of the way. The guide wheels will leave indents on the craft foam.

Adjust white guide wheels to avoid the foam material

Cut the acetate shapes using the fine point blade and use a standard grip mat. For the cut setting, browse all materials to locate the acetate material setting.

Once all the pieces are cut, you should have:

  • two layers of acetate
  • one outline layer in adhesive craft foam
  • one outline layer in cardstock

Assembly

Start with creating the shaker pocket. Before starting to assemble, wash the acetate with dish soap. Once the shaker is assembled, there is no way to remove the static cling.

Here is my secret to maintain the perfect shape of the adhesive craft foam. Keep the adhesive craft foam and the cut out together and put face down on a Cricut mat. Peel off the backing of the outline only and apply the acetate.

Cricut Shaker

Gently lift up and remove the open face shaker from the Cricut mat.

Find your favorite chunky glitter, confetti, micro beads, etc and add them to the open face shaker.

Cricut Shaker with Glitter

With the glitter added, grab glue with a precision tip and add a very small line all around the edge of the craft foam. Apply the other acetate shape to seal the shaker pocket. It may take a little time for the glue to dry.

Cricut Shaker add glue

Once the shaker pocket is dry, or nearly dry, add the cardstock as the finishing touch. This will cover up any imperfections and overall, provides a nice finished look.

Cricut Shaker cardstock layer

Once your custom shaker using Cricut offset is complete, you can glue it to a card or display it any way you would like. I love that double sided shakers are self contained so they can be applied anywhere.

Custom Shaker using Cricut Offset

Was this tutorial helpful?

Did you find this tutorial how to make a Custom Shaker using Cricut Offset helpful?  If so, please pin this idea and let me know your thoughts in the comments below!

Leave a Reply

Your email address will not be published. Required fields are marked *