


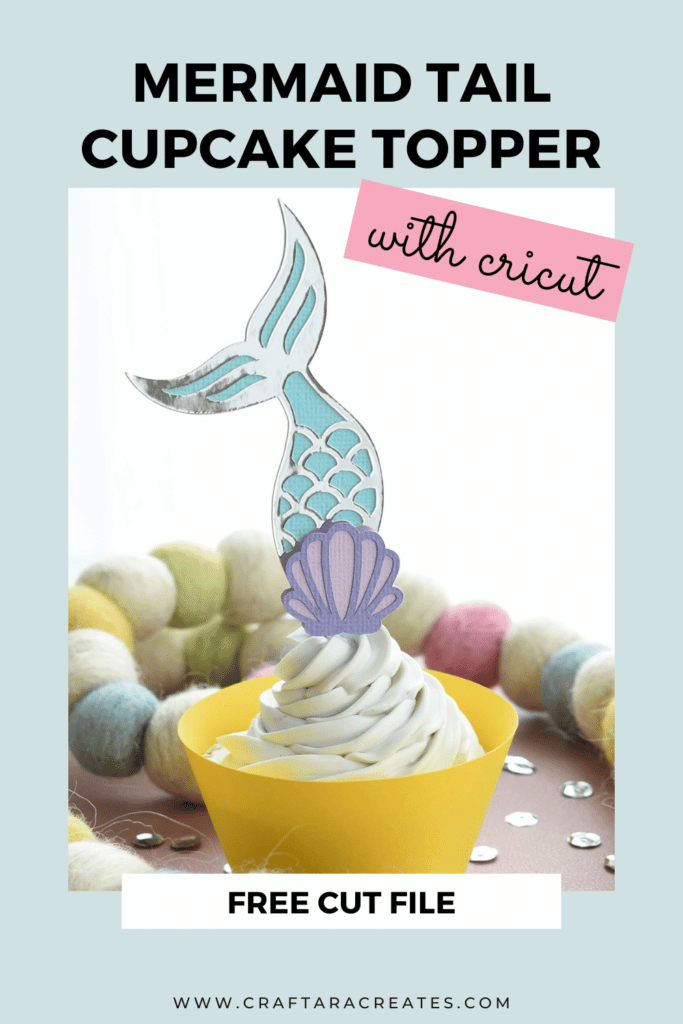
Learn how to make a mermaid tail cupcake topper with Cricut
Dive in to learn how to make a mermaid tail cupcake topper with your Cricut machine. They’re not only sweet and simple but also tons of fun to create. In this Cricut project, you’ll learn how to create an easy-to-make layered mermaid tail cupcake toppers that feature a mermaid diving behind a clam shell and right into a sea of delectable cupcake icing. Yum!
If you’re planning a special birthday celebration with a little mermaid theme, this Mermaid Tail Cupcake Topper is the perfect way to infuse the magic of the ocean into your party. Plus, the provided free cut file allows you to customize the colors to match your party’s style, whether it’s a 1-year-old or a 10-year-old.
Grab the free cut file below and follow along as I guide you step-by-step through the process of creating a cake topper that will transport your birthday celebration to the depths of the ocean.
This post may contain affiliate links, which means I’ll receive a commission if you purchase through my links, at no extra cost to you. Please read my full disclosure for more information.
Where can I find the mermaid tail cupcake topper cut file?
Grab the free mermaid tail cupcake topper svg cut file from my resource library in the spring craft freebie section and upload the SVG cut file into Cricut Design Space. Sign up below to unlock the resource library.
You will be included in my email newsletter with helpful Cricut ideas, tips and resources. Unsubscribe anytime and your email will never be shared.
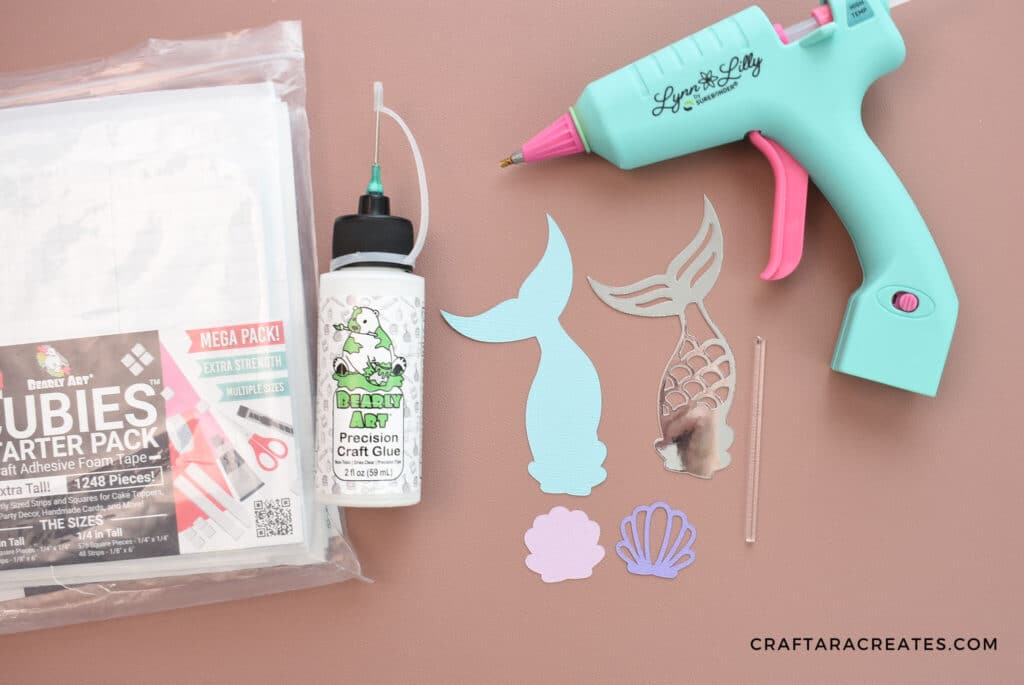
Here's what you'll need to make the mermaid tail cupcake topper
How to upload the design into Cricut Design Space
Start this project by uploading the cut file. The filename is SVG-MermaidTail.svg
Click on Upload which is on the left side of the screen. Then click Upload Image. You can either click the browse button or drag and drop the cut file into the Cricut Design Space window.
Click upload. Then select the design so that the green box is around it and click Add to Canvas.
How to prepare the mermaid tail cupcake topper
Once you have your free mermaid tail cupcake topper design in Cricut Design Space, you’re almost set to bring it to life. Here’s what to do next:
- Double-check the size of your cake topper to make sure it fits your cupcake just right. Typically, I go for a width of 2-3 inches, but since this design is a bit narrower at the bottom, feel free to opt for a larger size if it suits your cupcake better.
- When you’re all set and your topper size is spot on, click on “make it” to begin the cutting process with your trusty Cricut machine.
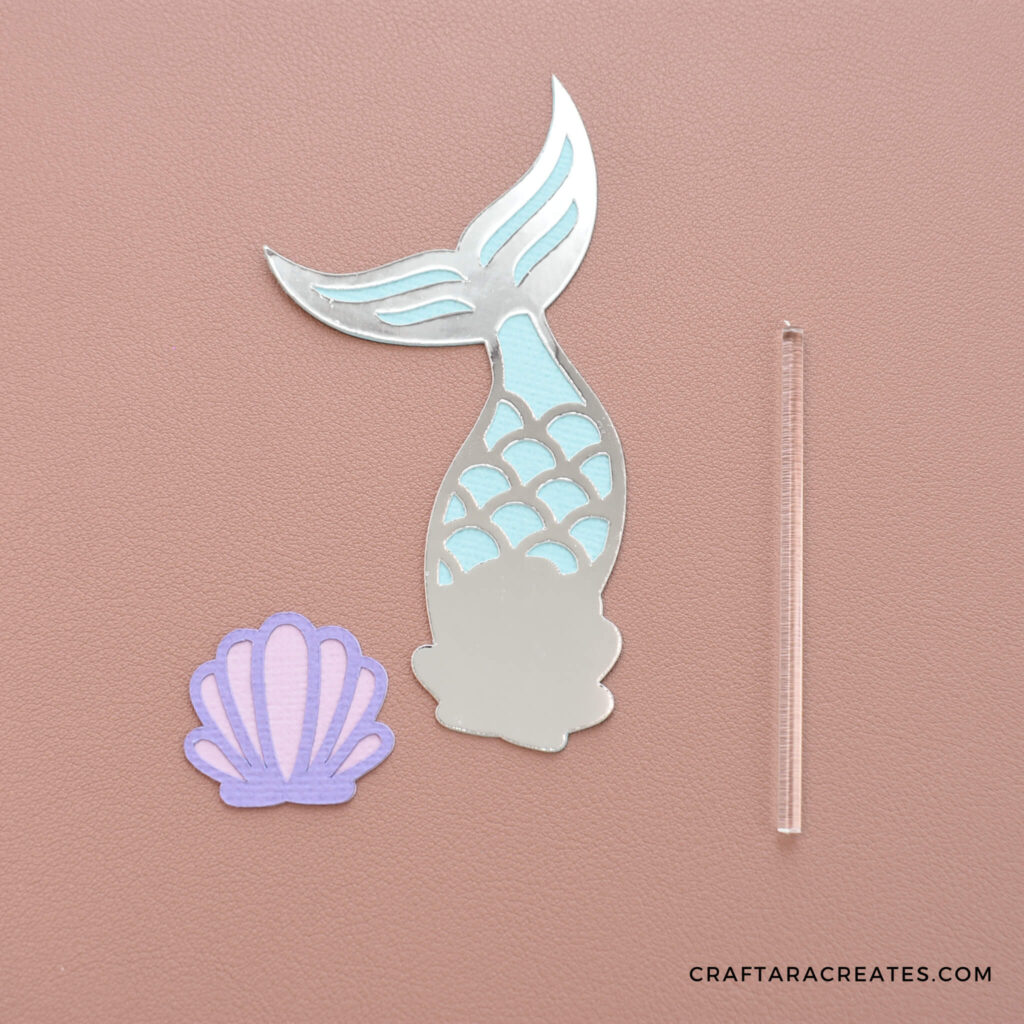
This crafty project is pretty thrifty on materials. You’ll need four different colors of cardstock, and it’s a fantastic way to use up those leftover scraps. Just ensure you’ve selected the correct cardstock settings on your Cricut before cutting out all the different layers.
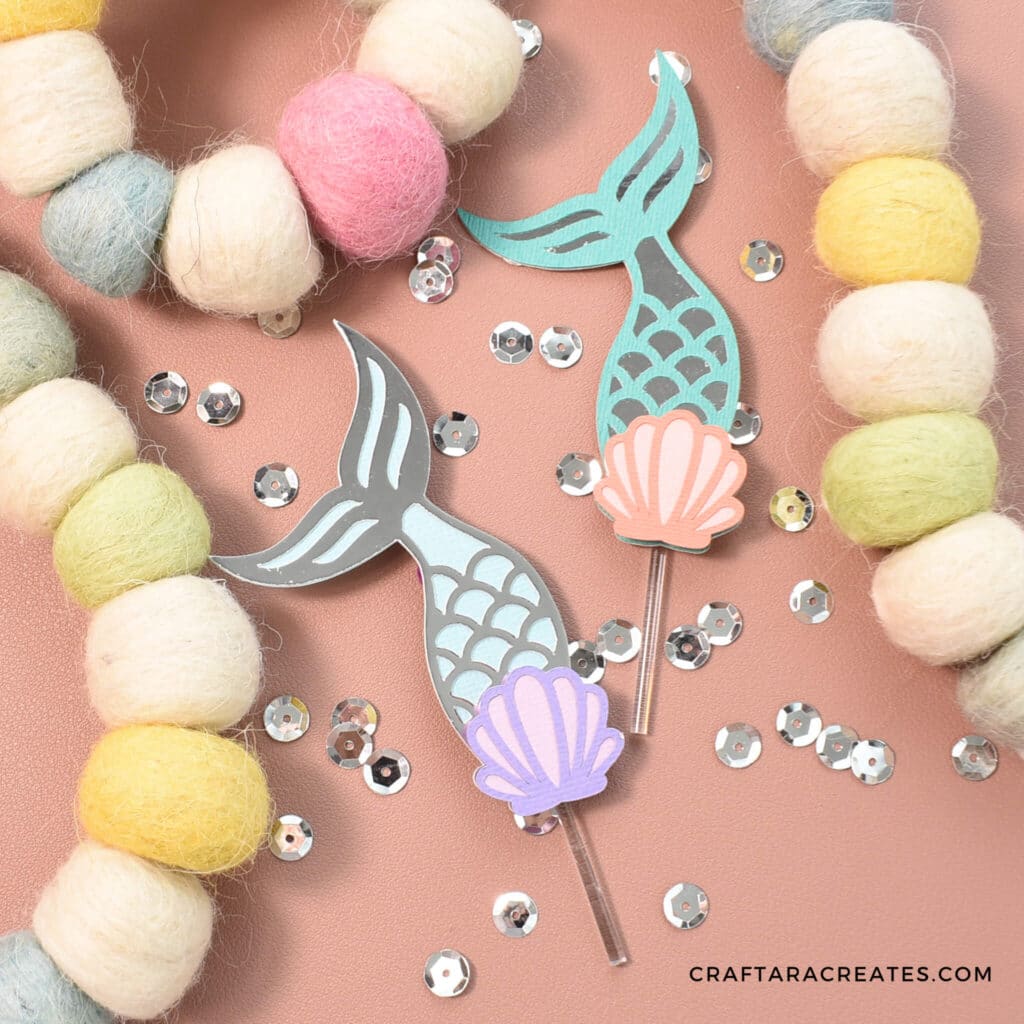
Assemble your mermaid tail cupcake topper
Now that you’ve got all the pieces ready, let’s put together your cute mermaid cupcake topper. Here’s what to do step by step:
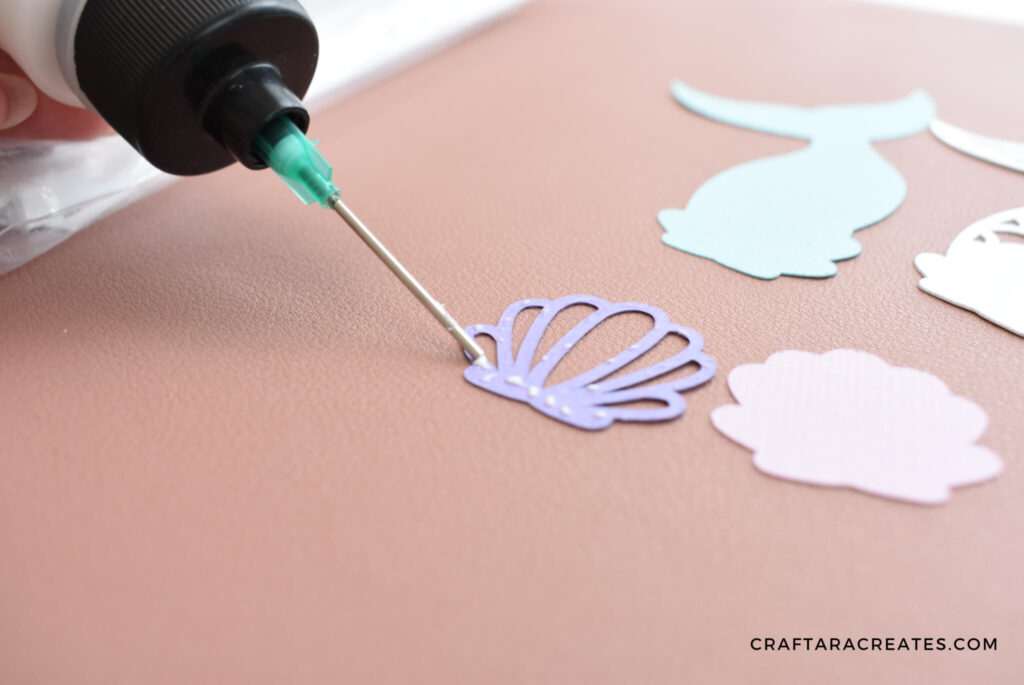
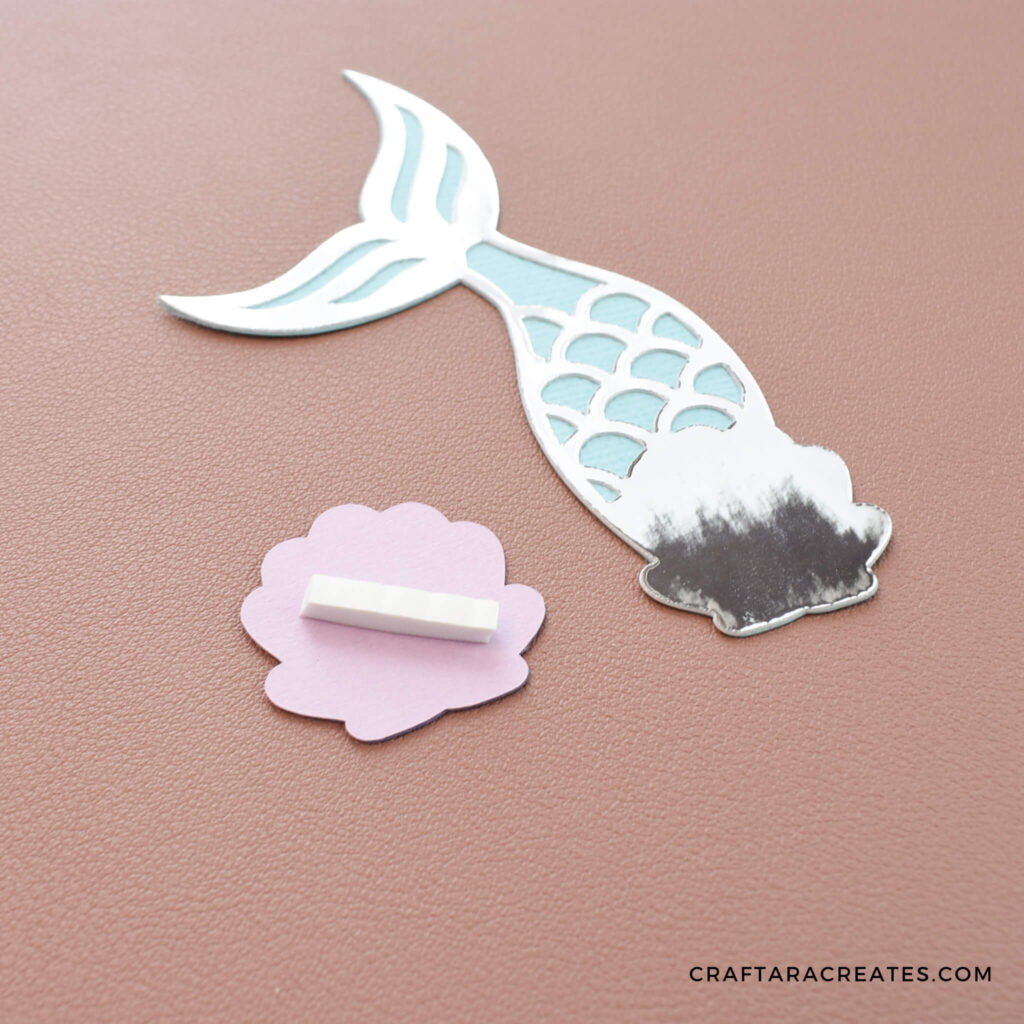
- Begin by gluing the clam shell outline to the base layer of the clam shell. Do the same for the mermaid tail and its outline.
- To give your topper some extra oomph and dimension, you can use foam tabs or tape to secure the clam to the mermaid tail. If you don’t have foam tabs, regular glue will work just fine.
- Now, let’s get ready to add the stick. For these cake toppers, I used an acrylic cake pop stick. Simply snip it in half using a pair of jewelry wire cutters. Then attach the stick to the back of the mermaid tail cupcake topper using hot glue. And that’s it!
Your mermaid tail cupcake topper is now ready to make a splash at your party!
Was This Tutorial Helpful?
Did you find this information on how to make a mermaid cupcake topper with Cricut helpful? If so, please pin this idea and let me know your thoughts in the comments below.