


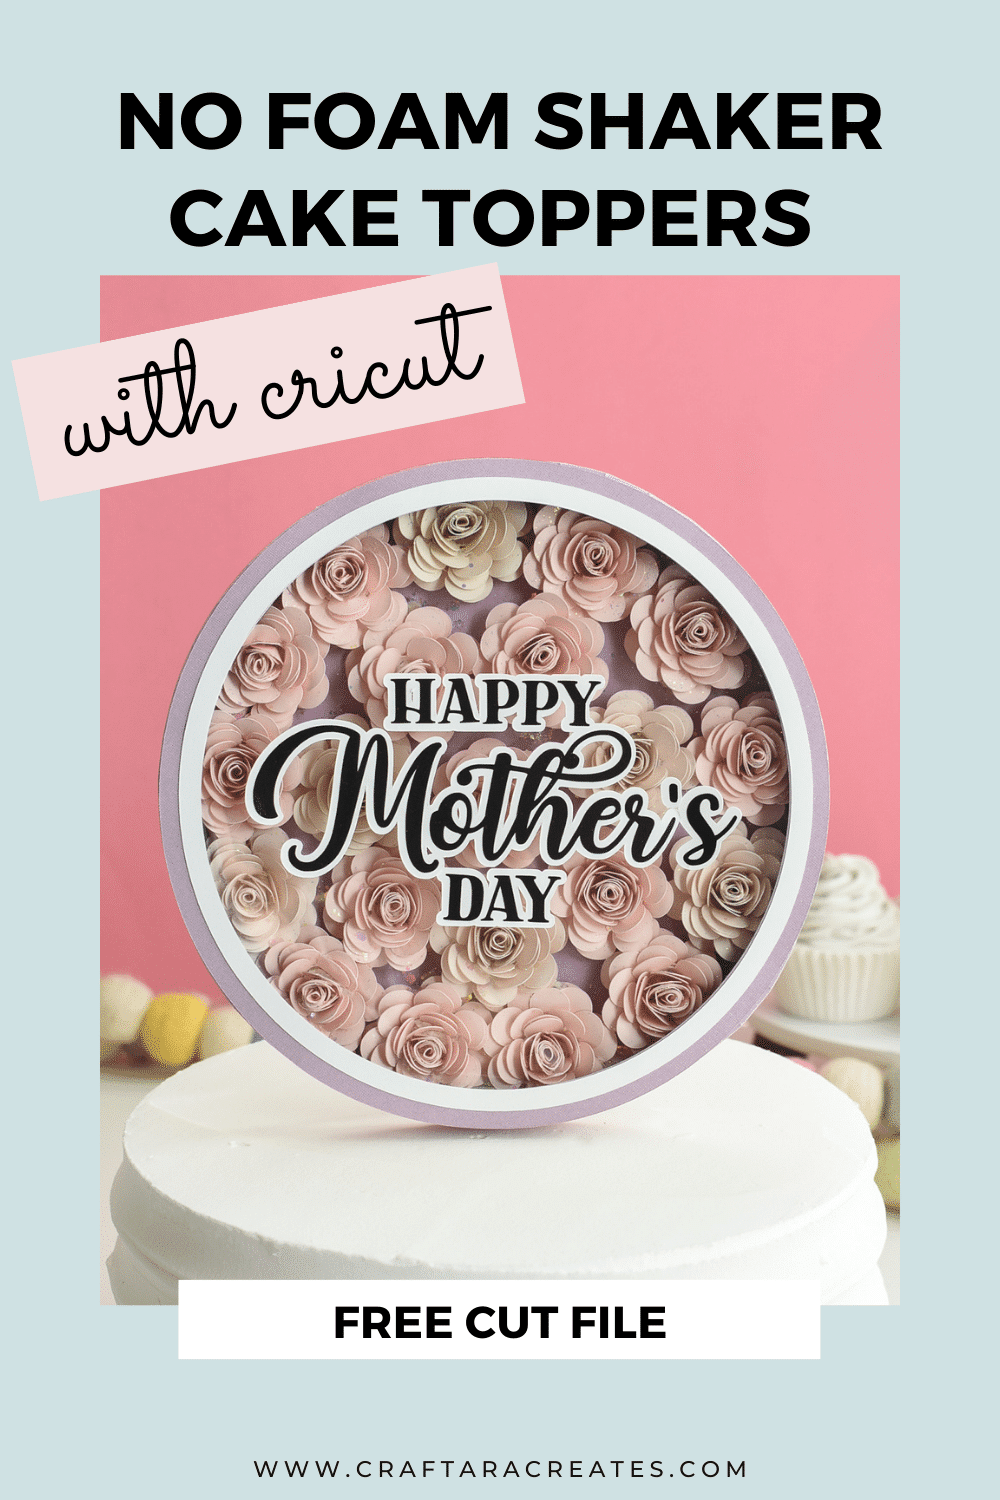
Sprinkle Some Fun Onto Your Cake With These Diy No Foam Shaker Cake Toppers Made With Cricut
Today, I want to show you how to make really fun no foam shaker cake toppers. This design includes deep side walls which allows for a lot of space between the bottom and top layers. In fact, these cake toppers have half an inch of space for you to fill up with anything you like.
This project is a great cake topper base that can be dressed up for any theme or celebration. Once we finish making it, we’re going to test out 5 unique items as filler for the shaker. I hope it gives you some ideas for your own cake toppers. Download the free SVG file to get started.

This post may contain affiliate links, which means I’ll receive a commission if you purchase through my links, at no extra cost to you. Please read my full disclosure for more information.
Where Can I Find The Cut File?
Grab the free no foam shaker cake topper svg cut file from my resource library in the Celebration craft freebie section and upload the SVG cut file into Cricut Design Space. Sign up below to unlock the resource library.
You will be included in my email newsletter with helpful Cricut ideas, tips and resources. Unsubscribe anytime and your email will never be shared.
What can I put inside no foam shaker cake toppers?
The neat thing about these no foam shaker cake toppers is that they have deep side walls. In fact, it’s got half an inch of space for you to fill up with anything you like. So far I have added a variety of items into the deep side walled shakers such as:
- Chunky Glitter
- Candy
- Legos
- Large Party Confetti
- Fuzzy 1/2″ Pom Poms
- Rolled Flowers Cut From My Cricut Machine
Materials And Tools Needed To Make No Foam Shaker Cake Toppers
- No foam shaker cake topper cut file
- Cricut machine
- Cricut machine mat
- Scoring wheel or scoring stylus
- Cardstock (at least one sheet of 12×12 cardstock for the strips)
- Acetate
- Craft glue
- Shaker filler of your choice
no foam shaker project set up
The first thing we need to do is get the SVG cut file we’ll use to cut out our project. Once you’ve opened Cricut Design Space, start a new project and click on the “upload” button to add the design file. Follow through the upload process to get the cut file onto your canvas.
If you need to, zoom out so you can see the whole project. We want to make sure the project is the right size, so click on one of the big round shapes and make sure it is 6.8 inches.
Now, we need to make a few adjustments. This project has score lines on the two strips, but Cricut Design Space doesn’t allow us to upload them as score lines. So, we’ll change the lines from cut to score.
To do this, select one of the lines and hold down the shift key, then click on the next line. Keep selecting the lines until they’re all chosen. Then, change the operation to score. Now you can see that the lines have changed to dashed on the strips.
Next, select the strips and the score lines and click on “attach”. This connects all the score lines to the correct shapes.
Before we move on, now is a good time to adjust any of the colors if we want to. We’re ready to move on to the next step of the no foam shaker cake topper project.
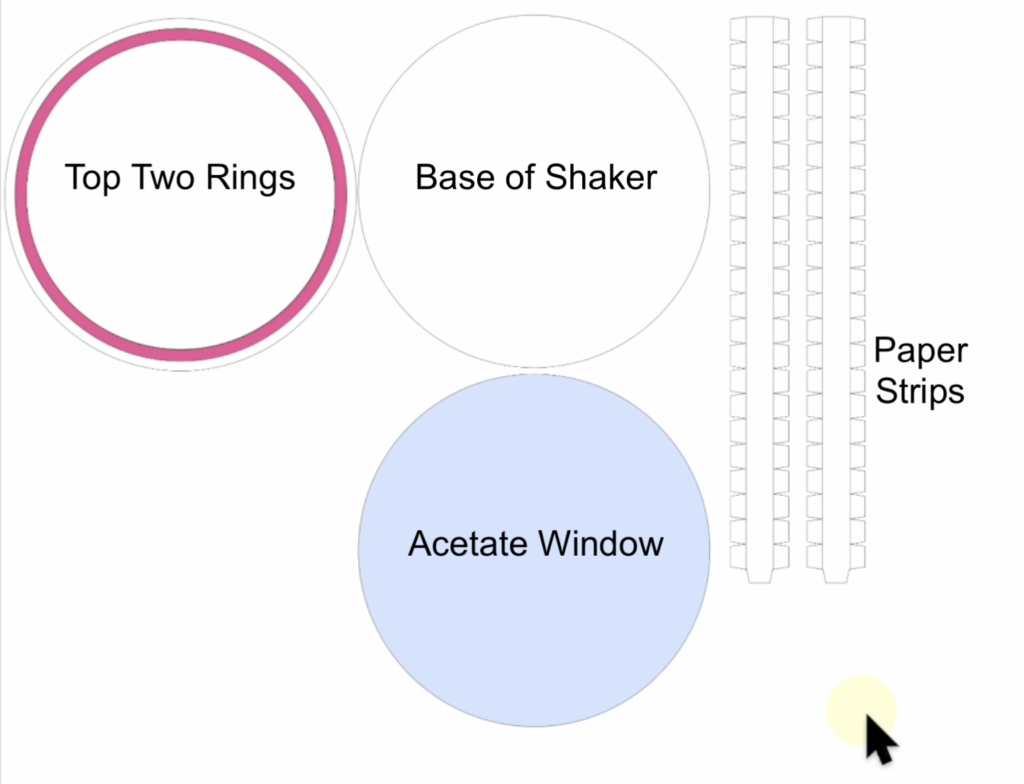
no foam shaker cake topper cut file explained
Before we jump ahead, one quick review of the design. The light blue circle is the window of the no foam shaker cake toppers. This shape will be cut using acetate.
The two strips and the large circle are cut with cardstock and together those will create the base structure of the cake topper to include the shaker. The strips will be used to create space between the bottom cardstock and top acetate. The strips are just about 11.5 inches long and are best cut out from a sheet of 12×12 cardstock.
Finally, we have two rings that will cover up the tabs underneath and give the cake topper a nice finishing touch.
How To Assemble No Foam Shaker Cake Toppers
Now that you have all your pieces cut out, let’s put the no foam shaker cake topper together. Grab the two strips and line them up straight with the pretty side facing up. Glue them together using the tab at one end.
Start at one side of the long paper strip and fold over each tab one at a time. Then, curve the paper strip into a ring and glue the tab at the end to close the circle.
Now it’s time to create the shaker part. Apply glue around the inside edges of the tabs you just folded over and place the circle base inside the paper strip ring you just created. Make sure it’s well adhered by checking the back to see if all the tabs are flat.
Next, fold over the remaining tabs around the outside edge and make sure they’re flat and even.
Moving on to the fun part – time to add your shaker filler! You have a lot of space to work with, so go wild.
Once you’ve added your filler, add glue around the edges and place the acetate sheet on top. Make sure it’s secure.
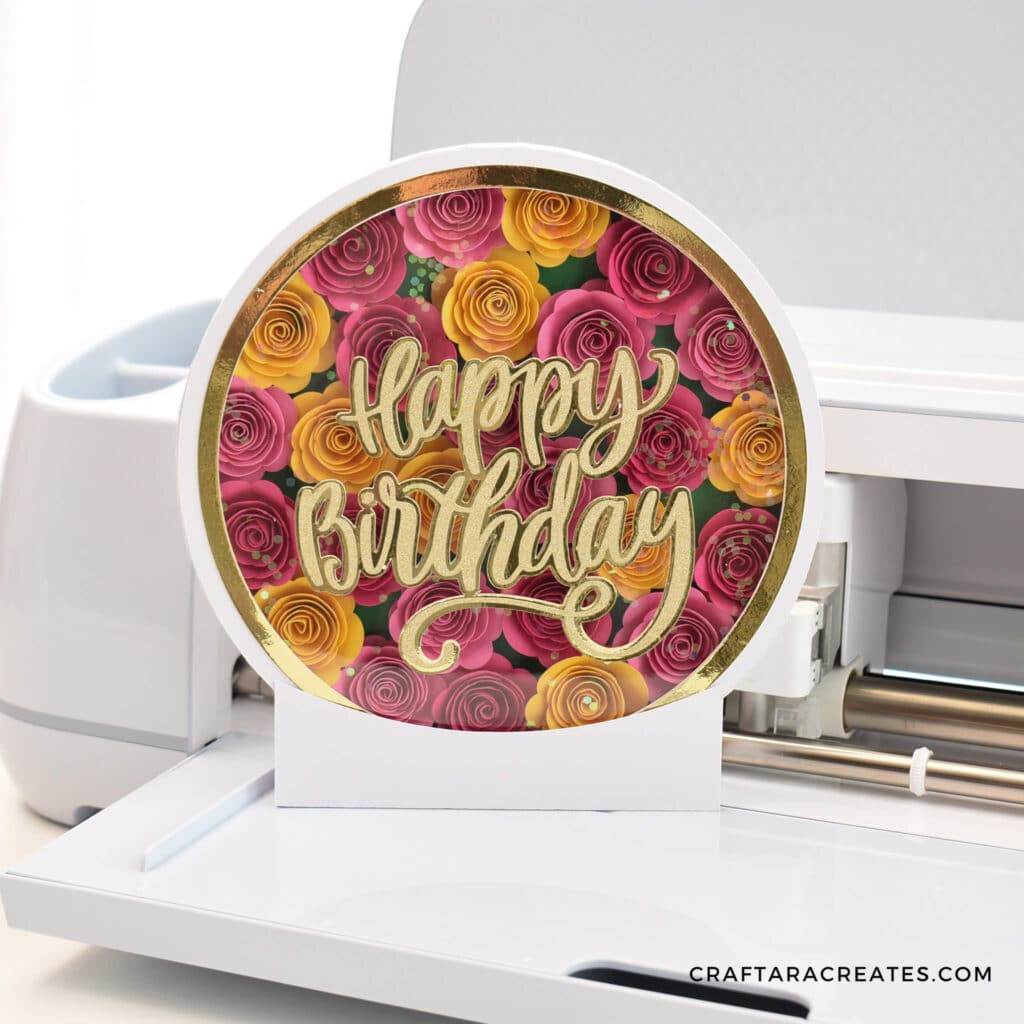
Finally, add the two rings to finish it off. Start with the thicker ring and then add the thin one. Now you can add a name, age or sentiment to the front and a cake pop stick to the back. And voila, your no foam shaker cake topper is complete!
How to prepare rolled flowers for this project
Your cricut machine can help you make paper flowers for this project. I searched the Cricut image library for 3D flowers to find a design. Size your paper flowers between 3 and 4 inches wide to get the right size for the no foam shaker cake topper.
Another tip: Sometimes cutting small rolled paper flower designs can be tough. Be sure to use a brayer to make sure your cardstock is secured well to the mat. Also, you can try the material setting of cardstock (for intricate cuts) for better results.
You can learn more about how to make rolled flowers and the flowtool at my crafty friend Shawn Mosch’s post:
Was This Tutorial Helpful?
Did you find this information on how to make no foam shaker cake toppers with Cricut helpful? If so, please pin this idea and let me know your thoughts in the comments below.
7 Comments
love them all but my favourite is the flowers , so clever x
I love the flowers too!
What is the font name? Thx
Both of the text designs used are premade designs I found in Cricut Design Space.
Love the rolled flowers shaker card!
Thank you for this. Lovely change of pace for toppers. Cheers 🌻
Thanks so much Lisa. I’m glad you love this project idea.