


How to create Under the Sea themed party decorations with a Cricut machine
I love making party decorations with my Cricut cutting machine.
But staring at a blank Cricut Design Space screen can be intimidating.
Sure, you can find a banner pennant template in Cricut Design Space but then you have to add other images and cut and slice your design together.
But thats not all. You have to do the same thing to create the matching cake topper. Ugh.
I can help with that!
This post may contain affiliate links, which means I’ll receive a commission if you purchase through my links, at no extra cost to you. Please read my full disclosure for more information.
I love to design digital kits for you to make with your Cricut cutting machine.
Use your precious time for the fun part of choosing the perfect colors your child (or grandchild) will love and add their name for a personalized touch.
Where can I find the Under the Sea Party cut file?
Ok. This sounds like fun, where do I find the cut file?
I’m glad you asked. Check out my shop of digital party bundles for your Cricut machine.
Better yet – sign up here for a coupon to grab the Under the Sea Party bundle.
You will be included in my email newsletter with helpful Cricut ideas, tips and resources. Unsubscribe anytime and your email will never be shared.
What Cricut machine do you need for this project?
While all Cricut cutting machines can cut cardstock, not all Cricut machines will work for cake toppers and banners.
The Under the Sea party cake topper and banner are best made on a Cricut Explore Air 2/3 or Cricut Maker/3 as the cut size is larger than the max cut size of the Cricut Joy.
I size my cake toppers around 6 inches wide.
What supplies do I need to create Under the Sea party decorations?
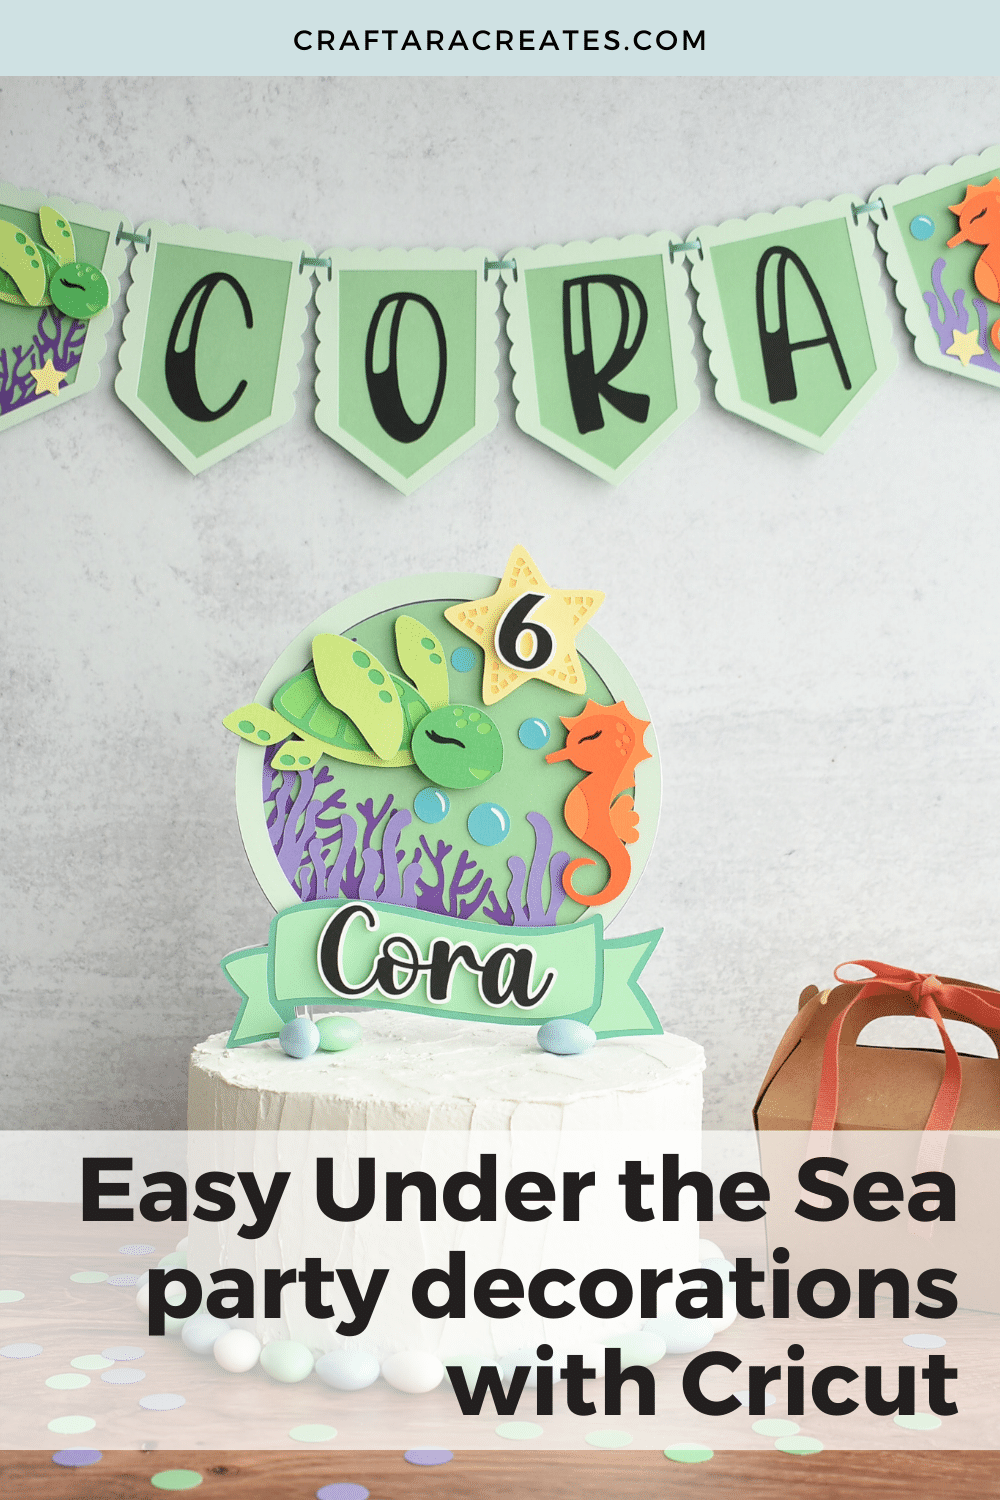
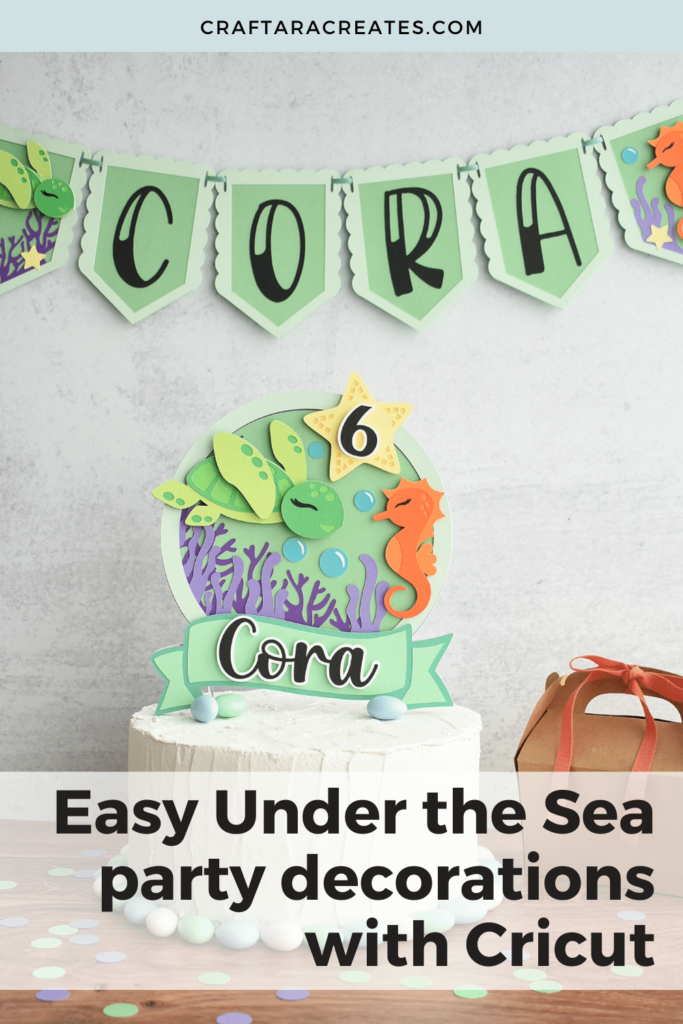
How do I make the Under the Sea birthday banner?
Start this project by uploading the Under the Sea cut file. The filename is SVG-UnderTheSeaBanner.svg
You can click browse or drag and drop the design directly into Cricut Design Space.
Double check the size of the design. Make sure the banner is 12 inches by 12 inches.
Next, ungroup the design. Duplicate the blank banner pendant for as many letters as you need. The sea turtle and seahorse pendant are predesigned and ready to go as they are.
Next, we need to add the text. Click the Text tool on the left side and type the name you want to use for the banner.
I used the font milko denilo from creativefabrica.com for the name on the banner.
When you are ready to cut the design with your Cricut machine, click Make It at the top left side of the screen.
You will see all the mats with different colors. Many of the cuts are small and would work well for scrap paper.
TIP: Cut the small eye lashes with vinyl.
Continue on and cut the project with cardstock using your Cricut cutting machine.
How to assemble the Under the Sea birthday banner?
Once all the pieces are cut out, check the PDF instructions that are included with the cut file for assembly instructions for each part: sea turtle, sea horse, bubbles, etc.
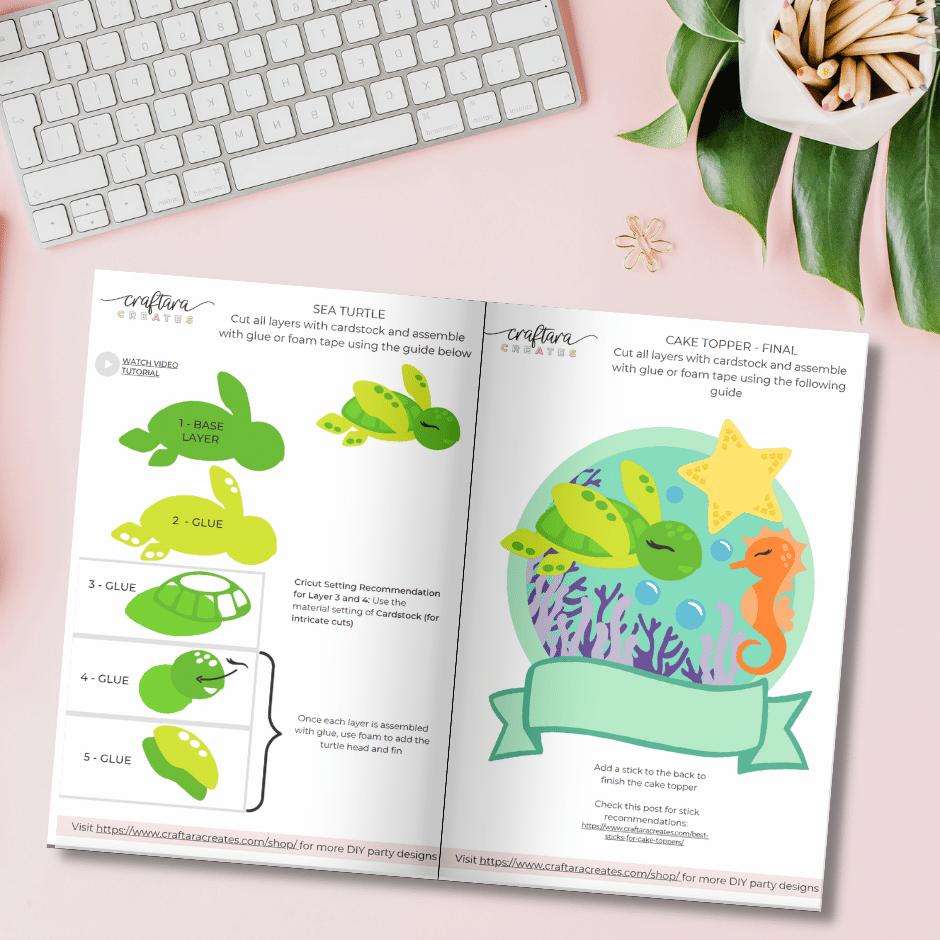
The banner pendants are designed like a shadow box with layers on top of each other that build out a frame. Combine the base banner pendant with the coral or seaweed layer, then add the top frame layer.
Once the banner pendants are done, use foam dots to add the sea turtle and seahorse.Use paper glue to add the bubbles and the starfish pieces.
Grab your favorite ribbon or string and thread through the banner pennants to finish off the project.
And that’s it. Your Cricut made Under the Sea birthday banner is ready to go.
Was this tutorial helpful?
Did you find this tutorial on how to create Under the Sea party decorations with Cricut helpful? If so, please pin this idea and let me know your thoughts in the comments below.