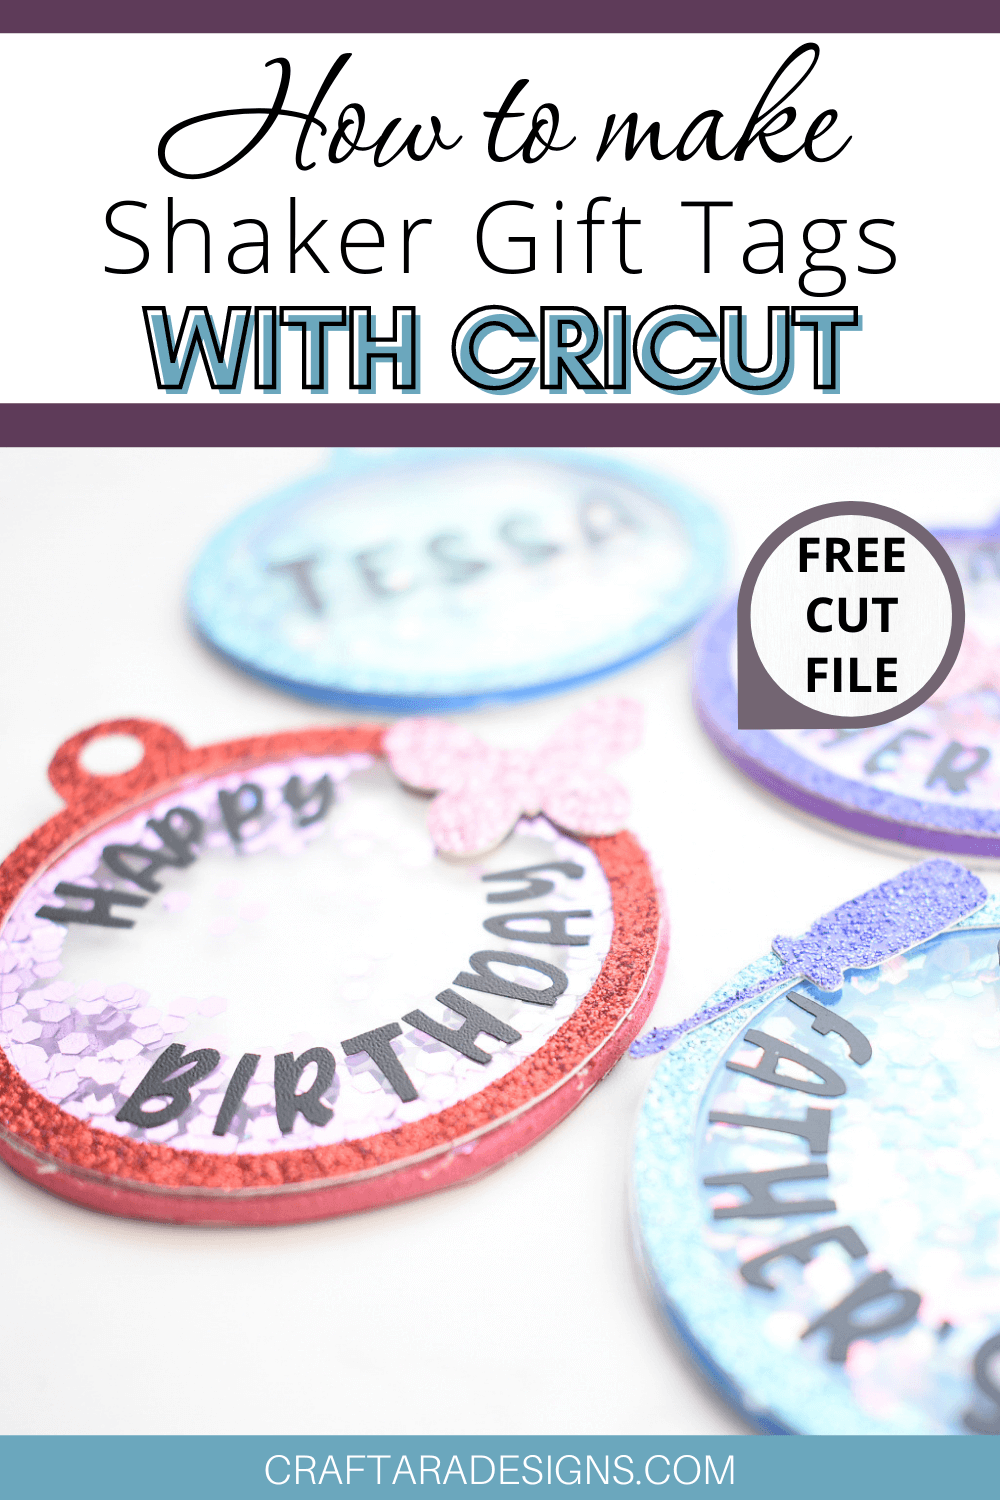
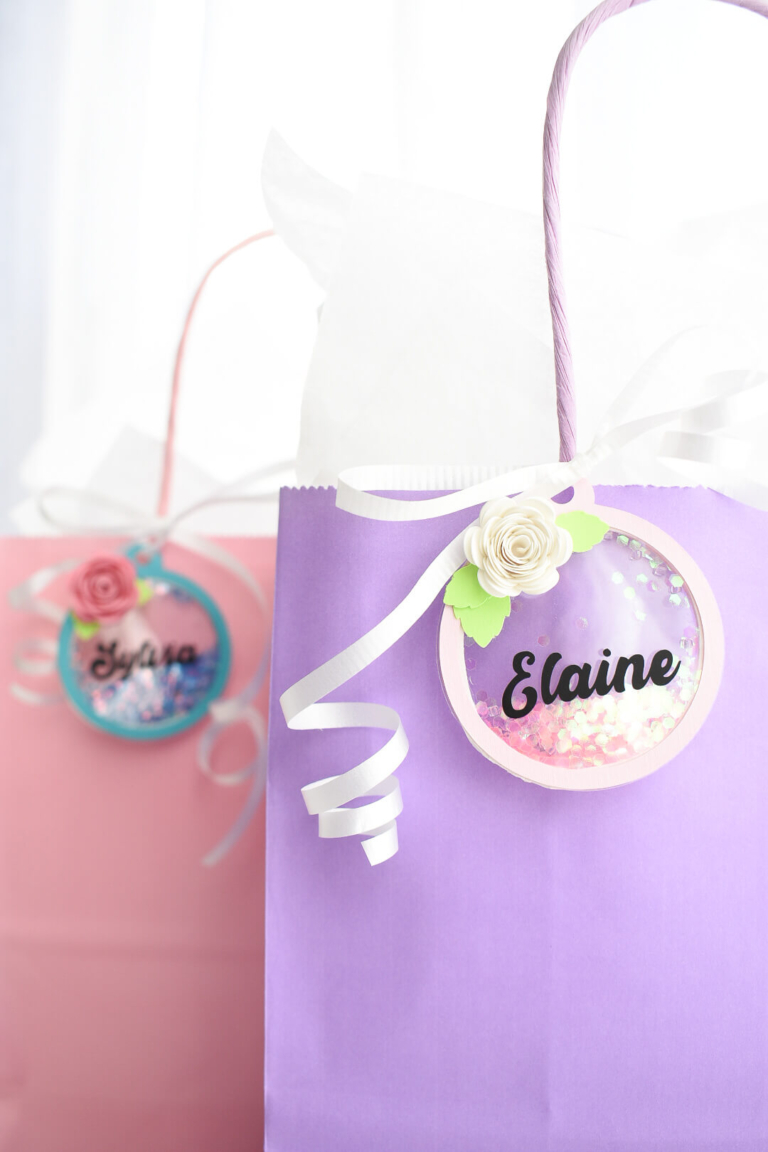
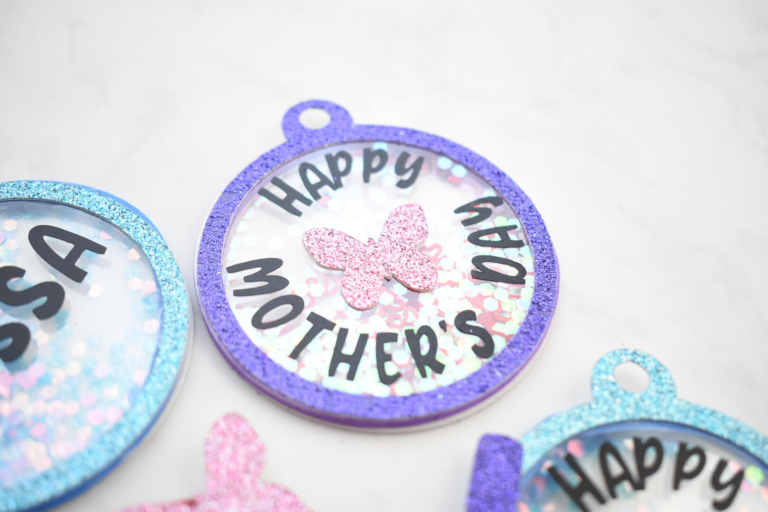
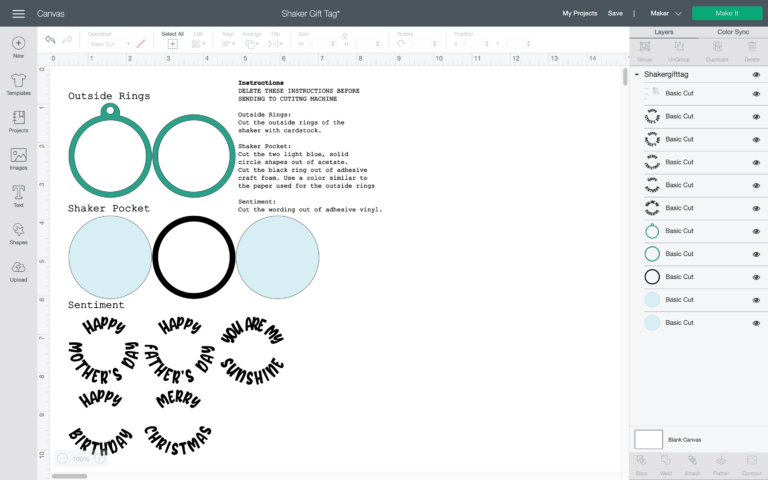
How to make a Gift Tag Shaker with Cricut

CATEGORY

This gift tag shaker tutorial is part one in a series of tutorials to share the basics of a shaker using your cricut machine.

This Cricut tutorial series uses some of the same designs and concepts to build your knowledge tool box with the goal of giving you the creative freedom to make your own amazing shakers with your Cricut machine.

Check out part two of the shaker tutorial series to learn how to make a flower shaker.

Table of Contents

How to make a Shaker Gift Tag with Cricut
Shaker Gift Tag with Cricut

What is a shaker?

In its simplest form, a shaker is a pocket of glitter made out of cardstock and acetate. This Cricut project is simple and packs a lot of impact from the glitter sparkle.

The trick with a shaker is the material used to create the pocket that allows the glitter to move when shaked. In this tutorial, we will be using adhesive foam to add the walls of the shaker pocket. I love using adhesive foam because the material is cricut friendly with the Cricut Explore Air 2 or Cricut Maker.

How to make a Shaker Gift Tag with Cricut

How to make a gift tag shaker with Cricut

To help demonstrate how to make a shaker, I created a cut file with instructions to help you make a shaker into a gift tag. We are making a double sided shaker with vinyl cut sentiment on the front.

Here’s what you’ll need to make a gift tag shaker with Cricut

Gift Tag shaker Cut File SVG for Cricut

The shaker gift tag cut file in my resource library is a simple three layer file designed to work with adhesive foam. Grab the cut file from my resource library in the Celebration Craft Freebie section and upload the SVG into Cricut design space. Sign up below to unlock the resource library

Instructions to make a gift tag shaker with Cricut

During the upload of the SVG file into Cricut Design Space, if you see a blue banner warning message saying “text elements are not supported” – click continue.

Cricut Design Space Warning - Click Continue

Embedded in the cut file are instructions on what material to cut each shape out of: cardstock, acetate, adhesive foam and vinyl. Delete or hide the instructions before sending to your Cricut.

Cutting the vinyl is optional and can be added after the assembly of the shaker using a low tact transfer tape (such as a used piece of regular transfer tape or press-n-seal).

Cricut Design Space Preview

Cardstock Cuts

The card stock cuts are standard. Use whatever cardstock you have on hand with the fine point blade. I used 65lb weighted cardstock.

Cutting Acetate with Cricut

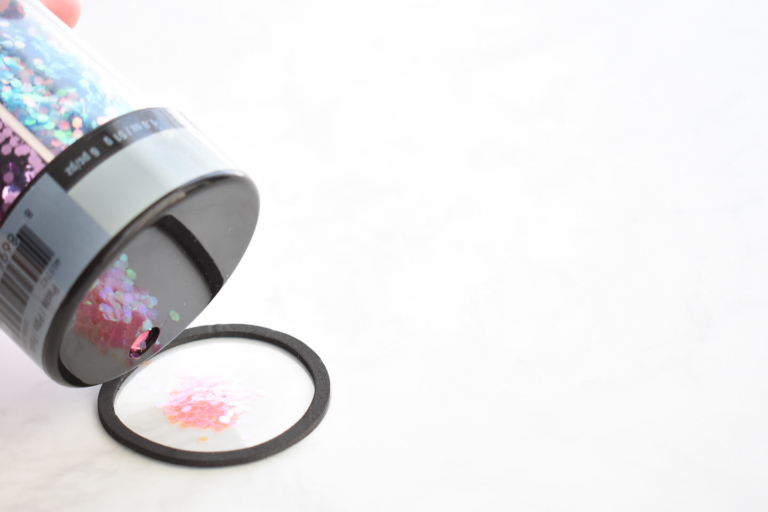
Before cutting acetate with your Cricut machine, remove the protective film from the top layer and place that side up to cut. I found if the film is left on, the Cricut blade is not as effective.

Within Cricut Design Space, search for the acetate setting and use the standard fine point blade.

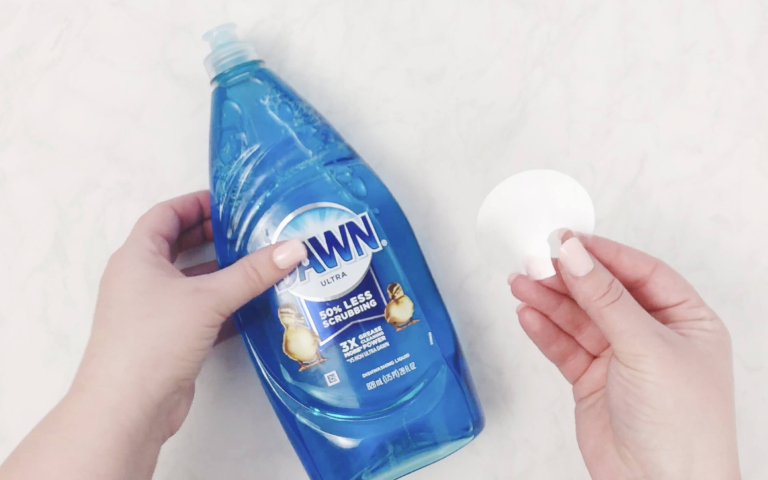
Once the cut is complete and before you assemble, clean off any stickiness by washing the acetate with dish soap.

Additionally, and this is important, washing acetate with dish soap significantly reduces the static cling of the glitter once the shaker is all put together. Washing the acetate made a noticeable difference.

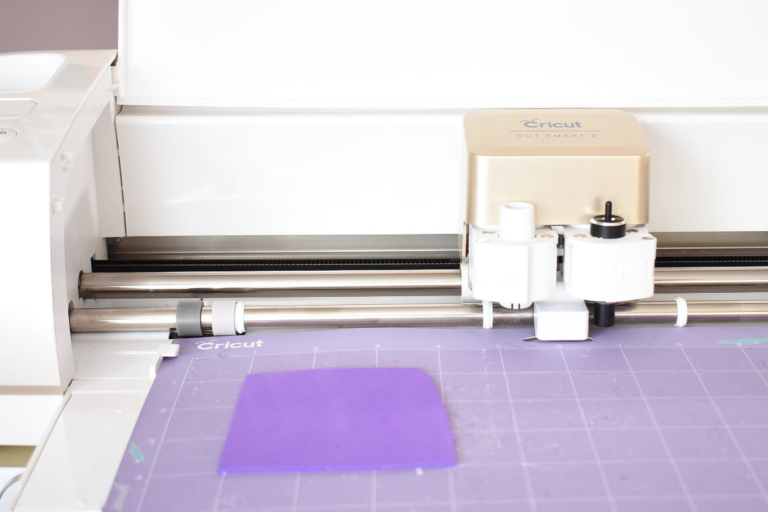
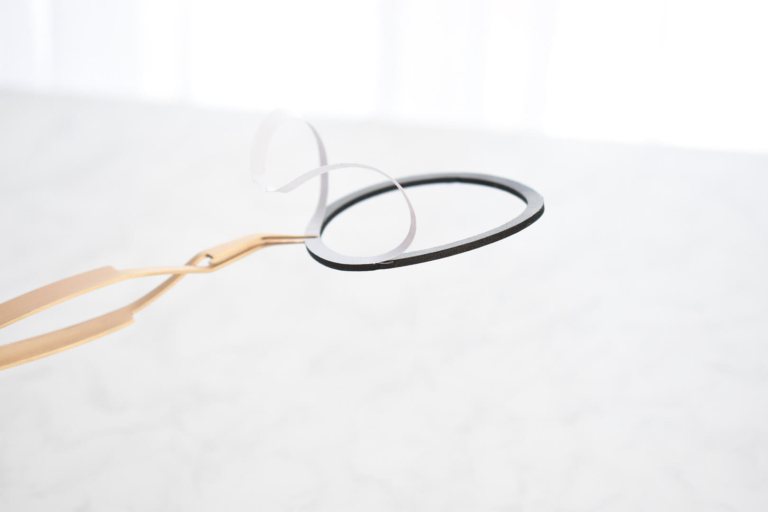
Cutting Adhesive Foam with Cricut

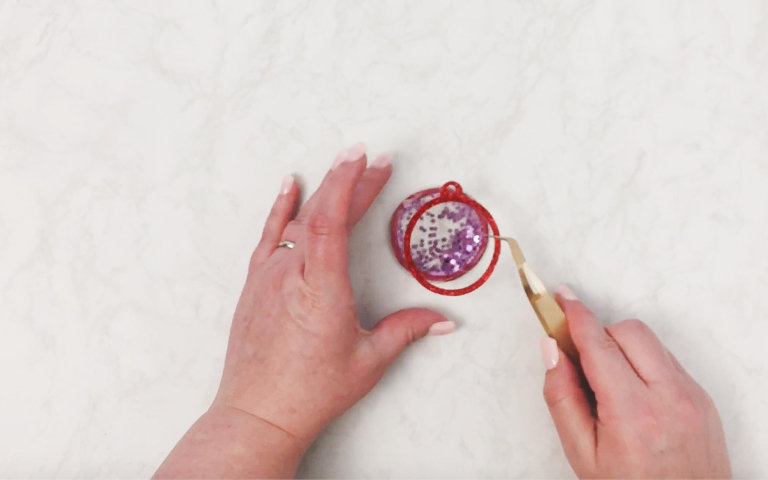
The middle layer of the shaker is made from adhesive foam, which can be cut on the Cricut Maker or Cricut Explore Air 2 using the deep point blade. The thick foam is what creates the pocket between the acetate layers for the glitter to move within the shaker.

Cricut Design space recommends using the deep point blade for Adhesive foam and for the Cricut Explore Air 2 – that is your best blade.

However, if you have a Cricut Maker, the knife blade makes the best results for designs with more detailed cuts. For this simple circle shaker, the deep point blade vs the knife blade did not make much of a difference.

In Cricut Design Space, search for craft foam as the material.

With the Cricut Explore Air 2 and the deep point blade be sure to set to More Pressure and check the cut before unloading. Press the C button to repeat the cut if it did not go all the way through.

Use a new standard grip mat or a previously used strong grip mat and move the white guide wheels out of the way. The guide wheels will leave indents on the craft foam.

Cricut and Adhesive Foam
Move the white guide wheels to avoid going over the Adhesive Foam

Assembly

Start with creating the shaker pocket. Before starting to assemble, remember to wash the acetate with dish soap. Once the shaker is assembled, there is no way to remove the static cling.

Remove the adhesive backing from the adhesive foam ring and apply to one of the clean acetate circles.  I love using adhesive foam for shakers because it removes one glue step.

Apply the foam to the acetate

Time for glitter! Grab some chunky glitter or sequins to fill the shaker. Before adding the glitter, tape down the shaker to the table top. This really helps to avoid accidentally flipping the open faced shaker over and spilling glitter everywhere. 

Add glitter to shaker
Add a small amount of glitter to the shaker pocket

With the glitter added, apply glue with a precision tip and add a very small line around the edge of the craft foam. If you do not have precision tip glue, apply glue with a thin paint brush.

Add the other acetate circle on top to seal the shaker pocket. It may take a little time for the glue to dry. The less the shaker is moved at this point, the less the glitter will clump up with excess glue.

Notes about glue. I tried several glue options and always came back to the Bearly Arts precision glue.

  • Hot glue: Caused both the foam and acetate to deform from the heat creating air pockets that allow the glitter to escape. Not good.
  • Super glue: dries super fast but is difficult to work with and any excess that gets on your skin is a mess.
  • TomBow liquid glue: Did not stick well to the acetate.
Shaker Assembly
Add glue and then the second acetate layer

How to create a shaker gift tag: Final Steps

Once the shaker pocket is dry, or nearly dry, add the cardstock. One cardstock outside ring on each side as the finishing touch. This will cover up any imperfections and overall, provides a nice finished look.

Add the cardstock layers as a finishing touch

Lastly, if you’d like to add a sentiment to the shaker gift tag, the cut file includes five options perfectly sized and curved to fit.

Cut the sentiment with adhesive vinyl (removable vinyl would work too).

To avoid damaging the cardstock outside rings, apply the vinyl with a low tact transfer tape. If you use a brand new piece of transfer tape, it may pull and damage the cardstock. Use an older piece of transfer tape or pat the tape on your shirt to reduce the stickiness. Otherwise, press-n-seal is a great option as well.

If the sentiments are not your thing, you could skip that all together or add a name instead.

With the shaker gift tag complete, add any embellishments (such as rolled flowers or butterflies) and a string. 

Another way to use the shaker gift tag is to create a unique bouquet of balloons cake topper. To achieve this look, grab a bunch of gift tag shakers, turn them upside down, add ribbon to look like balloon string and glue together in a bunch to a lollipop stick. This cake topper looks great from either side because of the double sided shaker design.

Bouquet of Balloons Cake Topper with Cricut
Was this tutorial helpful?
Did you find this tutorial how to make a Shaker Gift Tag using Cricut helpful?  If so, please pin this idea and let me know your thoughts in the comments below!

8 Comments

  1. Hi – great tutorial but the resource library link to the file is broken… it just brings you back to the tutorial instead of a downloadable file. Did I do something wrong? Thanks so much for all your awesome tips and helps!

    1. Hi Ernestine! I can see where the confusion is. The photo of the project in the library links back to the tutorial. The download button starts the file download. If you’d rather I email you a copy of the file, send me an email at [email protected]

  2. What a great tutorial! Love how personal one can make them and for any occasion. The balloon idea is so cute! I have seen shaker type projects everywhere but have never really read through as to how to make them. I am glad I did! Thank you.

Leave a Reply

Your email address will not be published. Required fields are marked *