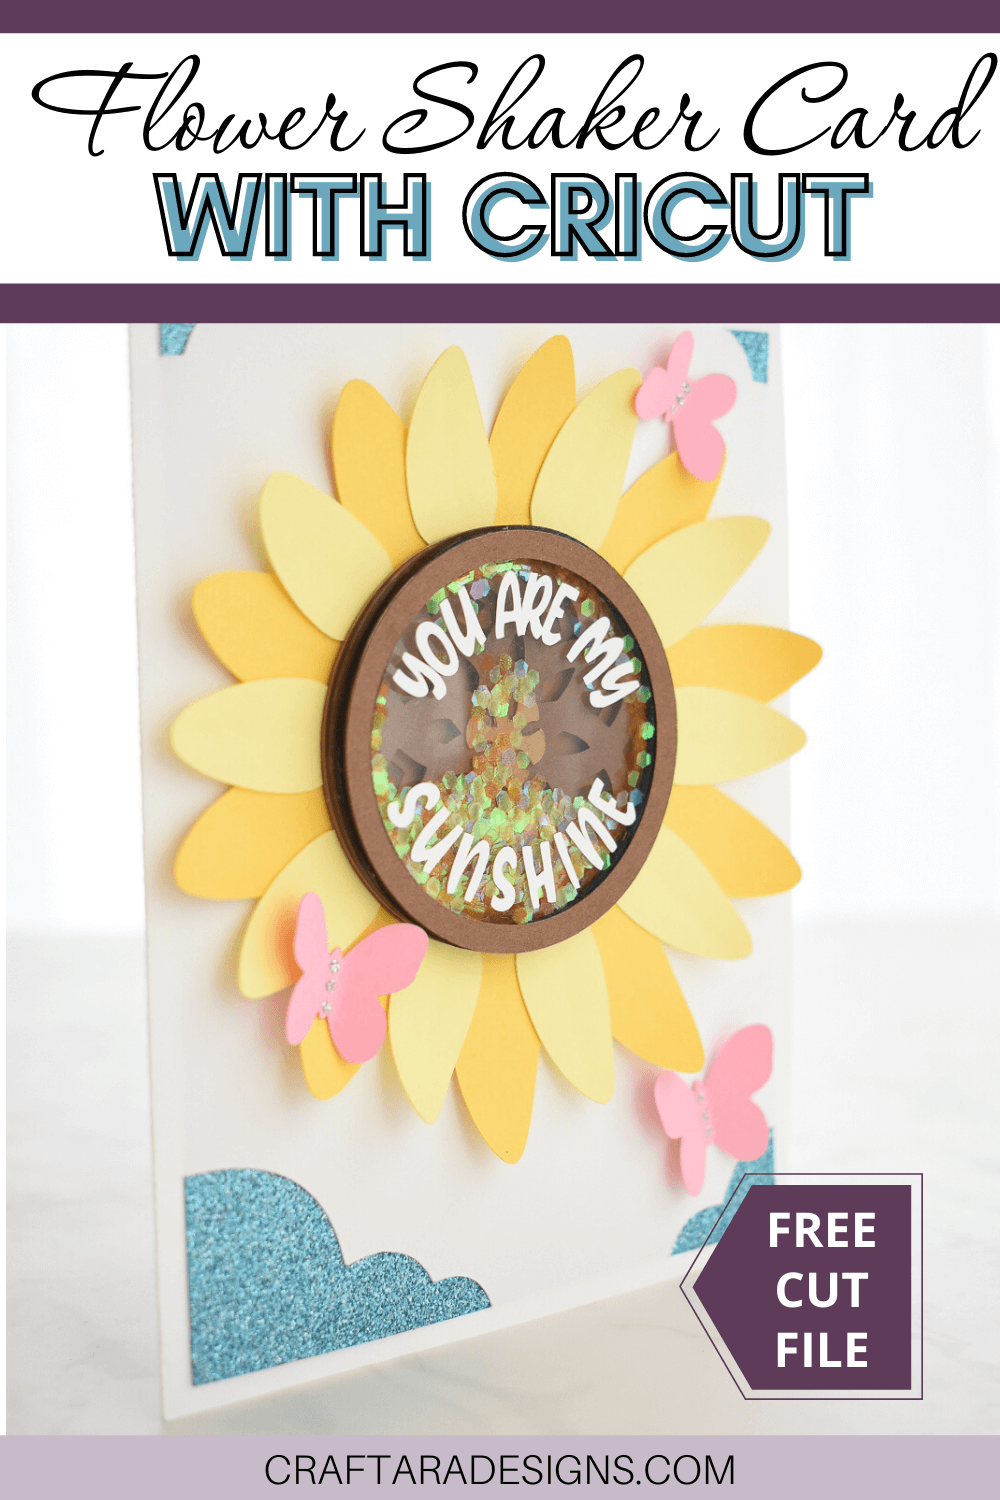
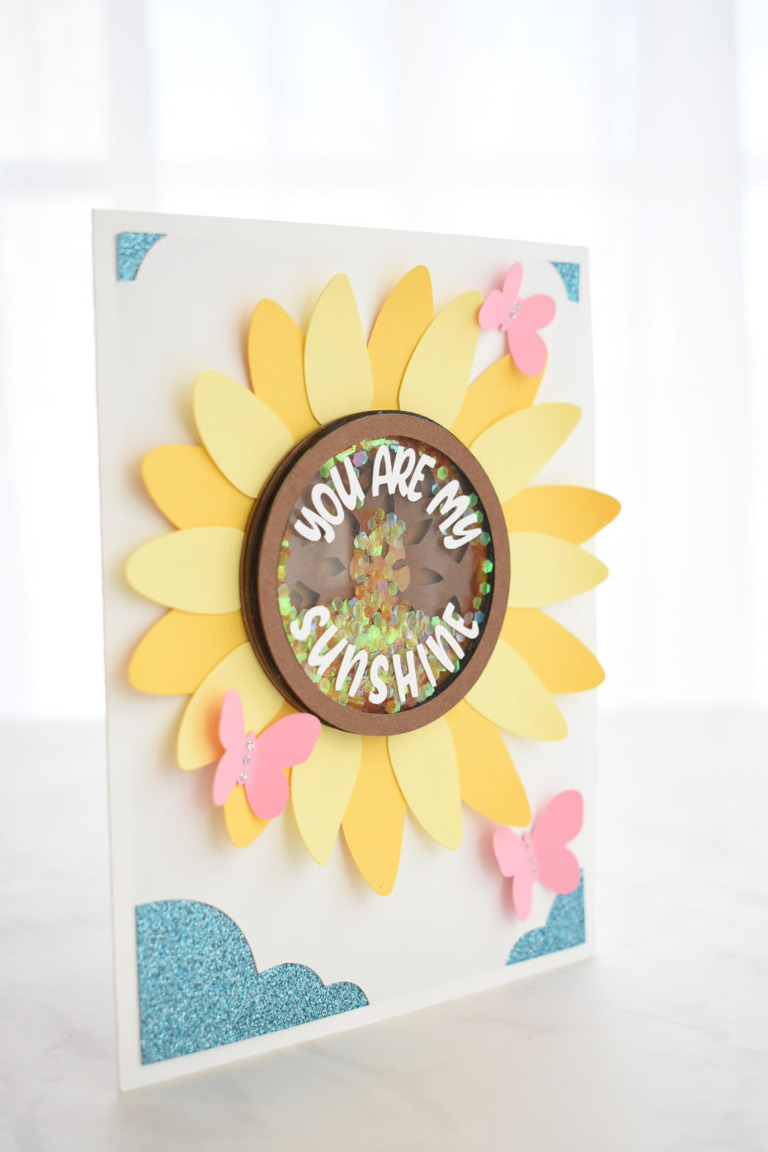
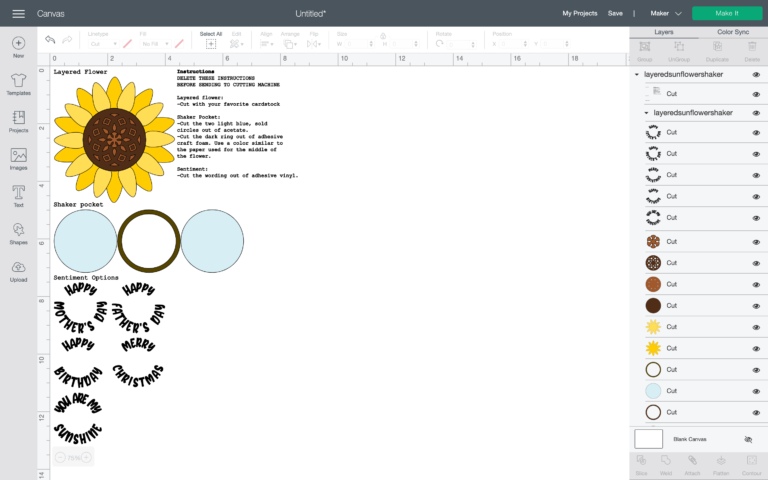
How to make a Flower Shaker Card with Cricut

CATEGORY

Learn how to make a beautiful layered flower shaker card using your Cricut machine

This Layered Flower Shaker Card tutorial is part two of a series of tutorials to share knowledge about how to make a shaker. This Cricut tutorial series uses the same shaker design and builds upon each concept so that you have the foundational knowledge to make your own amazing shakers in the future. Check this post to view part one. 

Table of Contents

Layered Flower Shaker Card with Cricut

This post may contain affiliate links, which means I’ll receive a commission if you purchase through my links, at no extra cost to you. Please read my full disclosure for more information.

How to make a layered flower shaker with Cricut

Before starting out on this flower shaker project, please check out my post on how to make a simple gift tag shaker to learn the basics.

Adding a shaker to the front of the layered flower design is optional. The flower design can stand alone but why not make your card extra special with glitter.

Here’s what you’ll need to make a layered flower shaker with Cricut

Layered Flower Shaker Cut File SVG for Cricut

The flower shaker design file in my resource library is designed to work with adhesive foam. Grab the cut file from my resource library in the Spring Craft Freebie section and upload the SVG into Cricut design space. Sign up below to unlock the resource library

Layered Flower Shaker Video

Instructions to make a flower shaker card with Cricut

During the upload of the SVG file into Cricut Design Space, if you see a blue banner warning message saying “text elements are not supported” – click continue.

The layered flower cut file includes the flower, shaker pocket and sentiment sayings.  Embedded in the cut file are instructions on what material to cut each shape out of: cardstock, acetate, adhesive foam and vinyl. Be sure to hide or delete the instructions before sending to the cutting machine.

Cutting the vinyl is optional and can be added after the assembly of the shaker using a low tact transfer tape (such as a used piece of regular transfer tape or press-n-seal).

Cricut Design Space Preview

Cardstock Cuts

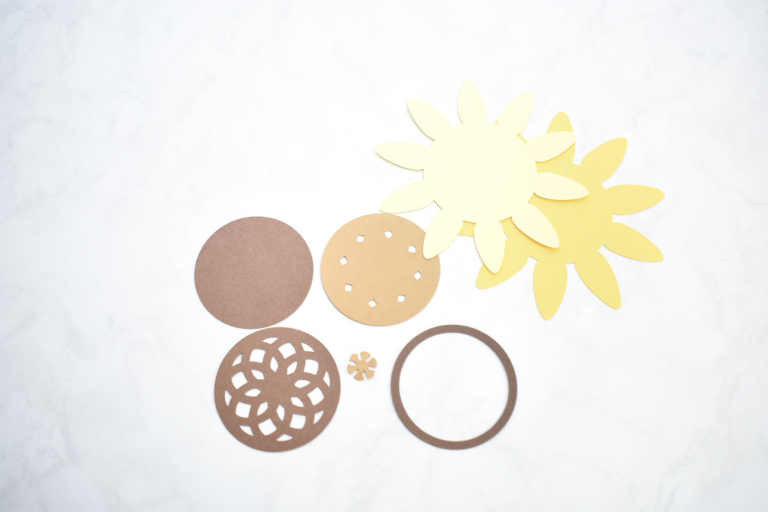
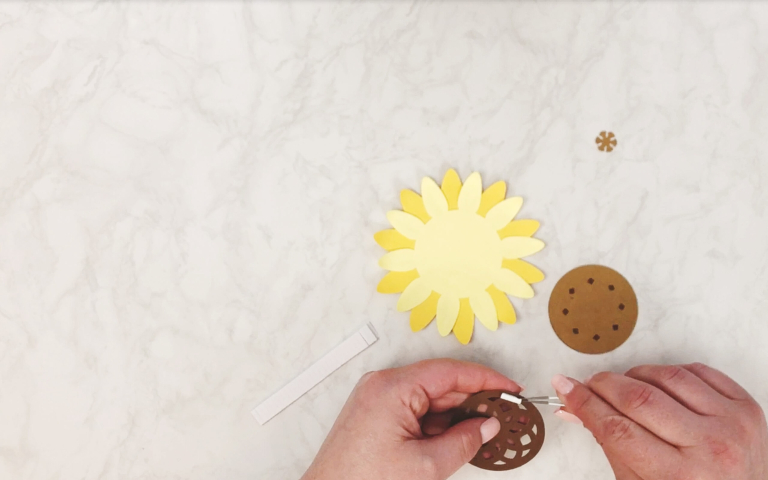
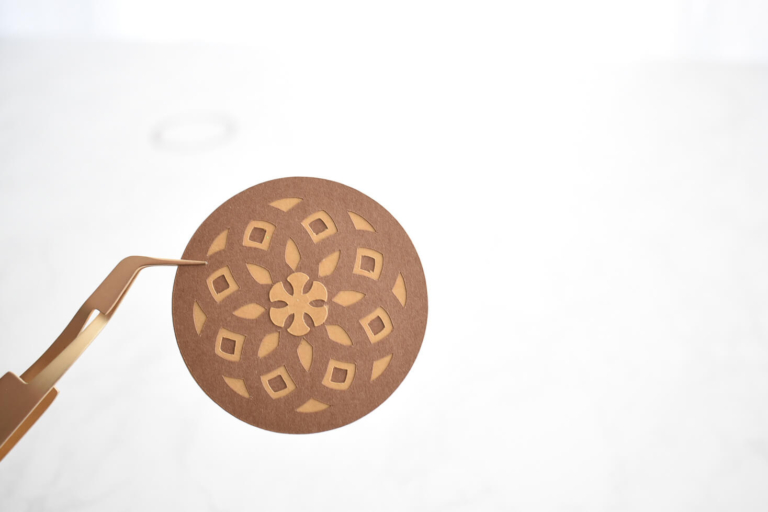
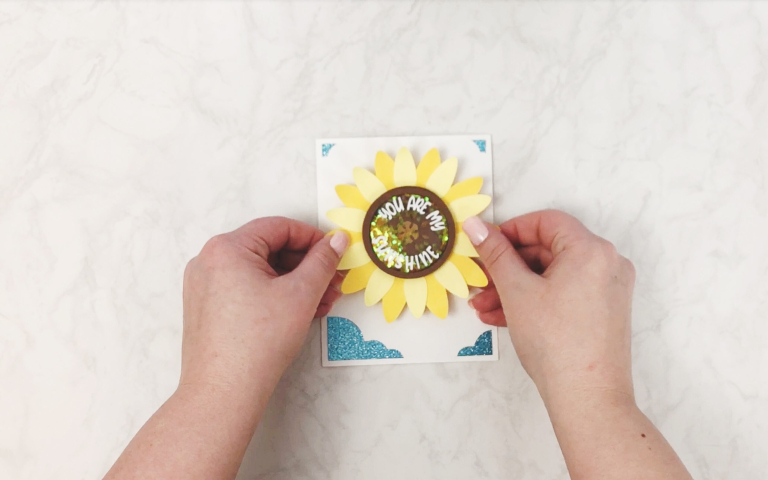
The Layered Flower Shaker design uses four different cardstock colors. Two different shades for the flower petals and two different shades for the middle of the flower. I used 65lb weighted cardstock.

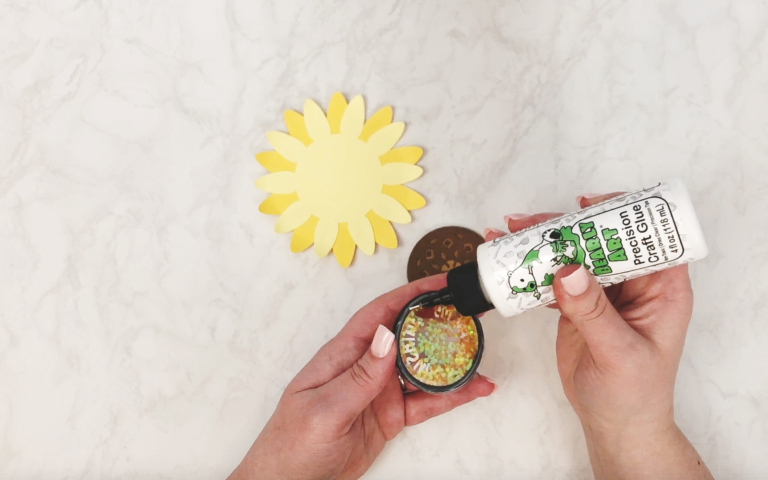
For the acetate and the adhesive foam cuts for the shaker, please review my post on how to create a gift tag shaker with Cricut which covers the basics of making a double-sided shaker.

Layered Flower Shaker Cuts
Cricut cardstock cuts for layered flower shaker

Assembly

Start with creating the glitter filled shaker pocket. Check my gift tag shaker tutorial for the step-by-step instructions. Let the glue set on the shaker pocket while assembling the rest of the layered flower.

To assemble the flower, start with the two base flower petal layers. An optional step to add dimension, use a paper molding detail tool to add an indent of a stem to the middle of each petal and slightly curl the petals inward.

Layered Flower Shaker Assembly with Cricut

Glue together the base flower petals with the top layer of petals in-between the bottom layer.

Layered Flower Shaker Assembly with Cricut

To keep the flower thin enough for a card envelope, use glue to assemble the flower center with the exception of the more intricate 3rd layer of the flower center. Use double sided adhesive foam strips to add just a bit of dimension to the intricate layer of the flower center.

Layered Flower Shaker Assembly with Cricut

Be sure to line up the cut holes within the layers well in the flower center.

Layered Flower Shaker Assembly with Cricut

Once the flower center is complete, you can add on the shaker top you already made with glue around the edge.

Layered Flower Shaker Assembly with Cricut

Finish the flower by gluing the flower center to the petal base.

Finally, add your layered flower shaker to a card. The card I used is a blank card template in Cricut Design Space named Cloud Corner Cut Card #M139BE356.

Layered Flower Shaker Assembly with Cricut

With your card all assembled, feel free to add embellishments such as butterflies, gems, etc.

Think outside the design box. There are many ways this layered flower design could be used with or without the center shaker part. Here are some ideas I plan to try:

  • Cut extra layers of the base petals with cardstock for extra dimension and display the layered flower in a frame.
  • Create the layered flower in different cardstock colors to connect as a banner.
  • Use the layered flower with the shaker as a fun wand for my two little girls.

Was this tutorial helpful?

Did you find this tutorial how to make a Layered Flower Shaker Card using Cricut helpful?  If so, please pin this idea and let me know your thoughts in the comments below!

5 Comments

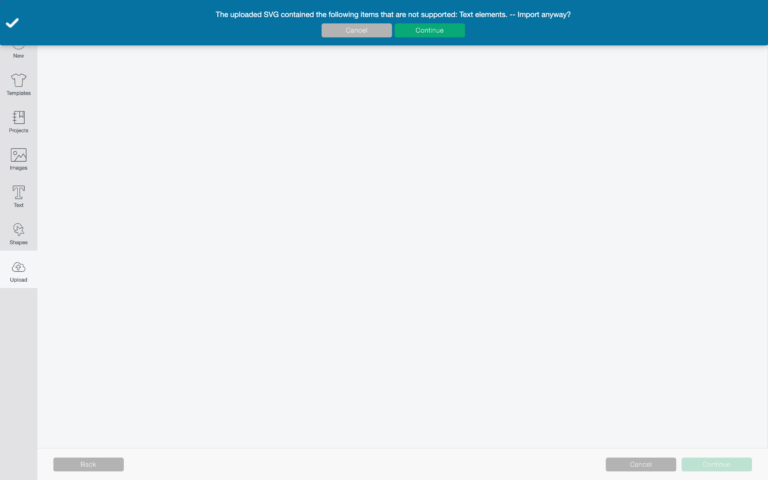
  1. Love this design but having trouble loading into design space. This is the message I get on my MacBook: The uploaded svg contained the following items that are not supported: text elements. I loaded anyway and nothing appears. Thanks!

    1. Thanks for the heads up. I found a few errors in the SVG designs. I made the fixes and added the improved designs back into the resource library. Please download them again to get the updated versions. Sorry about that.

Leave a Reply

Your email address will not be published. Required fields are marked *