


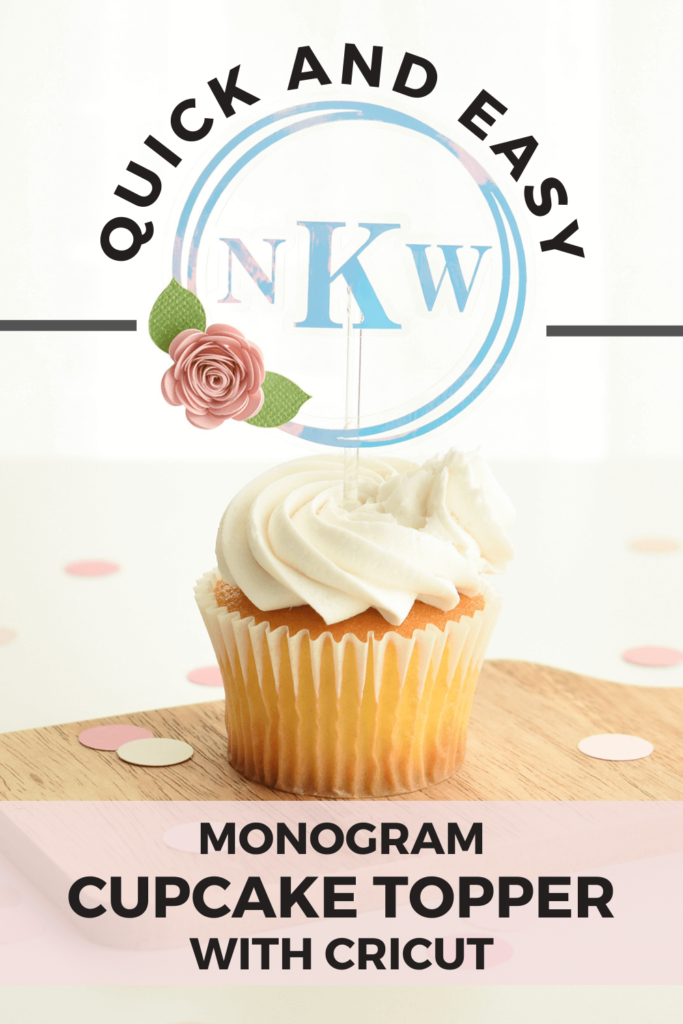
Learn how to make a monogram cupcake topper with Cricut
Once was a time when making a monogram design with Cricut required searching for special fonts and the perfect frames. Followed by manually designing a monogram within Cricut Design Space.
The alternative was to cut and chop apart a design to create a space for the monogram. Or manually curving and altering text which can be tedious in Cricut Design Space.
But that cumbersome process is no more with the Cricut Monogram Maker feature.
This post may contain affiliate links, which means I’ll receive a commission if you purchase through my links, at no extra cost to you. Please read my full disclosure for more information.
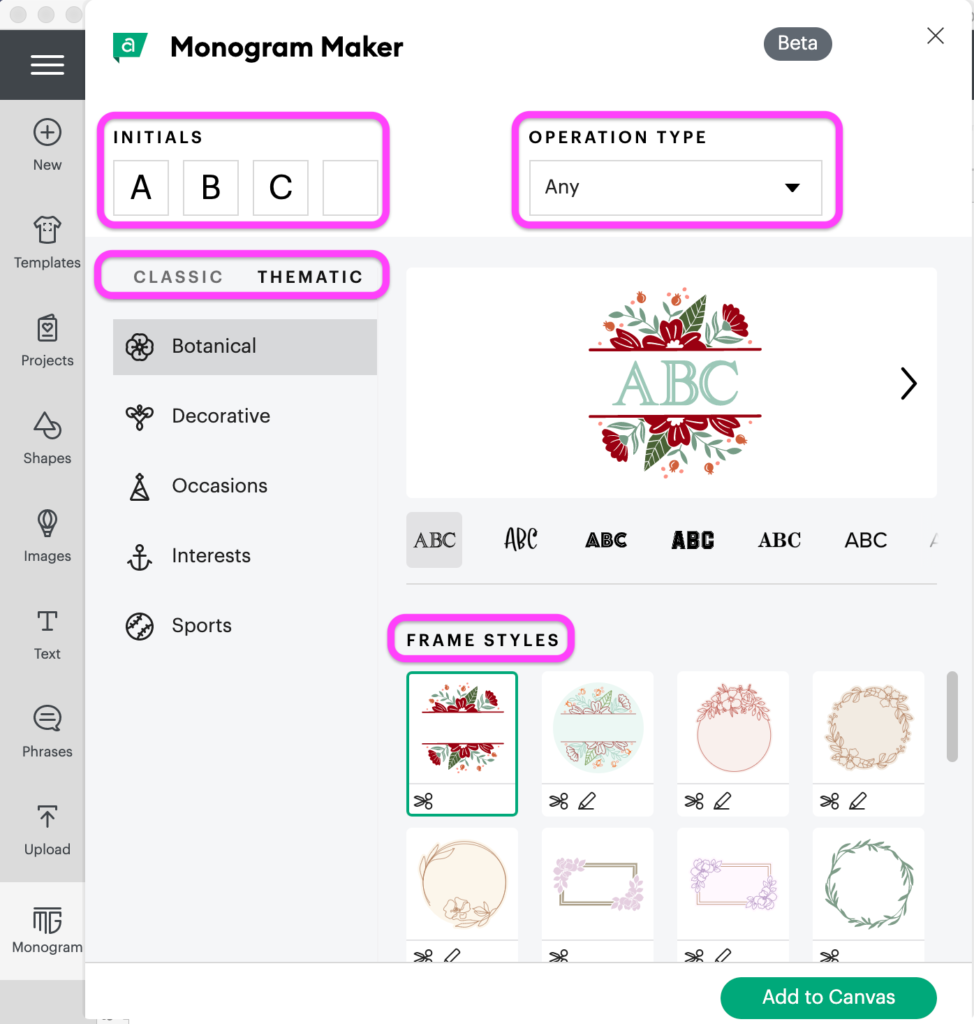
Where do I find the Cricut Monogram Maker?
This feature sounds awesome. So what’s the catch?
The Monogram Maker feature is only available on the desktop and to Cricut Access subscribers.
You can find the Monogram Maker on the bottom, left side of your Cricut Design Space screen from your desktop computer.
The feature was released with Cricut Design Space for Desktop in update v7.9 in the May 2022 timeframe.
How do I make a monogram with Cricut?
This neat little tool has everything you need to make a monogram with Cricut in any style to include cut only options, pen drawn designs or the combination of cut and draw designs.
At the top of the screen you will see the initial text input boxes. This is where you add the letters you want to use for the monogram.
Right next to the initial input boxes is the application drop down menu. This is a filter to show only cut, draw only or cut and draw designs.
Underneath the initial boxes and application menu are the monogram themes. There are a ton of styles to choose from including elegant, modern, vintage as well as botanical, decorative, occasions, interests and sports.
Within each monogram style, you can further customize your monogram by choosing a font and frame style.
Once you have finalized your monogram, click the Add to Canvas button to drop the design into your canvas.
This is where it gets interesting. The monogram isn’t an uneditable, merged together design.
Which means you can still adjust and add to the design.
You will see the monogram consists of grouped together layers, which means you can edit and add to the layers just like any other design in Cricut Design Space.
Follow along as I show you how to create a floating cupcake topper monogram with Cricut.
Here's what you'll need to make a floating cupcake monogram with Cricut
How to design a cupcake monogram with Cricut
To get started in Cricut Design Space, click on the monogram tool, which is on the bottom left side of the screen.
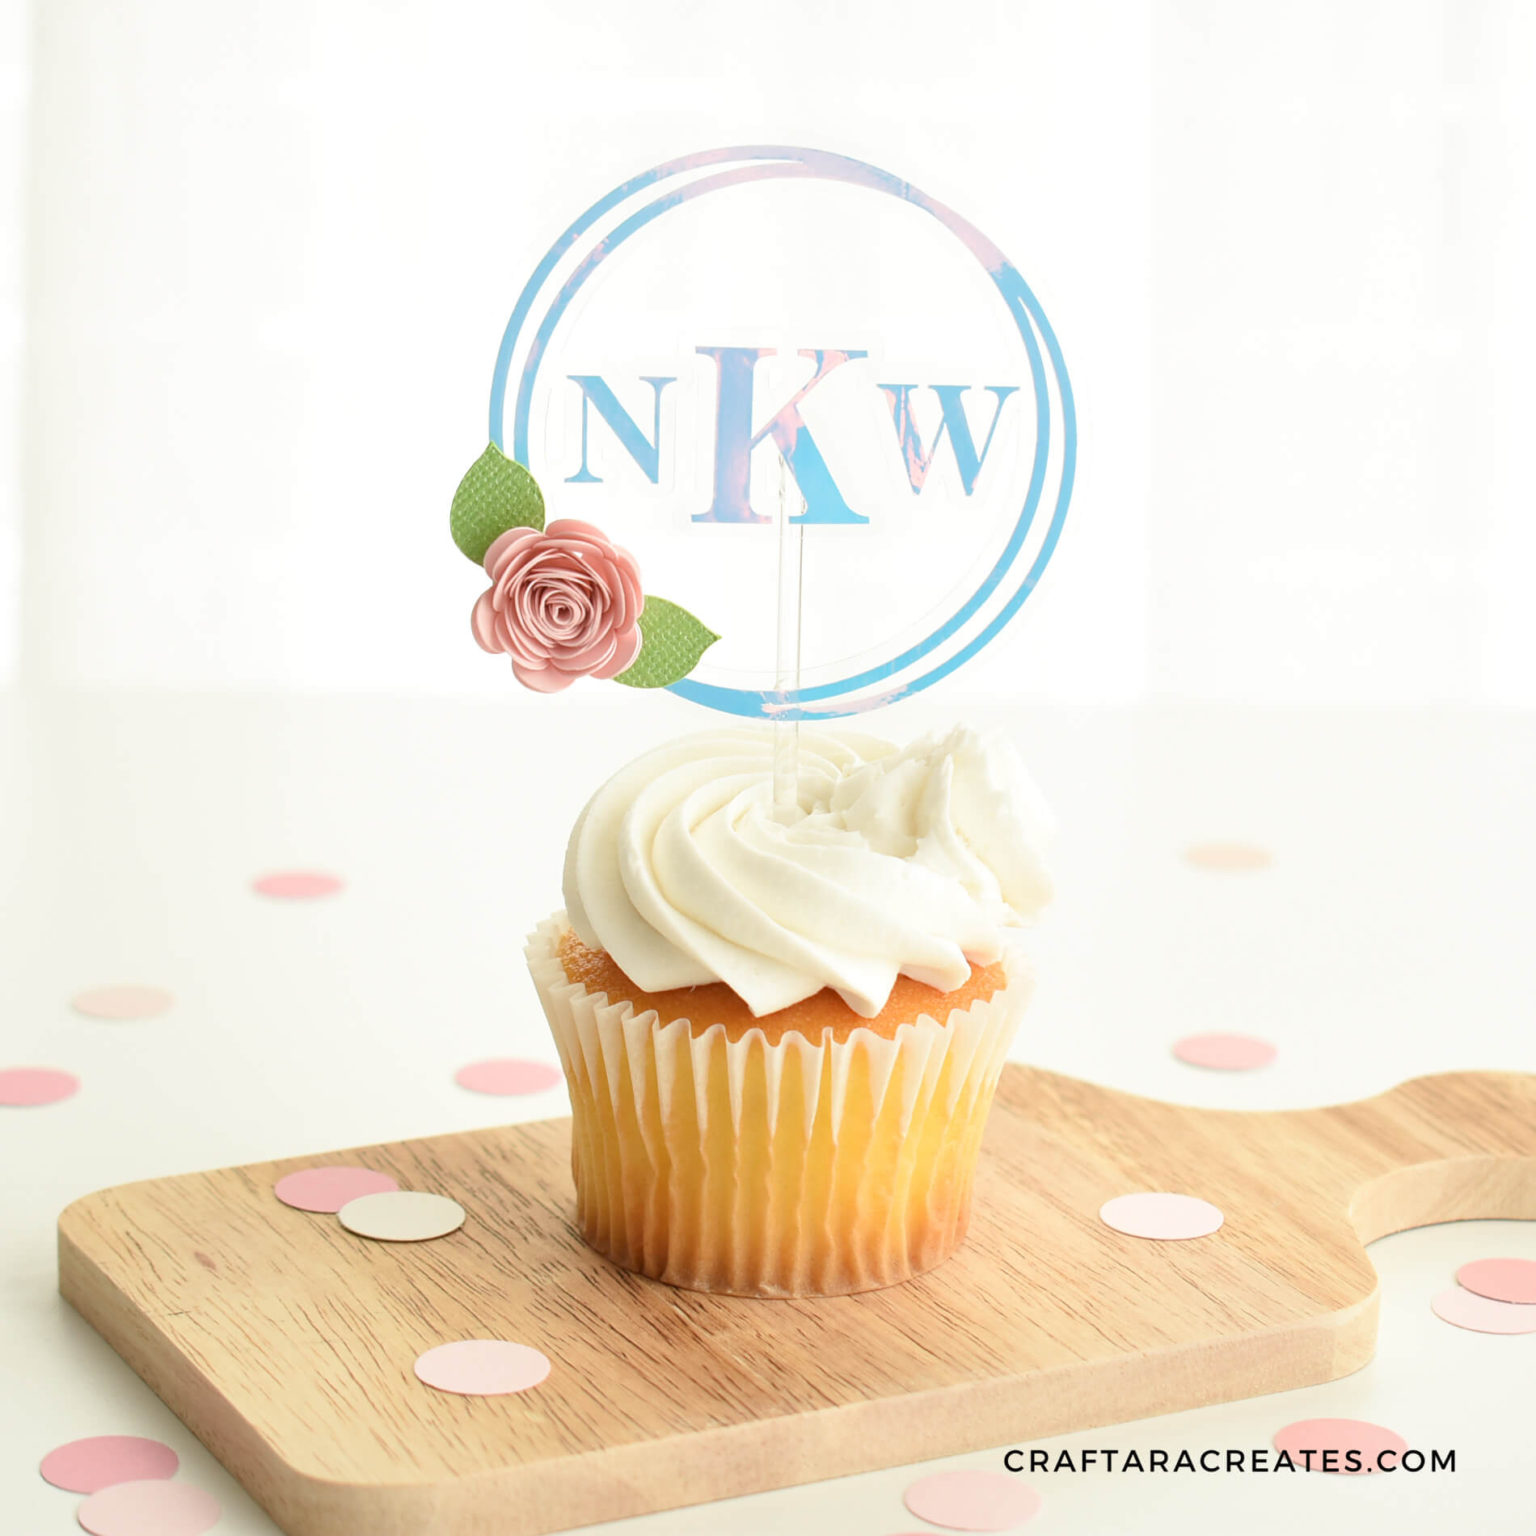
For the cupcake toppers, I choose the elegant style monogram.
Located near the top are the text boxes where you add the initials you want to use.
There are a bunch of frame varieties to choose from. For this project, I am using the simple double circle frame.
Once you are happy with the monogram, click add to canvas.
You will see that the design is on separate layers but grouped together.
For the floating cupcake topper, we need to attach the layers together.
First, with the design group selected, click the color options and choose one color for the whole design.
Next, with the design group selected, click on Attach near the bottom of the screen.
Now we can add an offset which will be used to create the floating effect.
Click the offset tool near the top of the screen and select a distance.
I used an offset of .2 inches. The goal is for the offset to connect the letters to the outside frame.
Resize the whole cupcake topper design to 3 inches wide.
The monogram cupcake topper design is done and you can add any embellishments.
I found two images in the Cricut Library to use as a rolled flower and leaf. I chose the design M4258D for the leaf and M3D7E1 for the flower.
When you are ready, click make it to send the project to your Cricut machine.
Sign up below for 50% off in my digital shop of cut file bundles.
You will be included in my email newsletter with helpful Cricut ideas, tips and FREE cut files. Unsubscribe anytime and your email will never be shared.
How to cut the cupcake monogram with Cricut
You will see all the mats with the different colors. This project uses:
- Holographic Vinyl for the monogram and circle border
- Clear acetate for the offset layer
- Green and Pink cardstock for the flower
Continue on and cut the project with vinyl, acetate and cardstock using your Cricut cutting machine.
Not sure how to cut acetate with your Cricut?
How to assemble the cupcake topper monogram
To assemble the cupcake topper, you will need
- The monogram design cut in vinyl and transfer tape
- The offset layer cut in acetate
- The rolled flower and leaves cut in cardstock
- And a clear cake pop stick
Grab a light grip cricut mat and add the acetate to the mat. This will help keep the acetate in place so you can apply the vinyl on top easier.
Use transfer tape to apply the vinyl to the acetate.
Next, we will prepare the rolled flower. Starting from the outside, roll the paper tightly inward. I used a paper quilling tool to help roll the flower.
Fold over the last circle and secure with a small dot of hot glue.
You can use hot glue or paper glue to add the flower to the cupcake topper.
Tuck the leaves in on either side of the rolled flower with more glue.
Now all we need to do is add the stick and the cupcake topper will be done.
I used a pair of jewelry pliers to cut the clear cake pop stick in half.
Use a very small dot of hot glue to add the cake pop stick. I added glue on the middle letter and on the bottom of the frame. This looks best if the glue is mostly hidden behind a vinyl section.
And thats it! Your floating monogram cupcake topper is ready to go.
Was this tutorial helpful?
Did you find this information on how to create a floating cupcake topper monogram with Cricut helpful? If so, please pin this idea and let me know your thoughts in the comments below.
4 Comments
How pretty clever and easy. Thank you
Thank so much Sue!
This is such a beautiful cupcake topper! Thank you!
So glad you love this project Shirl!