


This post may contain affiliate links, which means I’ll receive a commission if you purchase through my links, at no extra cost to you. Please read my full disclosure for more information.
HERE’S WHAT YOU’LL NEED TO MAKE A FAUX LEATHER DOUBLE PHOTO KEYCHAIN WITH CRICUT
- Cricut maker, Cricut Explorer Air 2 or Cricut Joy
- Cricut StrongGrip mat and Cricut StandardGrip mat
- Transfer tape
- Faux Leather
- Cricut EasyPress Mini
- Cricut EasyPress Mat
- Iron-on Vinyl
- Clear Acetate
- Free Photo keychain Cut file
- Painter’s tape
- Keychain hardware
- Hot Glue
- Glitter Glue or Super Glue

FAUX LEATHER PHOTO KEYCHAIN CUT FILE SVG FOR CRICUT
Grab this free Faux Leather Double Photo Keychain cut file from my resource library in the accessories section and upload the SVG into Cricut Design Space. Sign up above to unlock the resource library.
VIDEO INSTRUCTIONS
INSTRUCTIONS TO MAKE FAUX LEATHER PHOTO KEYCHAIN WITH CRICUT
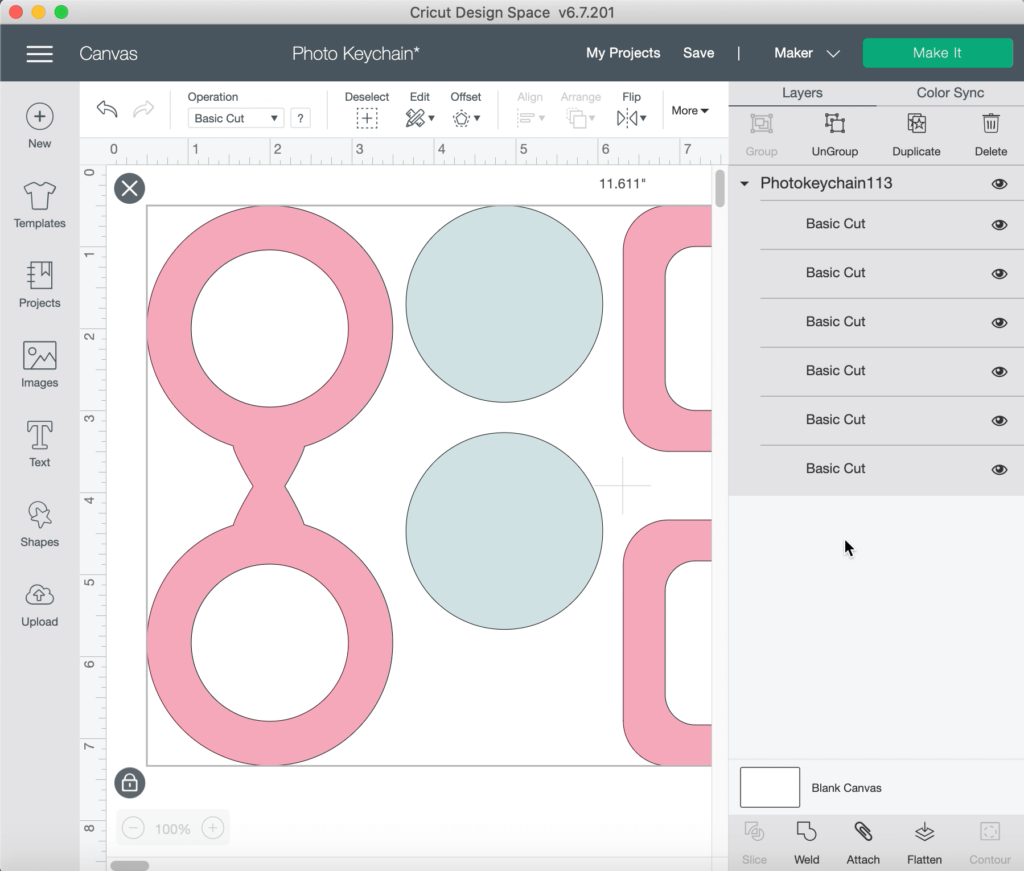
Begin by opening up Cricut Design Space and opening a new project canvas. Upload the layered photo keychain SVG/cut file into Cricut Design Space. The cut file comes with two keychain shapes: circle and rounded square.
The full design (of both keychain shapes) should upload in the size 11.611 inches wide by 6.836 inches tall.
Let’s focus on one of the photo keychain shapes. Ungroup the design and hide the shapes you do not need. I hid all the square shapes so I could focus on just the circle design.
Select the text tool and type the word you would like to use. This word is going to be curved around the circle shape so I kept the word short and sweet.
Select the curve tool to bend your text into a circular shape. The Curve tool can be found in the Text Edit bar at the top of the Canvas, between the Alignment and Advanced tools. At the same time, adjust the letter spacing as the curve will add extra spacing to your text.
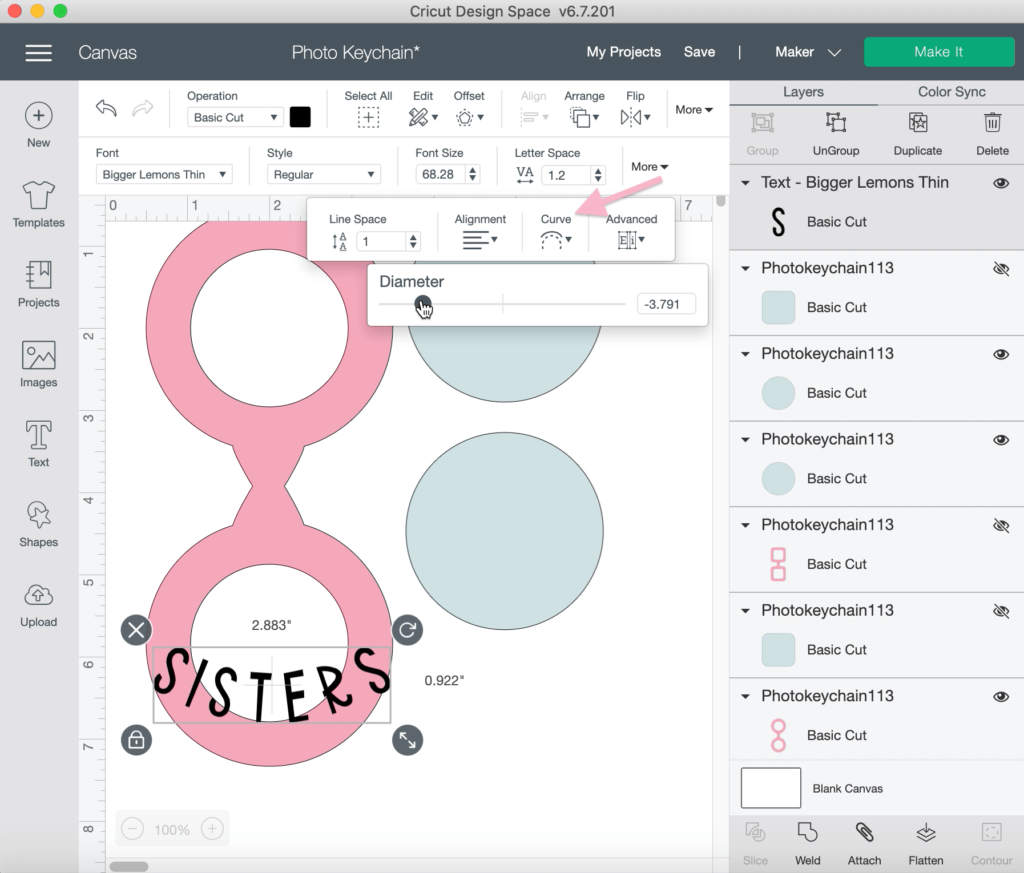
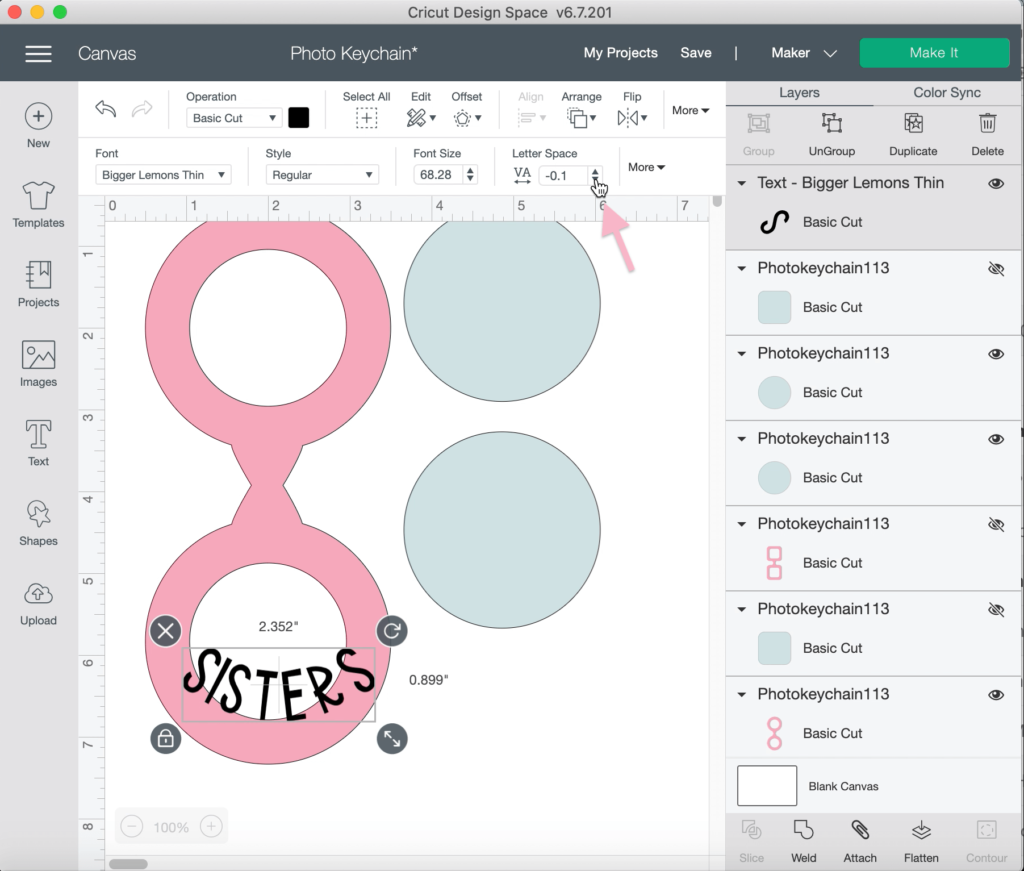
Once you are happy with the curvature and spacing of the text, select the text and weld together. This will ensure the text cuts all together in the shape you created.
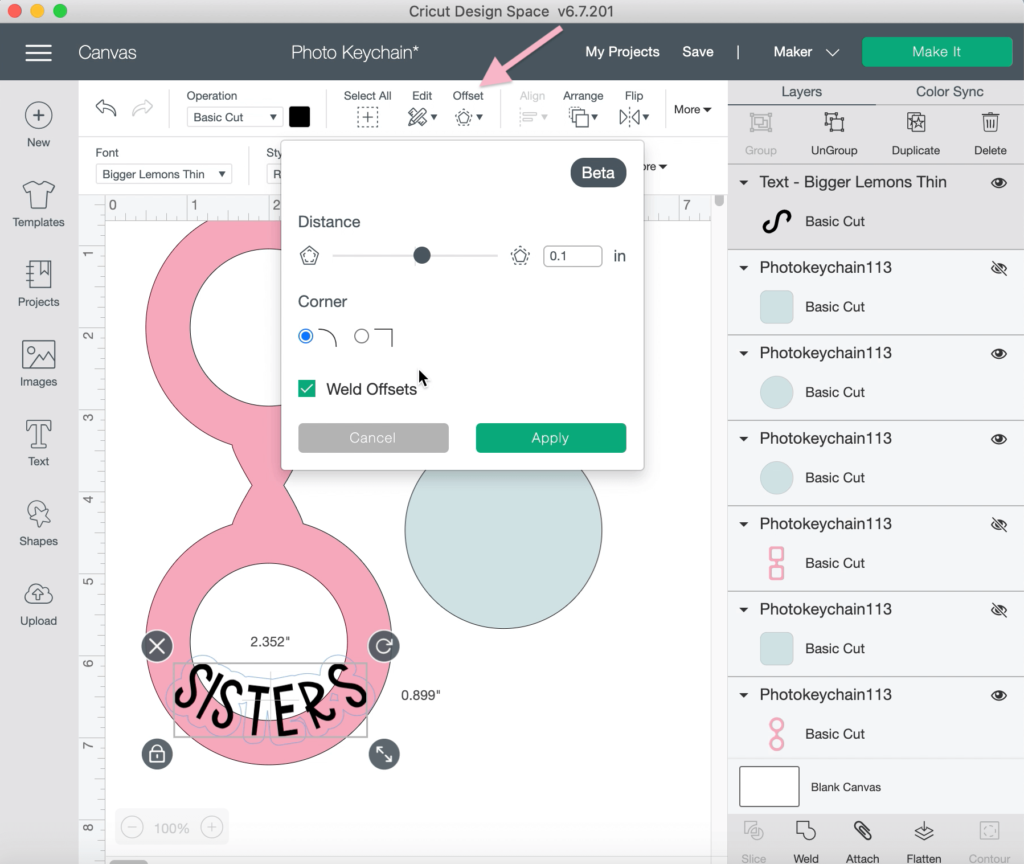
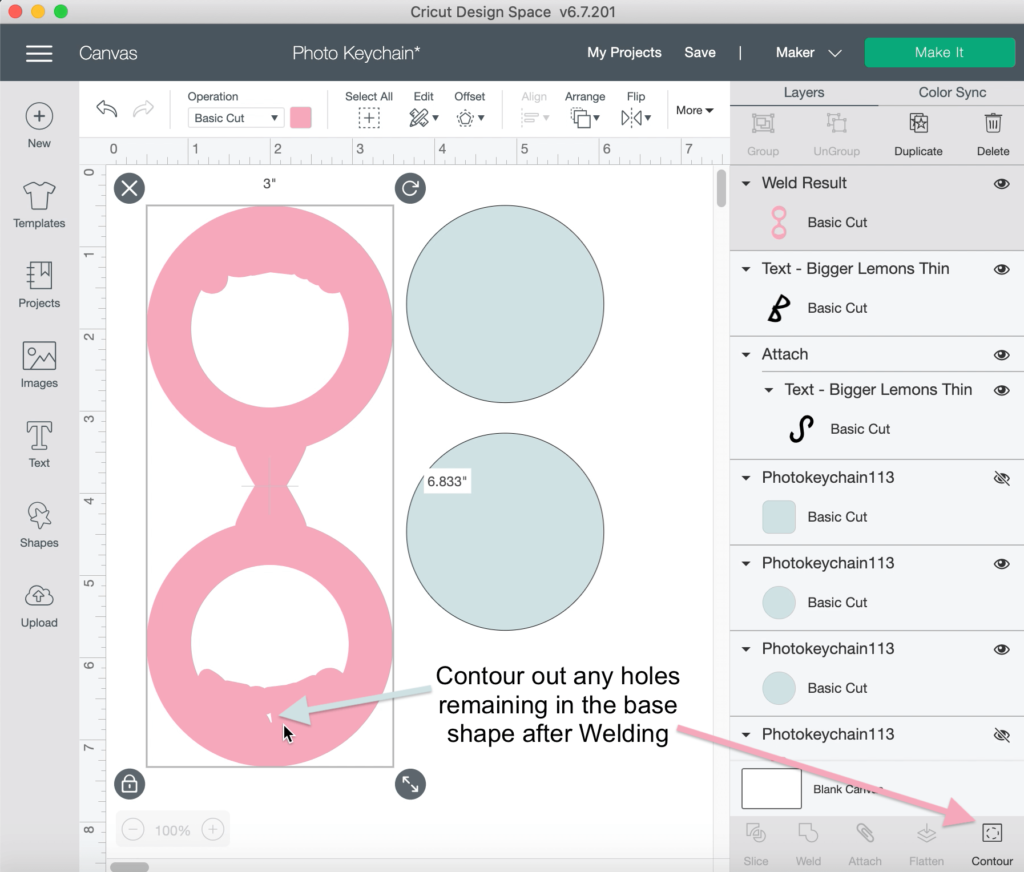
Next, select the offset tool to add a shadow later. I set my offset to 0.1. We will be welding the offset layer to the base shape of the photo keychain.
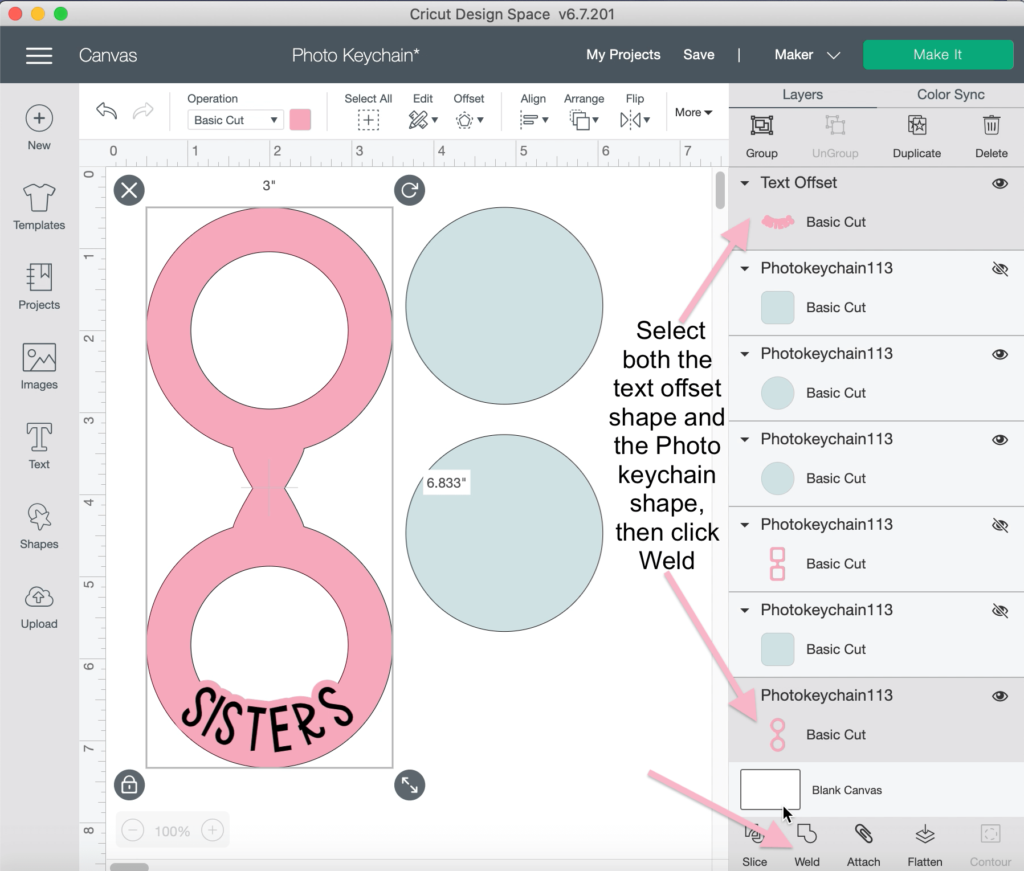
Once you are happy with the placement, select the text offset shape and the photo keychain base shape, then click weld to merge the two shapes together. This action may cause the text to get stuck behind the photo keychain base shape. To see the text again, select the photo keychain base shape and select arrange, send to back.
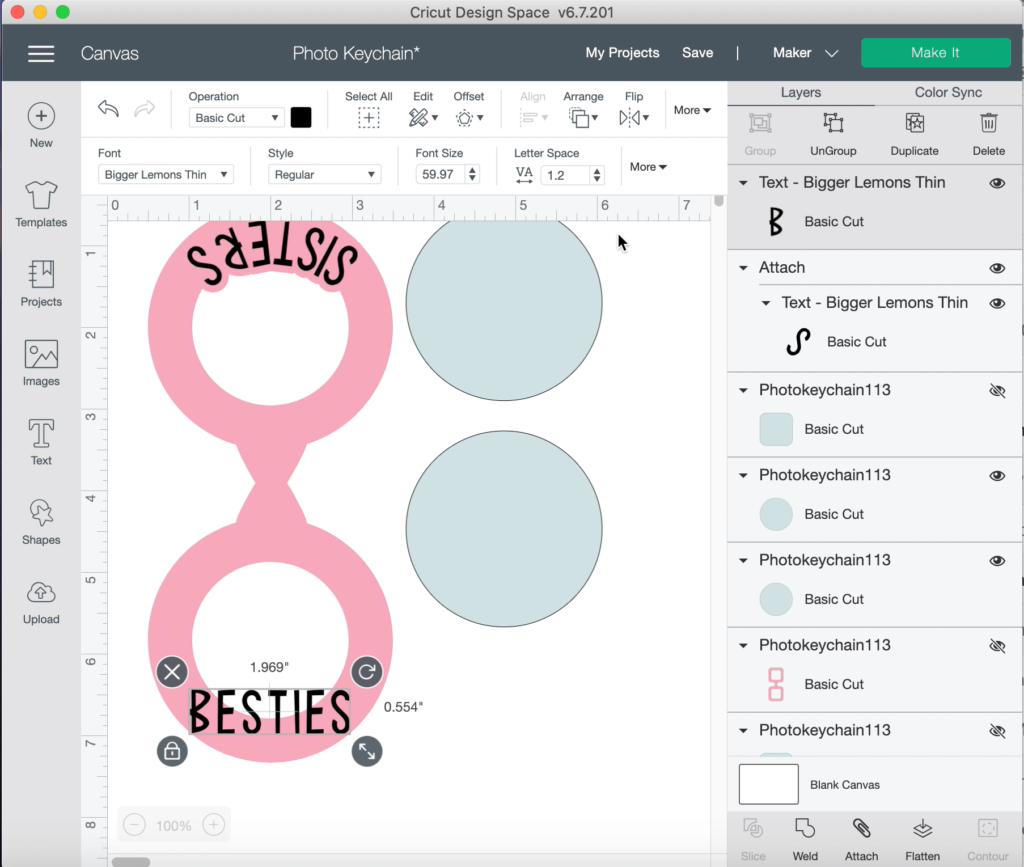
Our keychain is double sided so let’s add another word to the other side. To make it easier to work with, rotate the keychain to the other side. Select the photo keychain base shape and the text, use the rotate arrow to rotate the whole design to make it easier to work on the other side.
For the second side, repeat the previous steps to add text, an offset and weld the offset to the base shape.
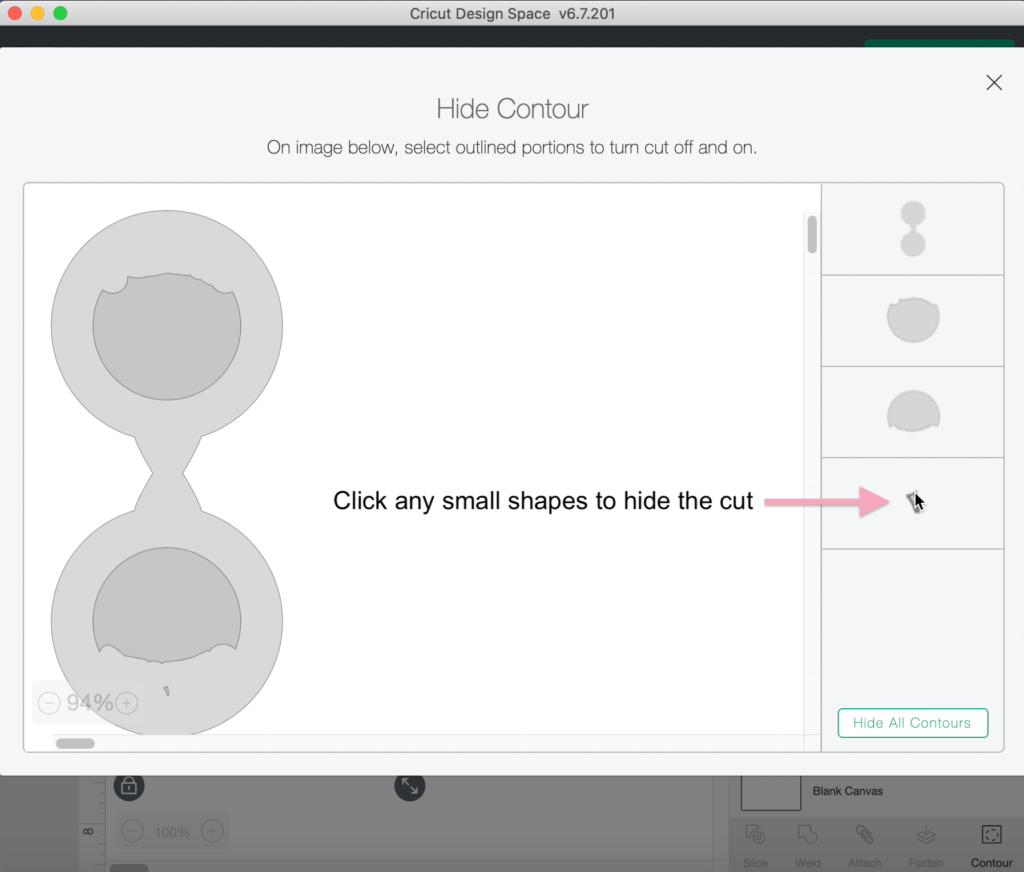
If after you weld the offset to the photo keychain base shape, there are small holes in the base layer, contour them out. We need the base layer to be one solid piece.
Use the contour tool to remove any holes.
After the offset shapes are welded to the base shape and any tiny holes are contoured out, it’s time to put your Cricut machine to work and cut all the materials.
For this photo keychain acetate is used for the photo window, iron-on is used for the words and faux leather is used for the base shape.
CUTTING ACETATE WITH CRICUT
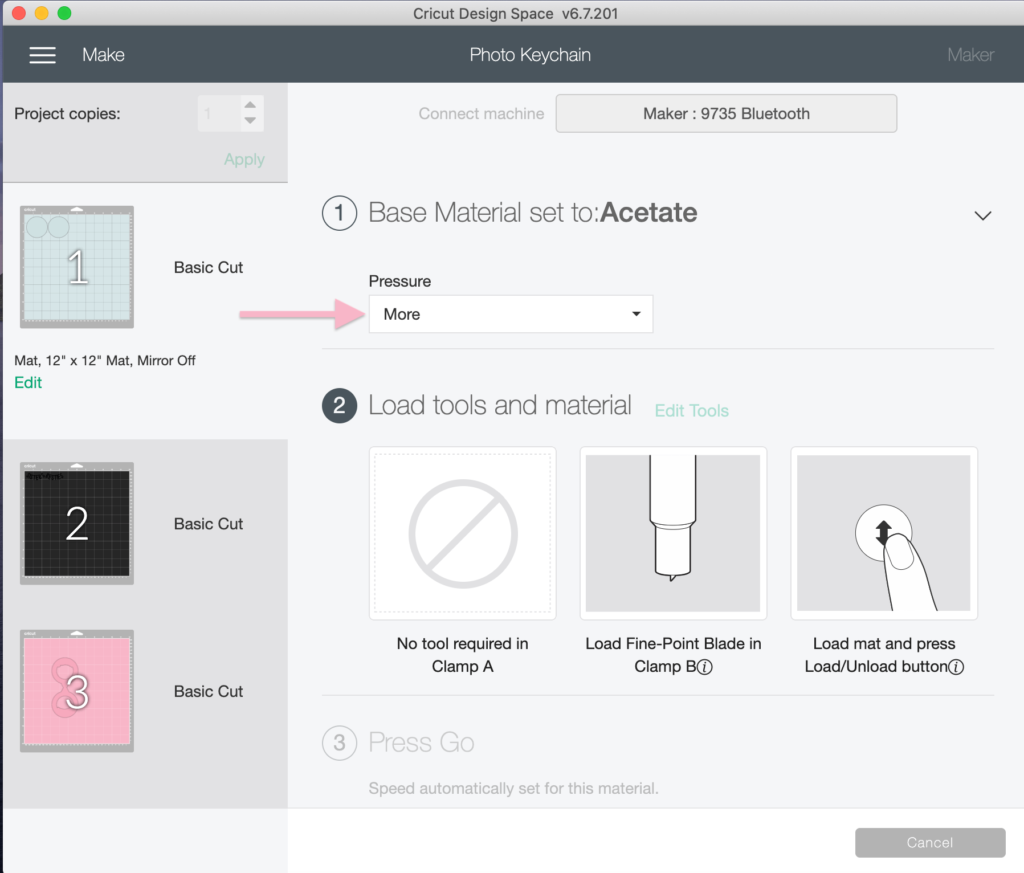
Once the design if ready, click Make It to send to the Cricut Machine. The two blue circles are for the clear plastic acetate.
Before cutting acetate with your Cricut machine, remove the protective film from the top layer and place that side up to cut. I found if the film is left on, the Cricut blade is not as effective.

Within Cricut Design Space, search for the acetate setting and use the standard fine point blade. I selected more pressure to ensure the cut was successful.
Once the cut is complete, check the clear acetate for sticky residue and clean off any stickiness by washing the acetate with dish soap.
CUTTING IRON-ON VINYL WITH CRICUT
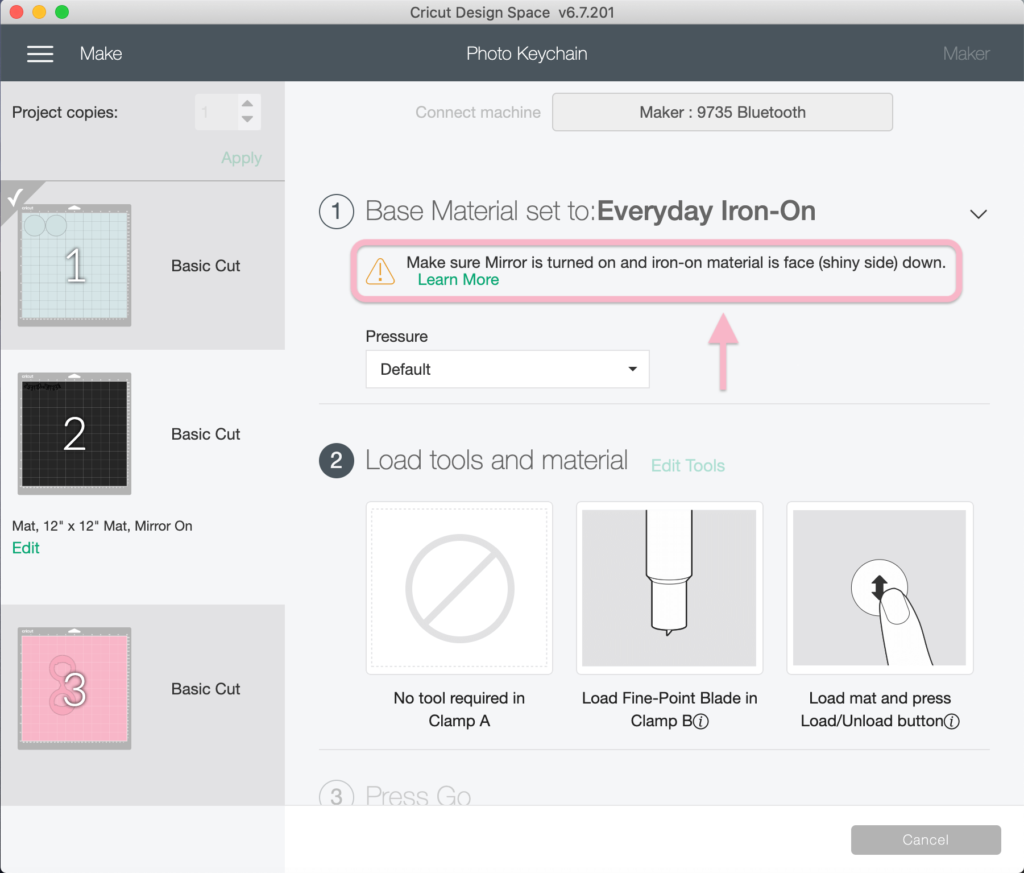
The text will be cut with iron-on vinyl. For iron-on vinyl, be sure to Mirror your mats before cutting if using Cricut Design Space. In the Cricut Joy app, Mirror is enabled automatically when you select a heat-transfer material.
Select the type of Iron-On material you are using. I selected Everyday Iron-On from the list of materials.
If using a Cricut Explore Air 2, turn Smart Set Dial to Custom.
Place iron-on sheet, liner side down (or shiny side down), onto Cricut StandardGrip cutting mat.
CUTTING FAUX LEATHER WITH CRICUT
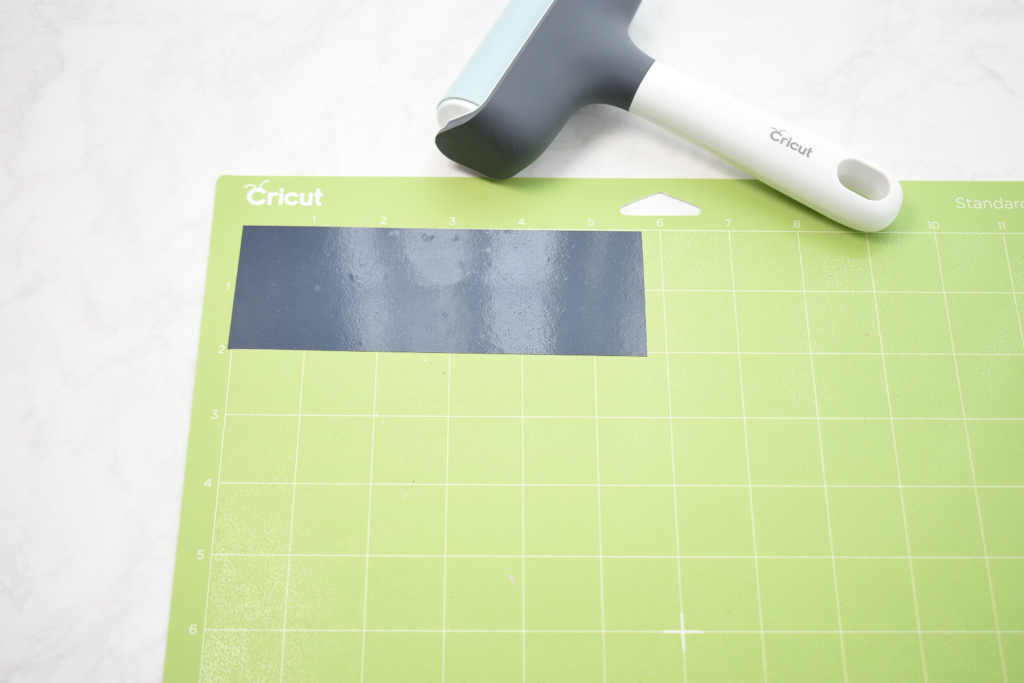
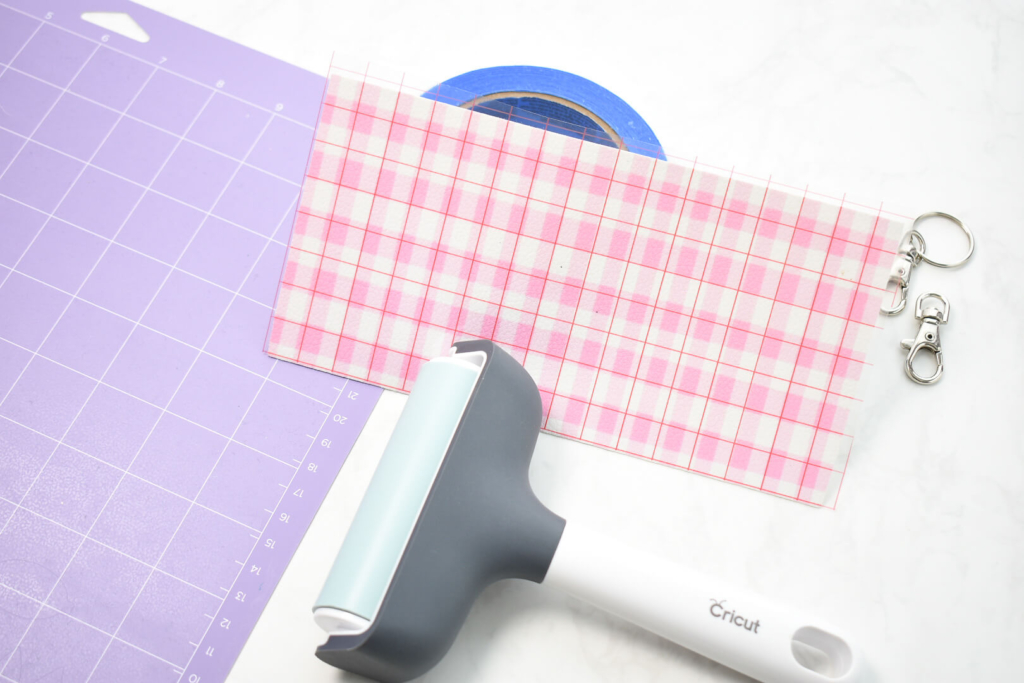
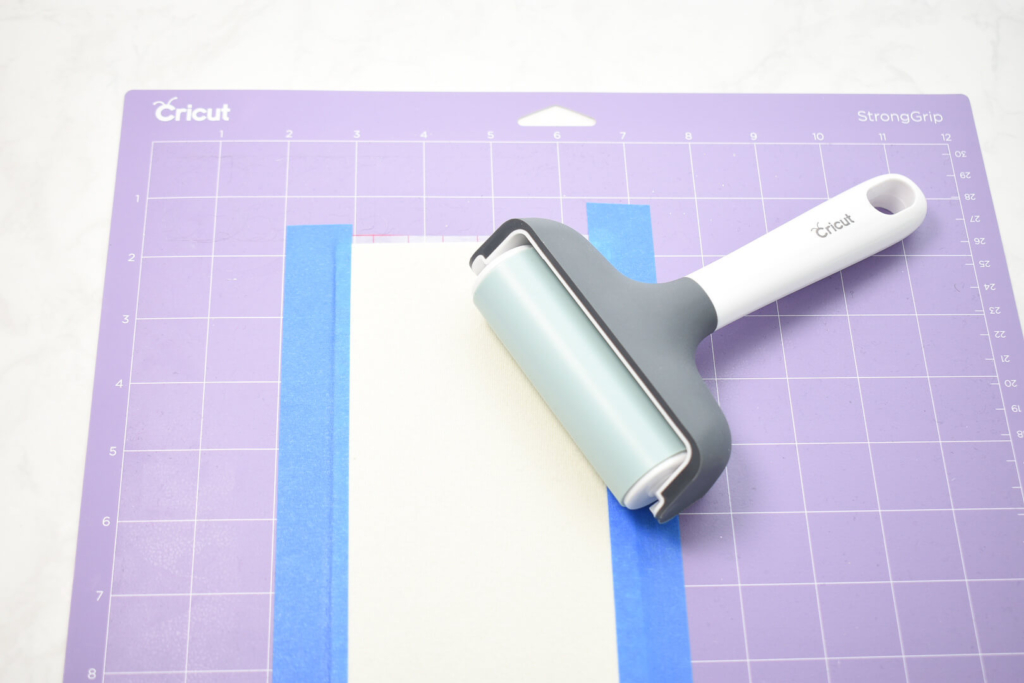
Prepare the faux leather by adding a layer of transfer tape to the pretty side and place it face down on a Cricut StrongGrip mat. The layer of transfer tape will help to protect your mat from little bits and debris left behind form the faux leather cuts. Further secure the faux leather by adding painters tape around the edges.
In my previous post, you can learn how to best prepare faux leather and what material settings to use: CLICK HERE.
Per Cricut’s website, faux leather goes pretty side down on the mat. As a result, we need to mirror the cut before starting just like with iron-on vinyl. (There is an exception to this rule, see #4 from the faux leather tips).
Browse all materials for Faux Leather (paper thin) as the cut setting and use the standard fine point blade. This cut setting will have the Cricut machine go two passes over the Faux Leather.
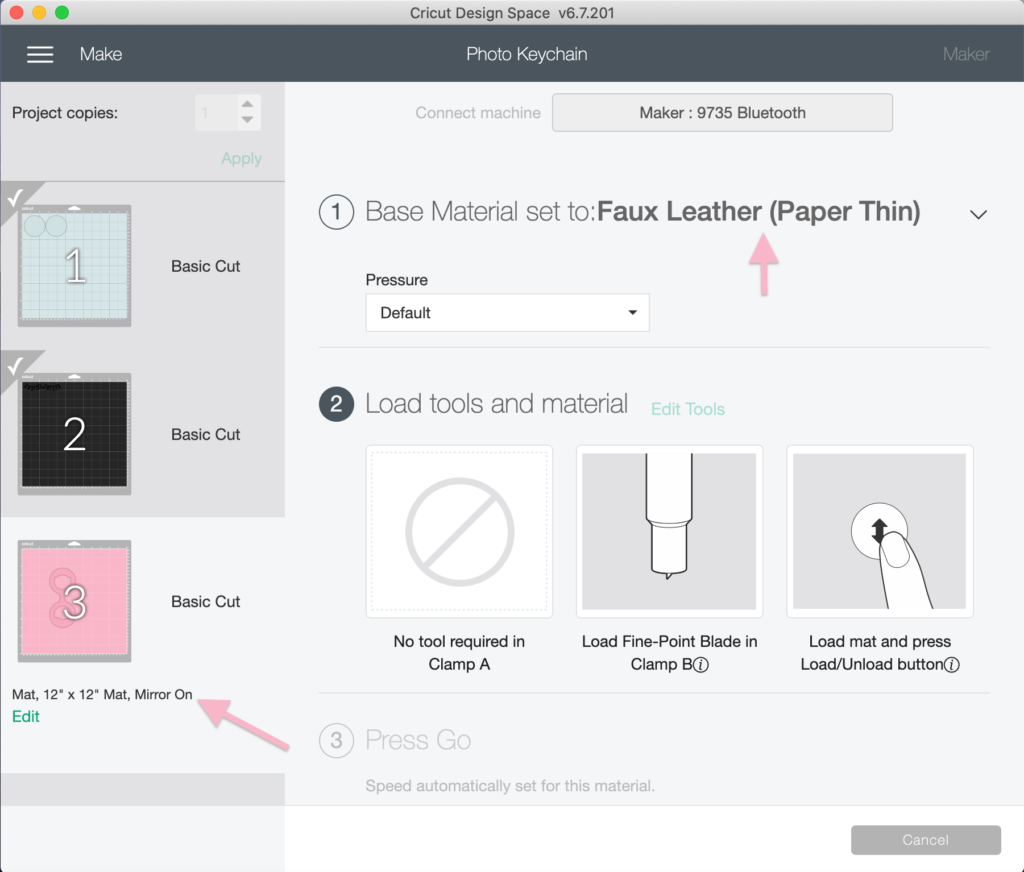
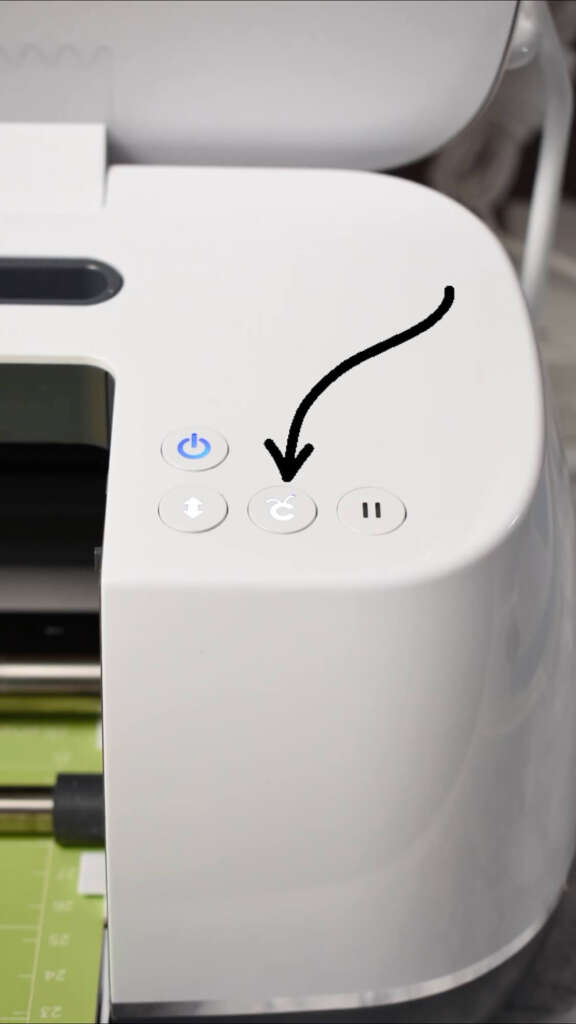
Check the cut before unloading the mat and press the C button on my Cricut machine for a second cut. If the faux leather is thick, a second pass with the Cricut machine will help ensure a successful cut.
HOW TO ASSEMBLE CRICUT MADE FAUX LEATHER DOUBLE PHOTO KEYCHAIN
With all the cuts complete and beginning with the faux leather, gently remove the faux leather from the mat. Try not to pull and stretch out the faux leather. Remove any remaining transfer tape left on the faux leather. If there is stickiness left on the faux leather, use a disinfecting wipe to gently rub off any residue.
Weed the iron-on. To weed, means to remove the excess material that you do not need.
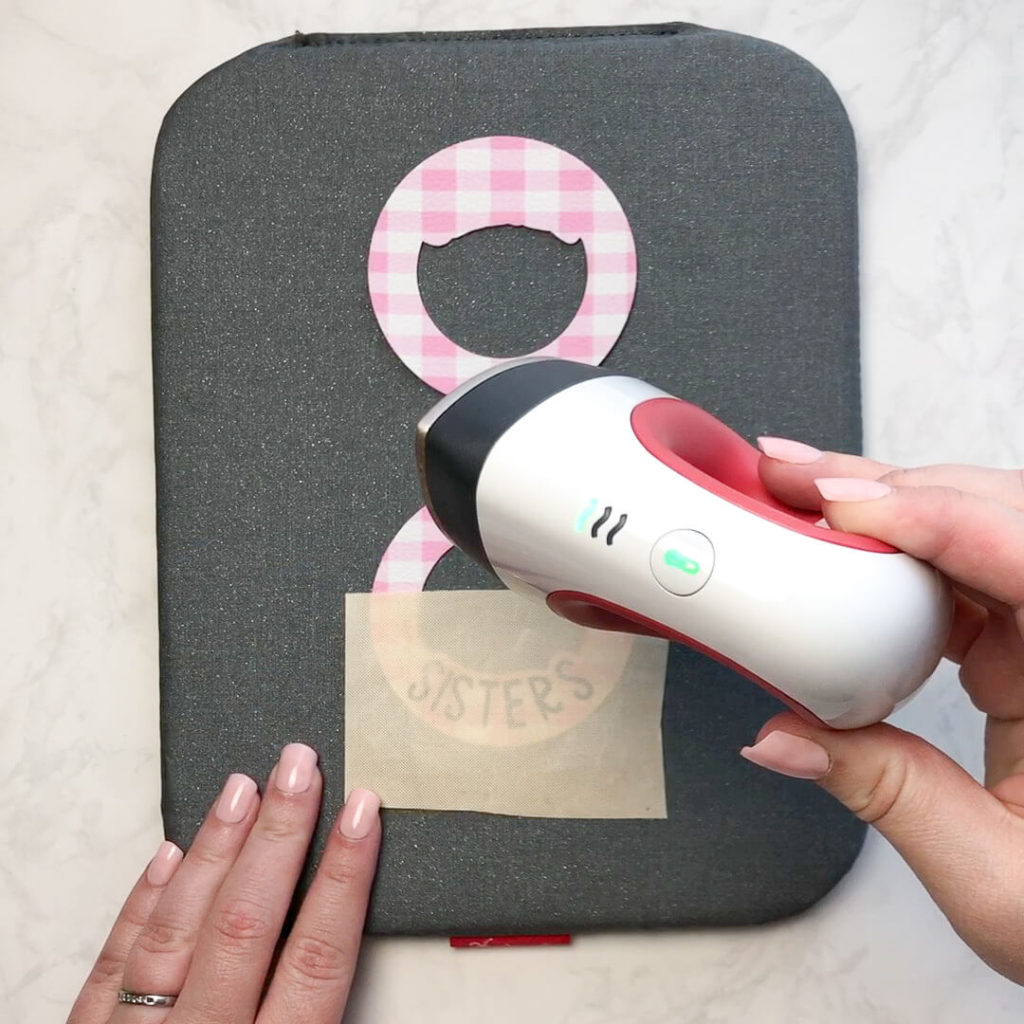
Grab a Cricut EasyPress mat and a Cricut EasyPress Mini to apply the iron-on vinyl. Make sure to use a Teflon sheet or heat resistant protective barrier (such as a previous used iron-on vinyl transfer sheet) to ensure the iron does not directly touch the faux leather. If so, the pretty pattern will likely melt and come off.
Apply heat with a Cricut EasyPress Mini on the lowest setting in short 10-12 second presses. Peel back the transfer sheet while the material is still warm (but not hot).
Repeat adding iron-on to the other side of the faux leather.
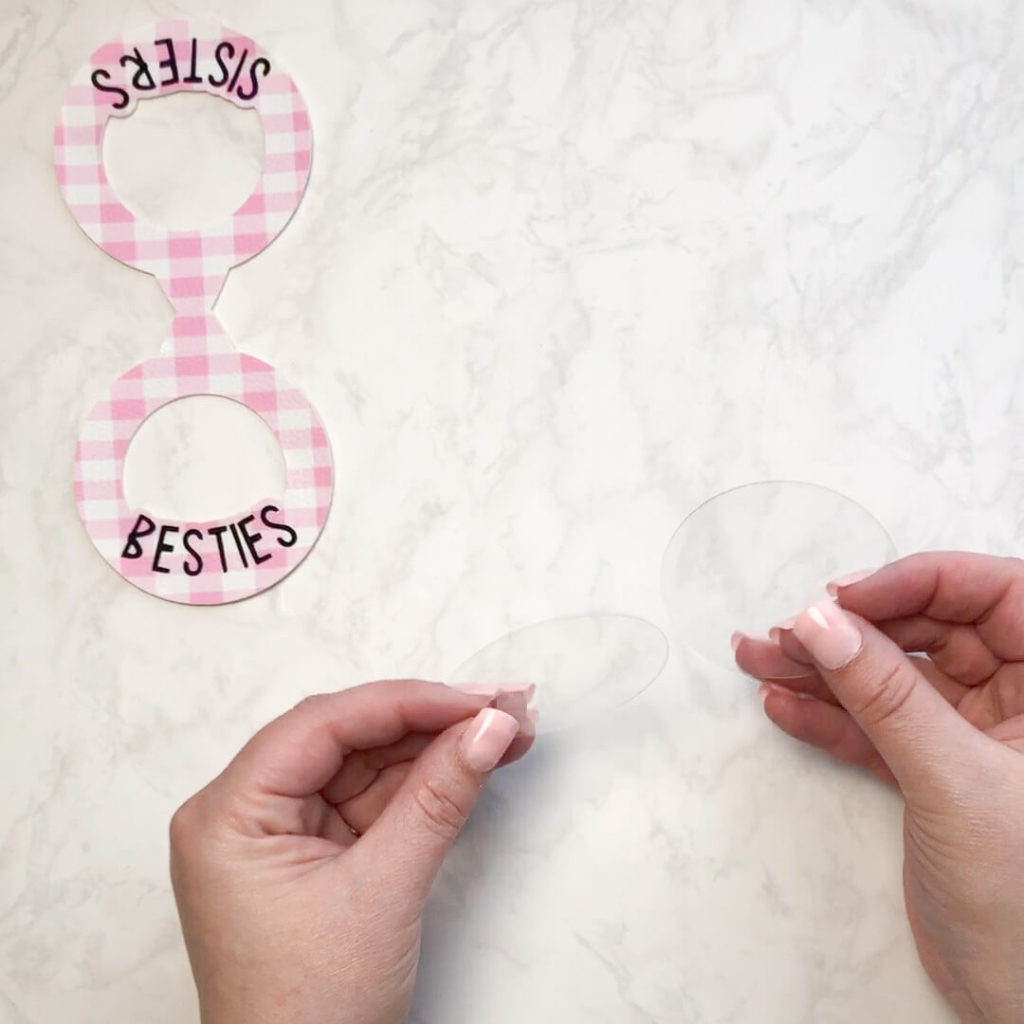
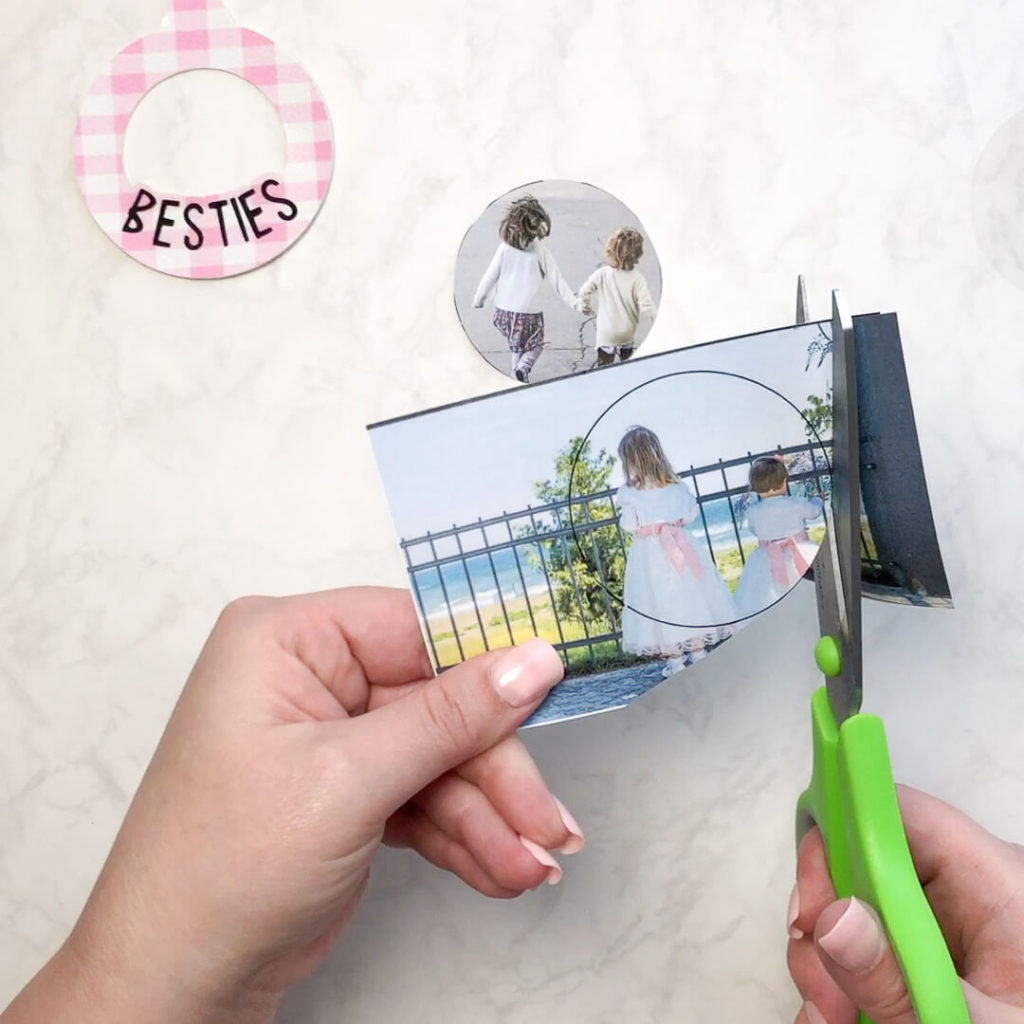
Grab the acetate shapes and the photos you want to use. This keychain is double-sided so find two of your favorite photos to use. Use the acetate to trace the shape needed on the photo for a perfect fit in the keychain photo frame.
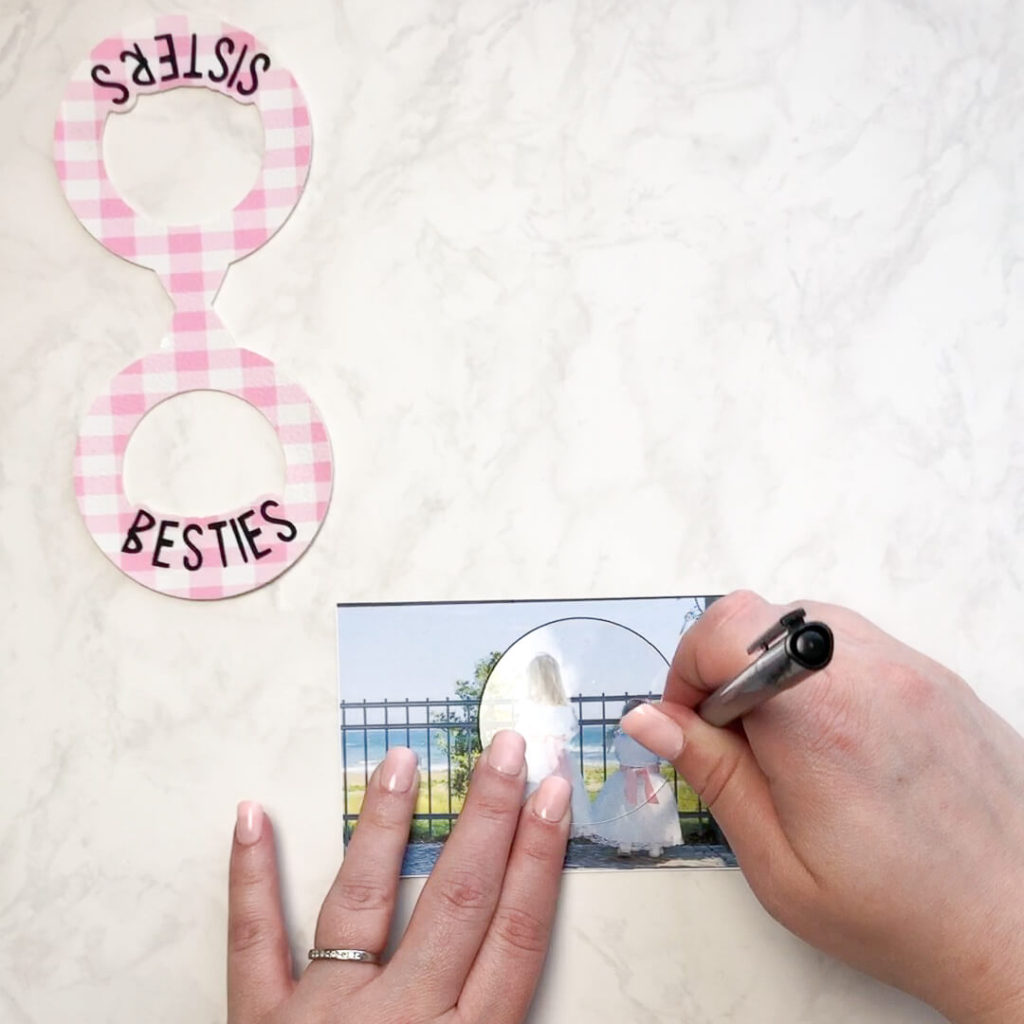
Cut out the photo shapes using scissors. The photo cuts do not have to be perfect circles because the faux leather provides a little bit of a frame.
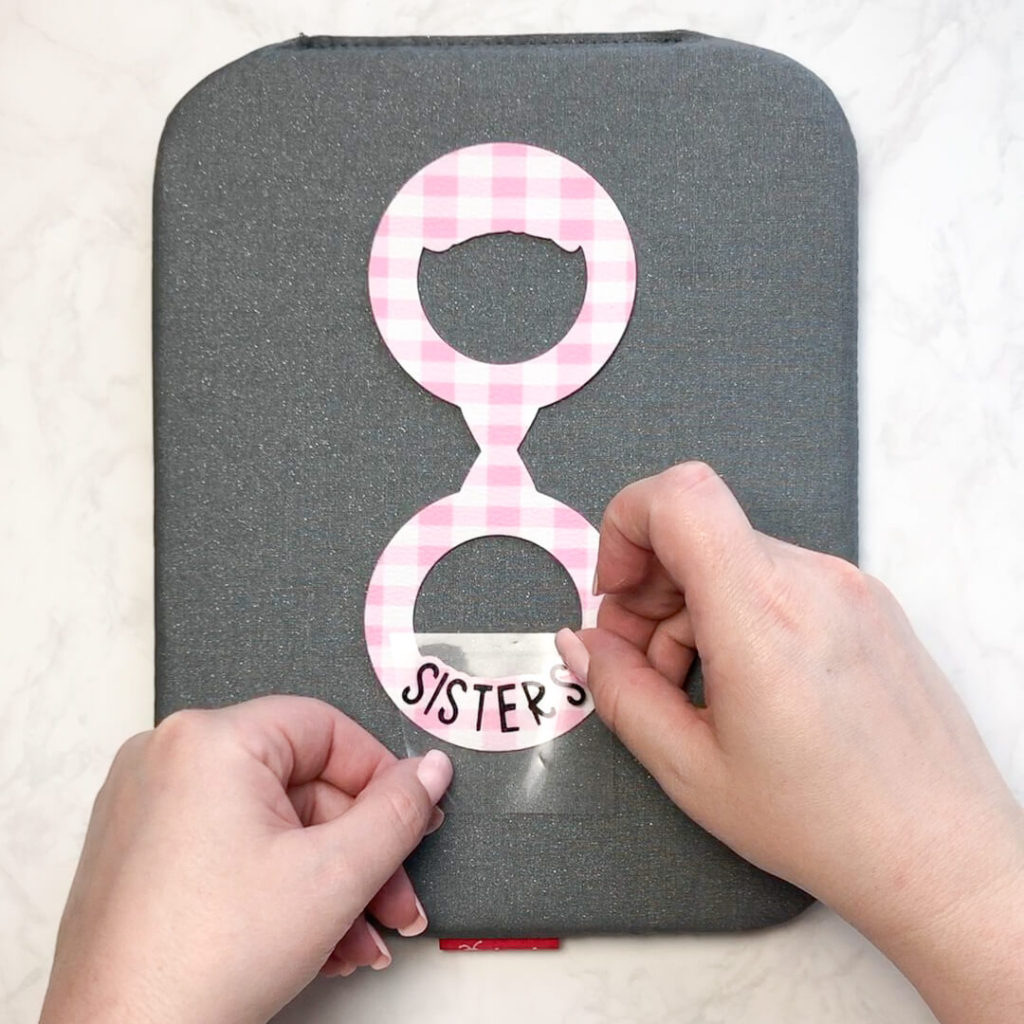
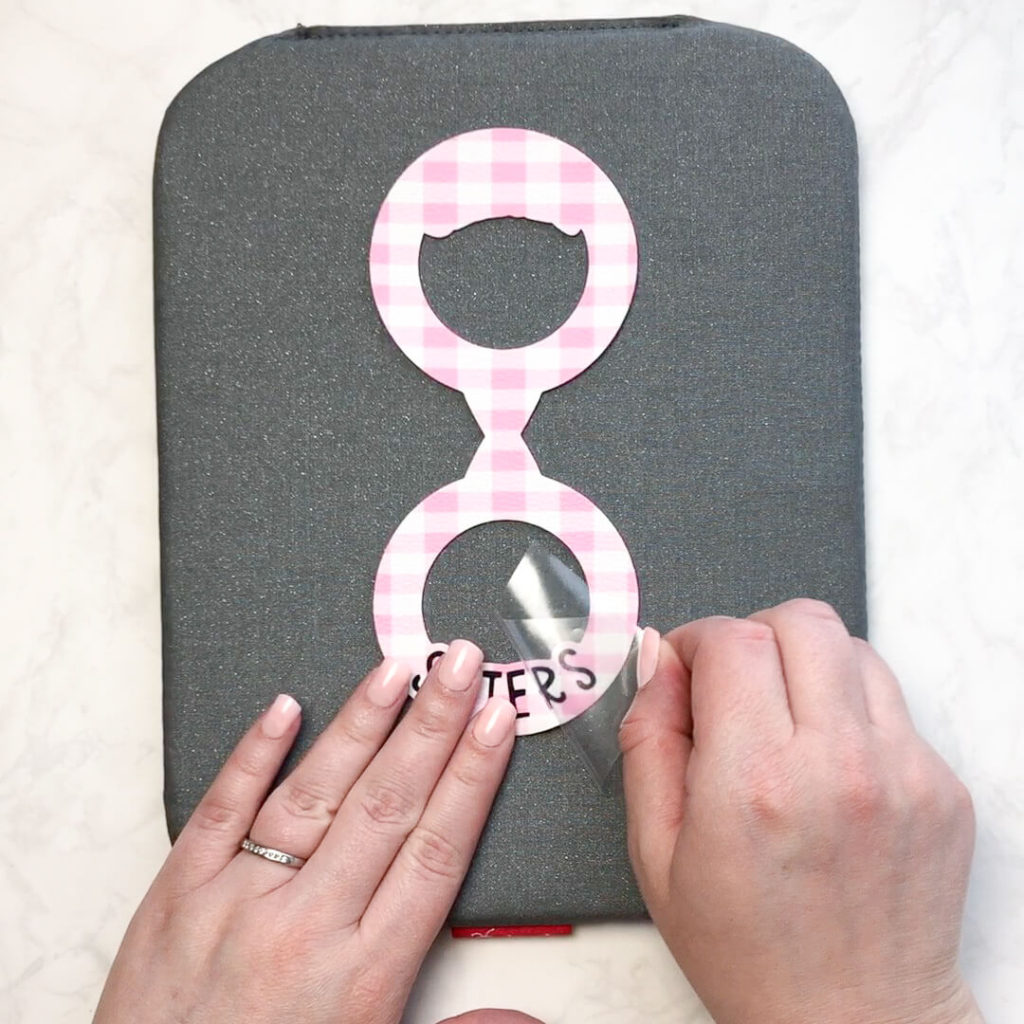
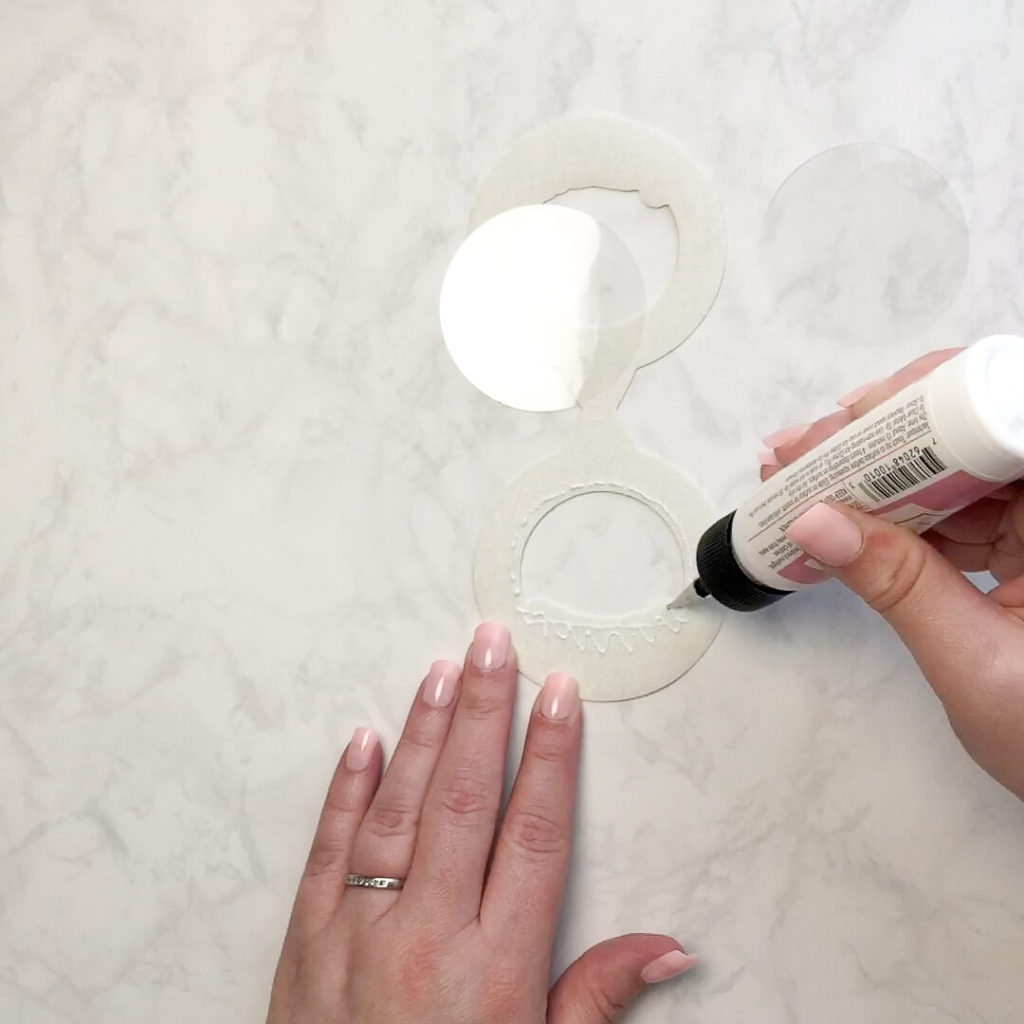
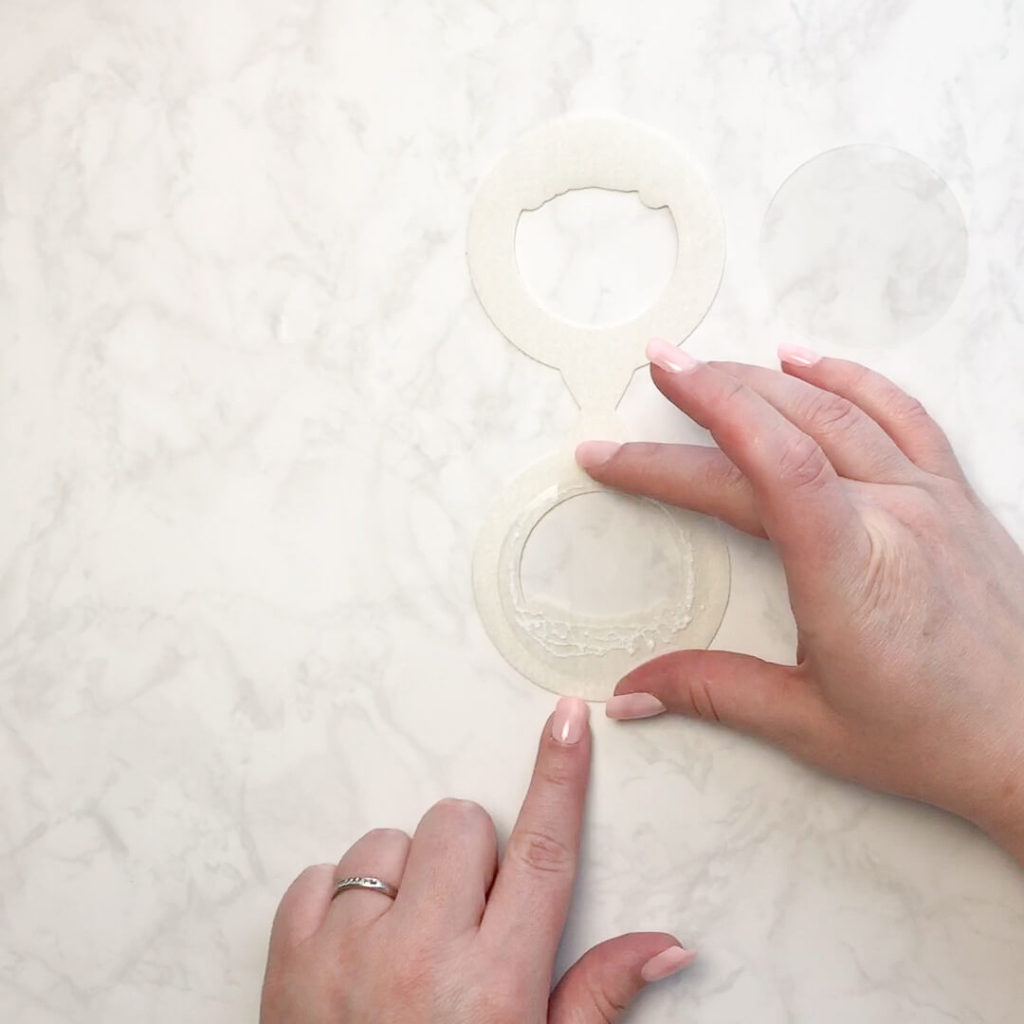
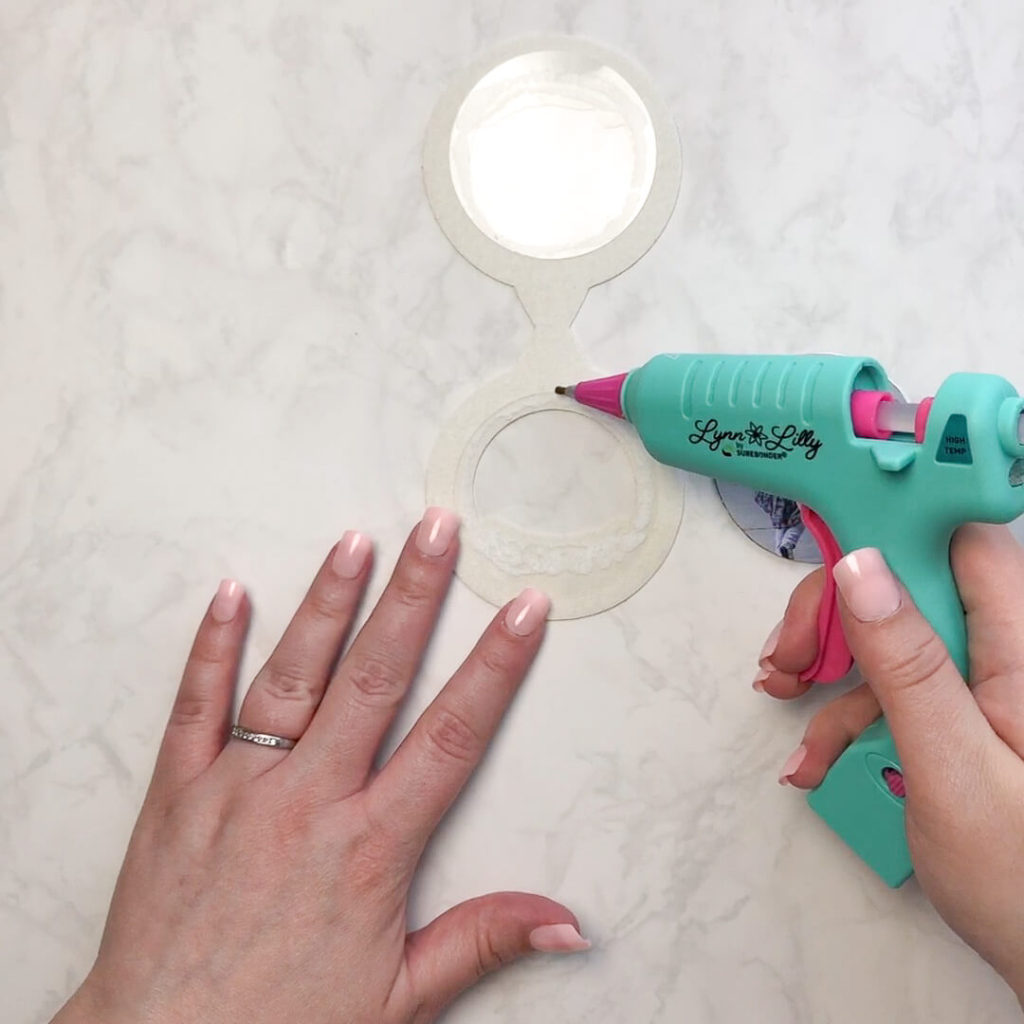
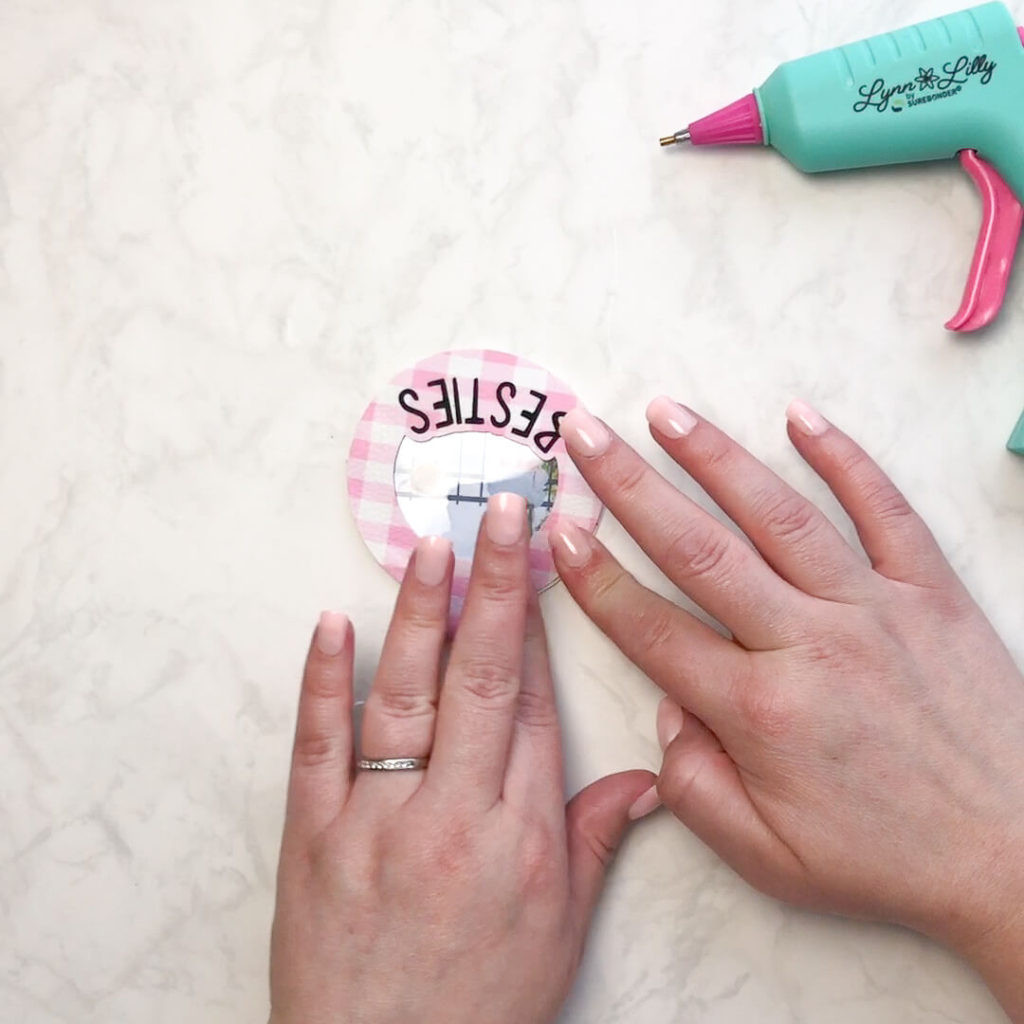
With the photos trimmed, use glue to secure the acetate to the faux leather. Gently push down on the acetate.
For faux leather and acetate projects, I skip using globs of hot glue because a lot of hot glue can warp the acetate. Instead, I used glitter glue to secure the acetate photo window. You could also use super glue. For the rest of the faux leather keychain, I used hot glue.
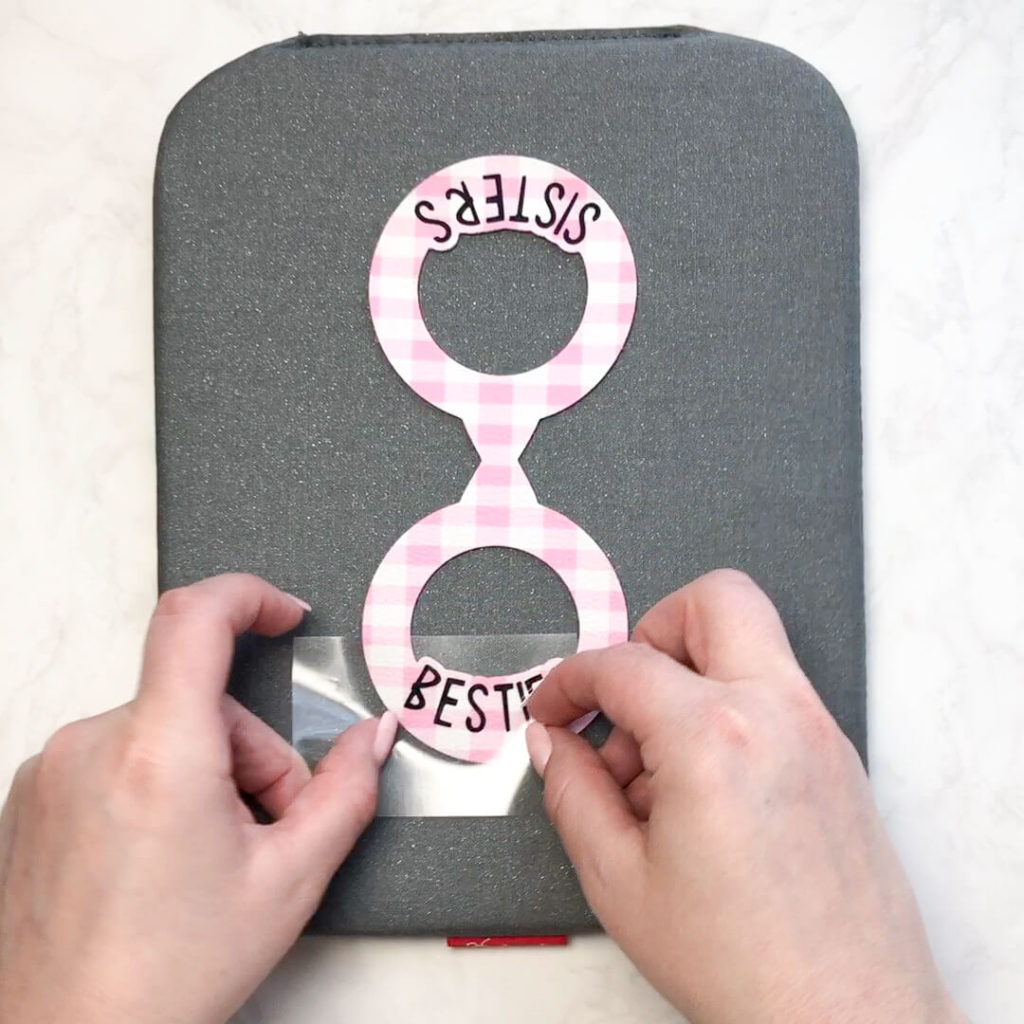
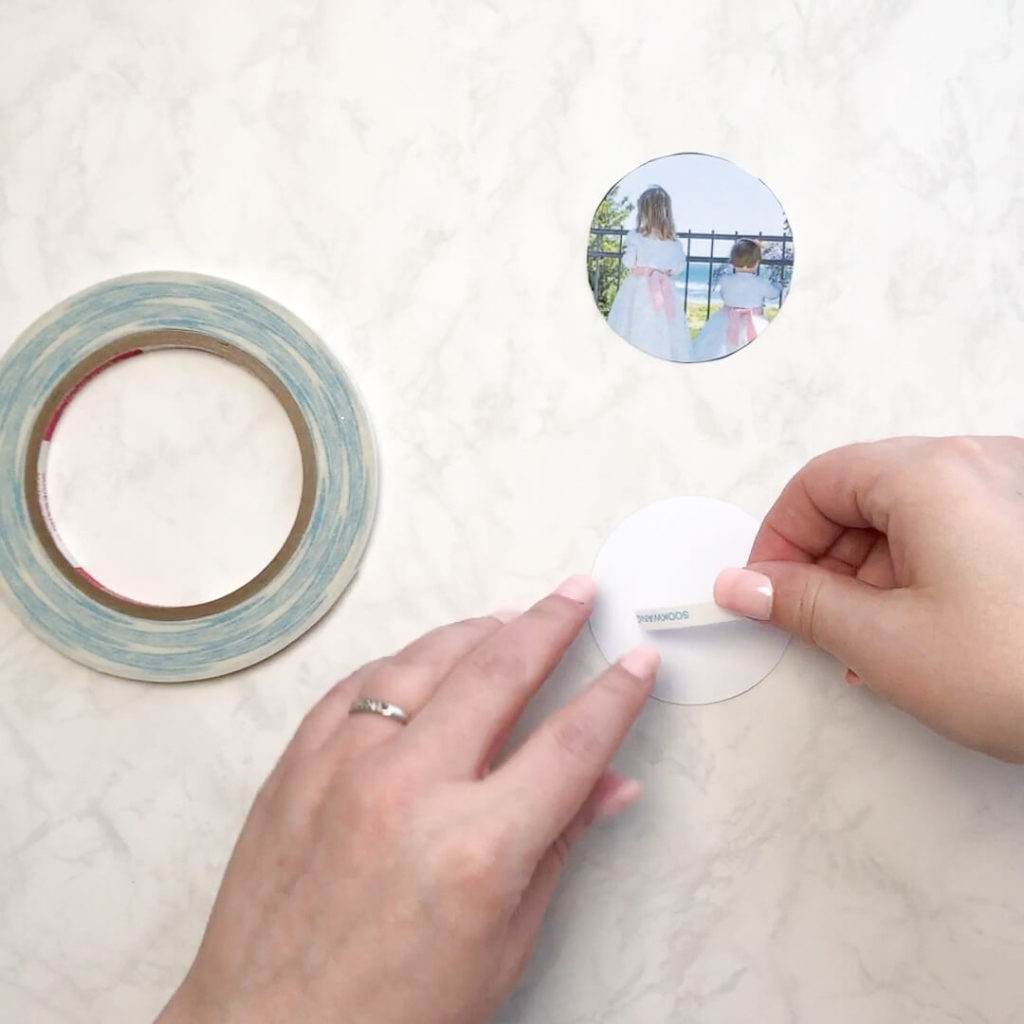
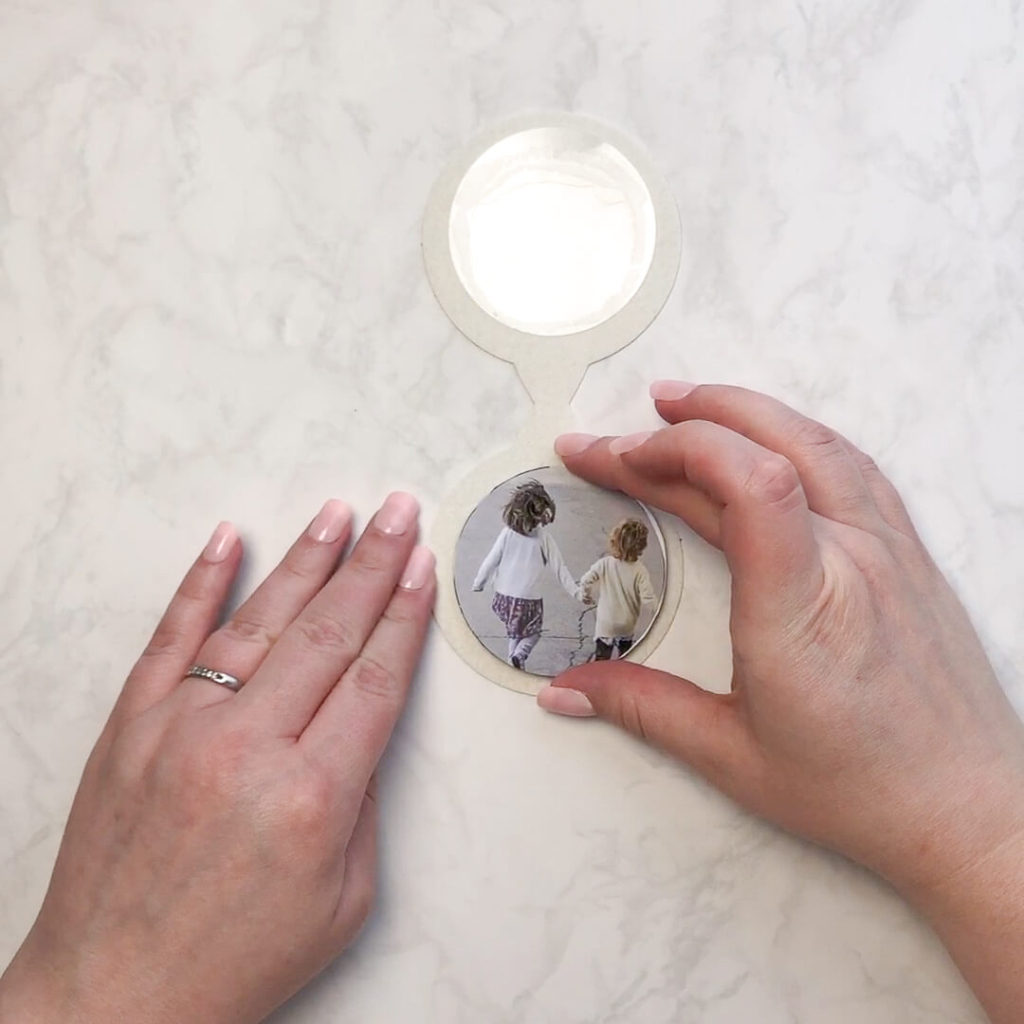
To keep the two photos together, I used double sided tape. Alternatively, you could use a small drop of glue.
Next, we need to add the photo into the window of the faux leather keychain. I added the tiniest drop of hot glue and laid the photo over the hot glue to keep the photo in place.
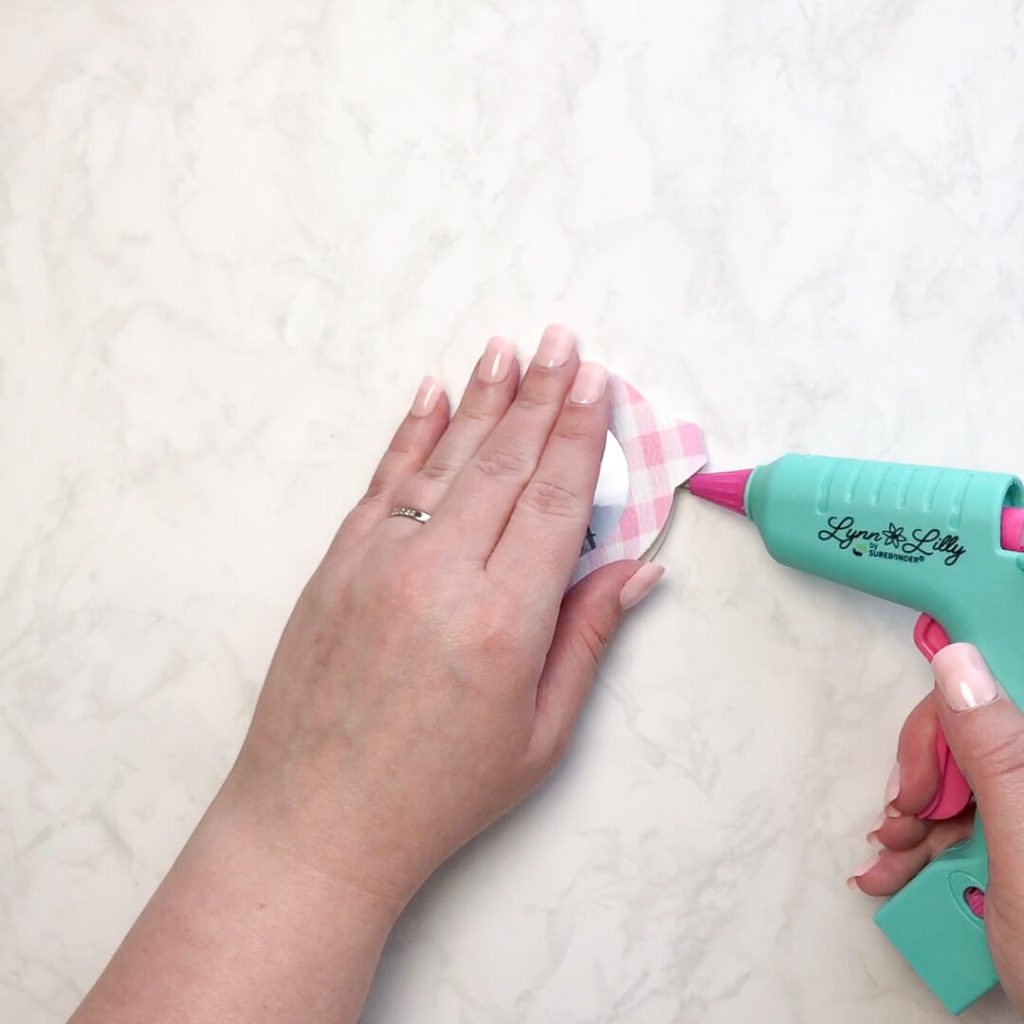
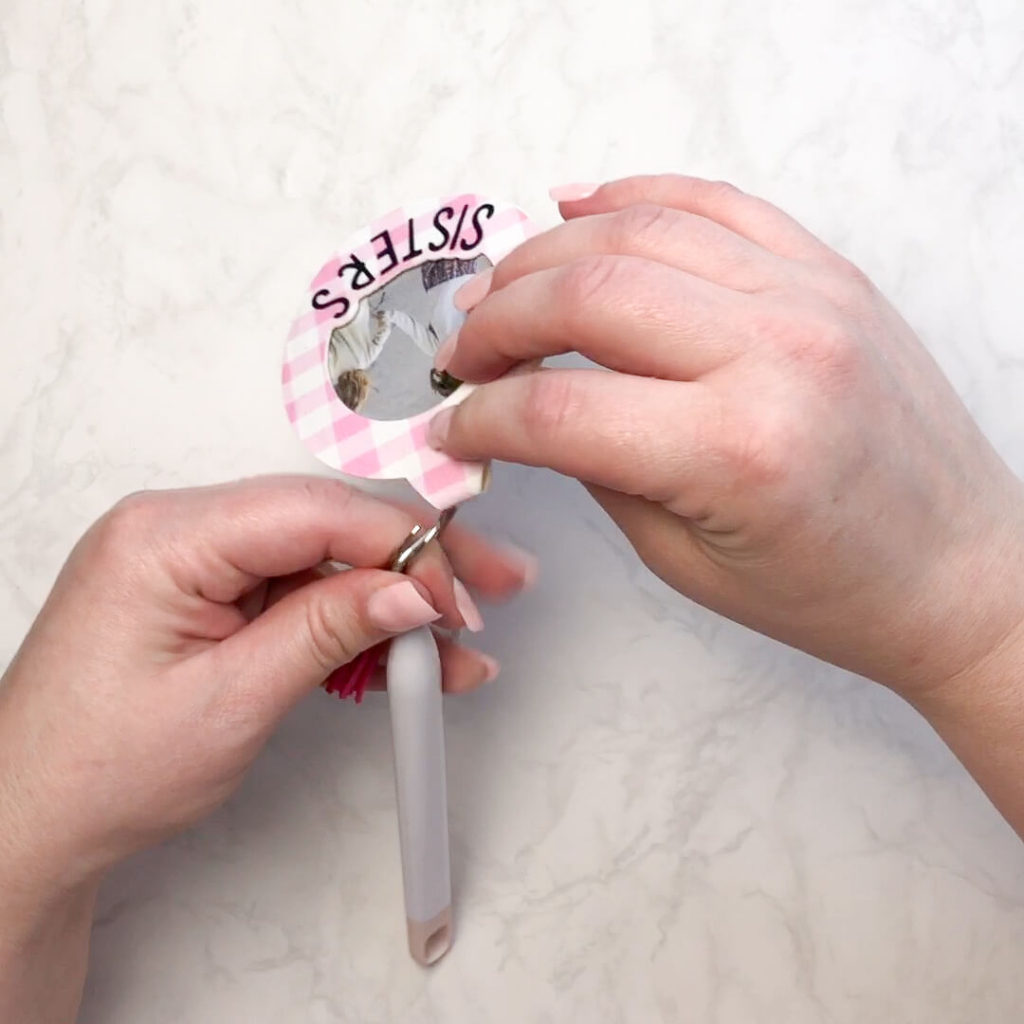
To close the photo keychain, add a thin line of hot glue around the edge and fold over the other side. Press around the edges. Do not glue the loop at the top of the photo keychain as that is where the keyring will go. To help the glue adhere well, place something heavy on top to help the glue hold.

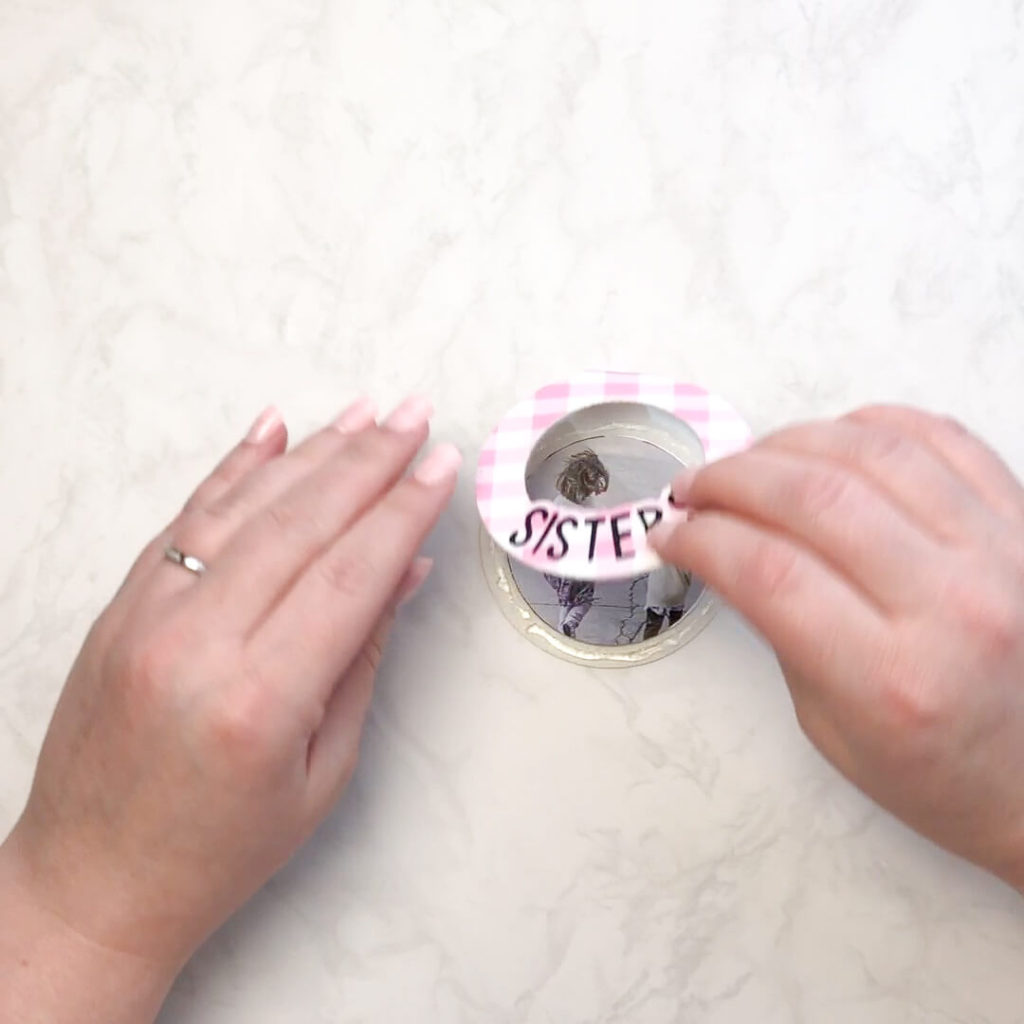
Check around the edges and add glue around the edges to seal closed.
ADD HARDWARE
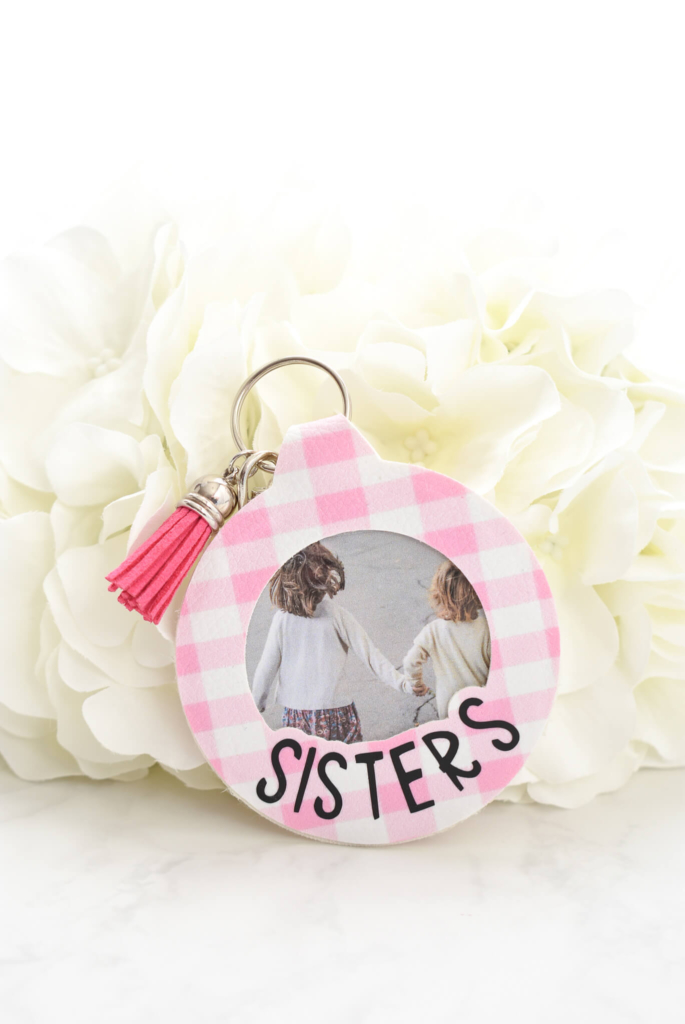
Almost done – time to add hardware! Once you are happy with your keychain, add a keyring. Tassel is optional, but super fun, in my opinion.
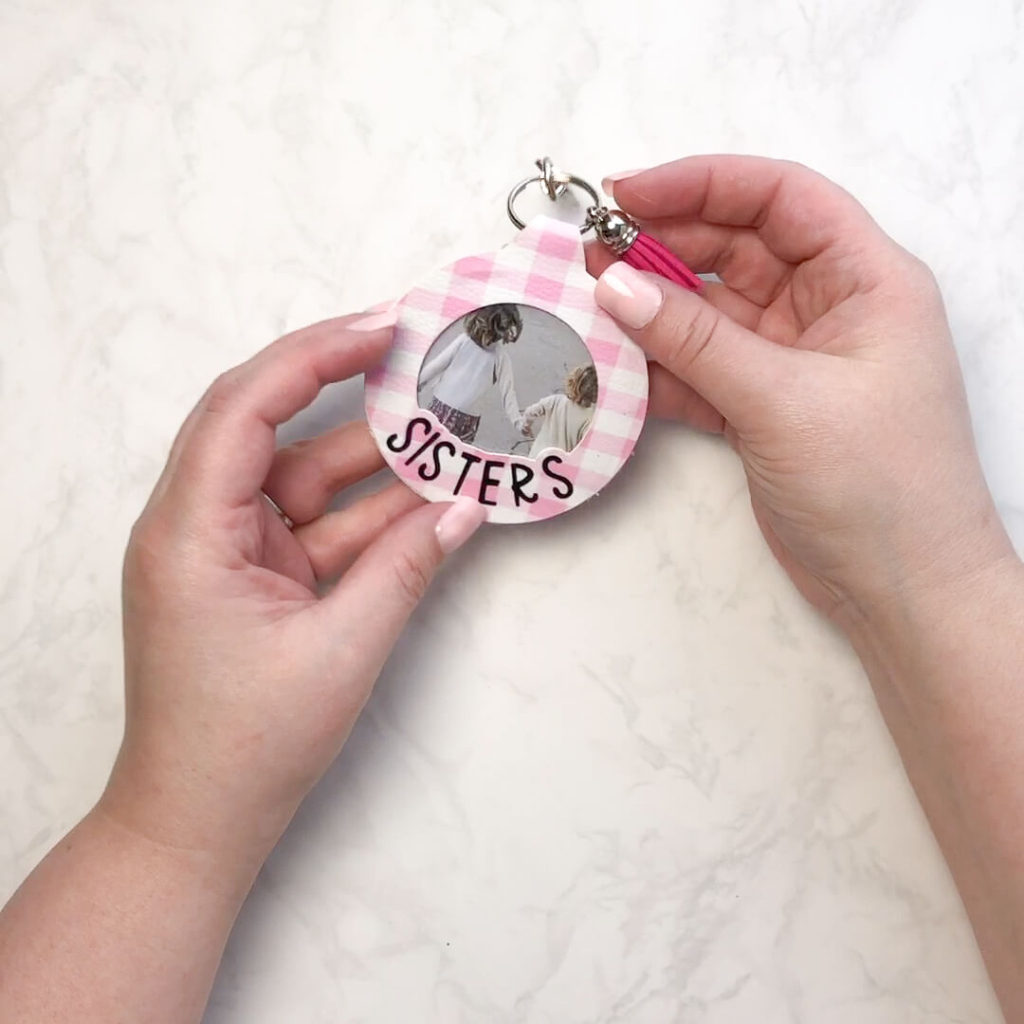
With the hardware added, your Cricut created faux leather double photo keychain is complete. I love how lightweight the faux leather is and this keychain makes a great personalized gift.
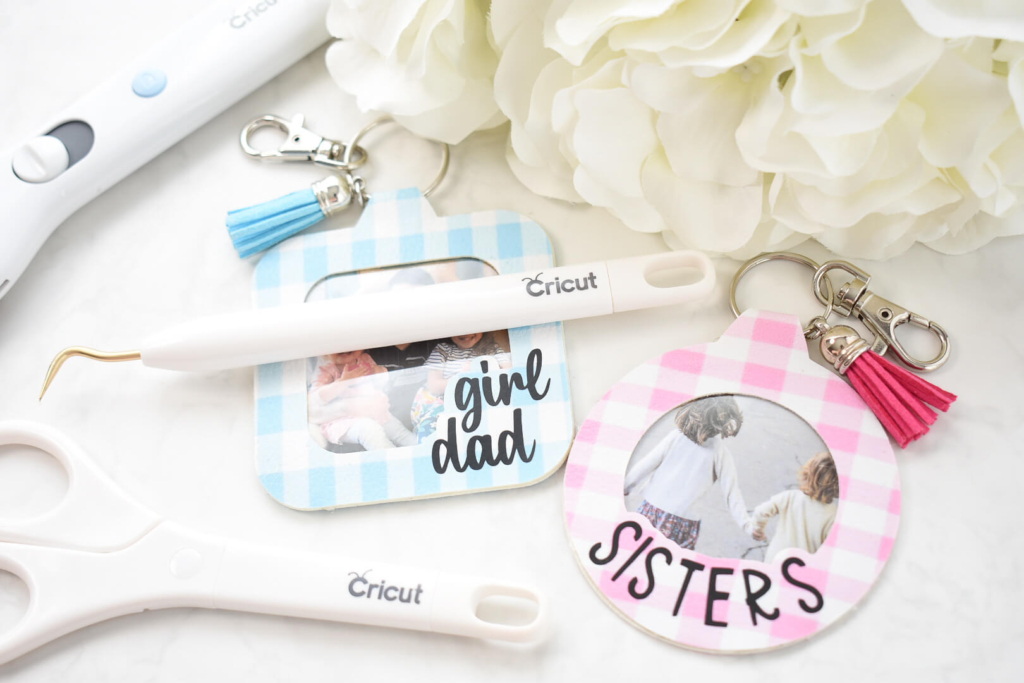
CHECK OUT MY OTHER CRICUT LEATHER TUTORIALS
- Faux Leather Earrings
- Magnetic faux leather bookmarks
- Faux Leather MOM Photo keychain
- Leather bow keychain
- Leather bow charm
WAS THIS TUTORIAL HELPFUL?
Did you find this tutorial how to make a faux leather photo keychain with Cricut helpful? If so, please pin this idea and let me know your thoughts in the comments below!
